Monday, November 30, 2020

Moria: One ring to view them all


The stats and gear that allowed me to survive level 36


Moria encourages, and perhaps demands, a slow, methodical, cautious game. This is, of course, impossible in the original Rogue, where hunger and finite resources compel you to keep moving into deeper, more dangerous territory, and games rarely take more than an hour or two before your almost inevitable demise, which is made less painful knowing that your subsequent retry will likely play differently enough to feel like a new experience.

In Moria, you can spend more than an hour exploring a single dungeon floor, and once you're rich enough to buy scrolls of word-of-recall with monsters' pocket change, you can repeat these floor indefinitely - you buy two (or three) scrolls in town, use one to return to the dungeon where a brand new level full of more mazes, monsters, and loot is generated for you, and use the second when you want to return to town, whether it's to avoid trouble or to repeat the loop all over again.

I'd been repeating stages quite a bit lately - as conservatively as I'd been playing, perhaps it wasn't quite conservative enough. Level 36 seemed like a huge difficulty leap after a series of fairly untroublesome and equally unrewarding runs at levels 31-35. Monsters posed little threat as long as I played carefully enough to avoid getting mobbed and made sure to recover mana at every opportunity, but experience yields were slim, and my character had only leveled once during this period, reaching 27. Had I simply been lucky/unlucky in only encountering easy monsters for this phase, and consequently reached level 36 underleveled? The recovered loot hadn't been great either; although I could identify things with magic and no longer needed scrolls, my mediocre strength meant I couldn't even pick up most of the weapons and armor drops. Money wasn't a problem, but shops in town didn't sell anything suitable as permanent gear/stat upgrades except for scrolls of enchant weapons/armor, and I was getting to the point where those were beginning to fail. The loot drops I prized most were potions that granted permanent stat upgrades, but these were rare.

I did, eventually, manage to clear out a dungeon 36 levels deep. I mentioned in my last post that Gray Wraiths are bad news that can drain your levels on touch and drain your mana from far away, and I did encounter one, but managed to approach it from the opposite end of a long, straight corridor and with  a full mana bar, where I could blast it to bits with a few well-placed Fire Bolts without suffering its draining touch. I graduated down to level 37, but still had to wonder if this was wise - was I really ready, or had I just barely survived the one before it? Impatience, and the safety net of a daily backed-up save, propelled me forward.

I had a few stock fighting strategies, depending on the encounter.

  • Kill with multiple casts off Fire Bolt. If the monster survives after I run out of mana, finish it off with melee or wand magic.
  • Damage with one cast of Fire Bolt, and then send it away with Teleport Other and rest. The spell itself has a high failure rate, but when it succeeds, monsters never seem to resist it. But monsters may simply be teleported into the next room, so this strategy can still fail.
  • Slow Monster makes most monsters helpless in melee, but they often resist the spell. You're lucky if you get a successful cast on a full bar of mana, but one success is all you need.


I had learned that it's okay to cast emergency spells on an empty mana bar, namely Teleport and Teleport Other, if it will save your life. You'll faint and possibly lose a constitution point, but if you live, you can recover with a potion.

There were problems that forced retreats when they didn't kill me outright:

  • An invisible wraith in a corridor drained my levels and seemingly couldn't be targeted by any of my spells. This could be remedied with a scroll of restore life, but still, I found no good way of dealing with it except for retreating and regenerating a new level.
  • Lesser vampires/wraiths/wights normally shouldn't have been problems, as you can just run away and fire spells backwards whenever you gain some distance. But occasionally a spell would fail, and when this happens it fails before you tap a direction and not afterward, and I'd unthinkingly tap a direction anyway and then walk right into its draining reach.
  • Invisible summoners are still big problems. One even summoned dragons, which are difficult enough to fight one-on-one, and completely unreasonable when a mage that you can't see or fight keeps spawning more monsters. I escaped by running through a corridor and casting Sleep on a weaker monster, blocking off everyone else and using word-of-recall to flee.
  • Emperor Wights are like other kinds of wights, except tougher, meaner, and instead of being slightly slower than you, they're much faster than you, making the retreat-and-cast strategy untenable. I escaped one's multi-hitting death touches by casting self-teleport and then reading a recall scroll.
  • Mature Dragons, like Young Dragons, can be slowed, but they'll just kill you with their breath which is more frequent and deadlier. I have found no reliable method for escaping them, let alone killing them.
  • Some invisible thing gazed at me and drained my levels very quickly. At this point I had bought a Staff of Detect Invisibility, but it really didn't help. I'd use it, see the thing's position, and then it would move somewhere and gaze at me some more, from a new unknown position.


I eventually cleared a level 37 without any bad encounters and also without leveling or meaningfully improving myself except for some experience gains.

On level 38, I found:

  • Ancient Dragons, who are even stronger than Mature Dragons, and worst of all faster than you. Detect Monster shows them as a capital D, and if you see them it's better to recall right away than risk having one chase you.
  • An invisible summoner that turned out to be a capital W embedded in a wall when revealed with a magic staff. I still couldn't find any way to fight it.
  • Emperor Liches. Everything bad about the undead but worse, and if I'm not mistaken fast too.
  • More invisible things that drain stats, levels, etc.


After numerous failed attempts with no meaningful gains, and quite a bit of irreversible acid damage to my armor, I decided to try a new approach. I needed better gear, and I'd buy scrolls of Detect Object to find stuff lying around, while using Detect Monster to spot dragons and other things that I didn't want to deal with. This wouldn't help me avoid invisible stat-drainers, but for that I had Recall and restoration potions.

I stealthily went down to level 40, which seemed like a nice round number for a dungeon to farm. One of the first things I found this way, which still took several runs, was a much-needed potion of strength. It wasn't much, but it helped a little bit with carrying more stuff. Some hours later, I found a far more badly needed ring of Detect Invisibility, not by Detect Object, but by killing an evil mage that was guarding a cache of other things which turned out to be useless.

With this trinket I could finally see my translucent tormentors.

  • Ghosts and banshees are horrible. They drain levels and intelligence with multi-hitting attacks, and their gaze causes fear. And you can't outrun them, because they move twice per turn, they can pass through walls, and teleport. Thanks to my ring, instead of being a menace you can't see, they're a menace you can't fight or evade.
  • The invisible, wall-embedded summoner I fought before was a Nether Wraith. Being stuck inside a wall makes them semi-invincible sources of unlimited monsters, which really bites.
  • Several standard enemies like giant ants and centipedes come in invisible varieties. With the ring, they become "clear" instead of invisible, and are otherwise unremarkable.
  • Quasits aren't too bad. Before I had the ring of invisibility, they were dexterity-draining nuisances who could be eventually killed by stabbing int he dark. With the ring I could target them with spells before suffering stat drain.


Some of my routs and deaths:

  • A sorcerer ate several Fire Bolts, draining my mana, and then summoned a Young Multihued Dragon, which finished me off with a breath attack of some kind.
  • While waiting to recharge mana from a fight, a Mature Dragon walked into my corridor. I teleported it away. I rested again, and it walked right in. I teleported it away again, rested again, and this time an Emperor Wight spawned in the room south of the corridor, where I had already explored, forcing me to run to the north. As I ran to the north, being hit several times by the Emperor Wight's life-draining hit, I ran into the dragon.
  • A Nether Wraith teleported right in while I was resting, drained my levels, and frightened me. As I ran, it teleported in front of me, and a throng of Dragon bats swooped in from behind. I had no means to fight, but enough HP to survive long enough to Recall out.
  • Recall took me into a room full of Dragon Bats and one humanoid who turned out to be a Ninja. After I exhausted my mana, the Ninja hit me repeatedly draining my strength down to the point where I was useless.
  • An Ancient Multi-Hued Dragon just outside the range of Detect Monsters wandered into the room I was exploring.


After a good day of running level 40 and usually returning in worse shape than I had left it, my only real gains being a potion of Constitution, I decided to be reckless and head for level 50 in the hopes of better treasure, and perhaps a look at the Balrog. I was perfectly aware that this tactic would be suicide if I weren't using backups, but that ship had sailed long ago. Reaching level 50 wasn't too difficult between my spells that revealed staircase locations, spells that revealed monsters, and spells that dug tunnels, but it still took a few tries. There were some mishaps from nastier monsters slipping past my magical reconnaissance, especially invisible ones which are not revealed by magic even with the Detect Invisibility ring, though none fatal.


The Balrog was on level 50, alright. I went in a few times, came back empty handed usually, but in one run, I self-teleported right onto him. And he utterly stomped me.

Here, I also sometimes found Evil Iggy, an obnoxious, nigh-invulnerable thief who had a penchant for stealing things from my pack and disappearing in a puff of smoke.

What I didn't find, at least not for awhile, was any good loot. The manual mentions "ego" weapons with amazing powers, and also mentions armor with elemental resistance. So far I haven't found either, nor have I found any rings or amulets with properties I haven't already encountered on earlier floors, or any more potions of Restore HP or Healing or powerful scrolls like Genocide. I did, after at least ten fruitless runs, locate another potion of strength, and a potion of experience which granted tens of thousands of EXP and took me straight to level 30, but this has hardly been the lootfest that I was hoping for. The stores haven't stocked anything new either.

How are you actually supposed to beat this game?

Wednesday, November 25, 2020

Moria: Fouler things than orcs

My current feelings about Moria are a little more favorable than they were during my first posting, but not much. It's fairer than Rogue, but also more boring, and for how slow this game is, with its huge dungeons that run twice as deep, it's still not quite fair enough - bad luck can kill you and undo days of progress no matter how carefully you play.

Starting now, I'm permitting myself one save backup per day. Enough that I won't have to totally restart and lose days or even weeks of progress, and perhaps afford to play a bit more adventurously, while still forcing myself to be cautious, to fear death, and occasionally accept semi-permanent setbacks.

I returned to town with a good 1,600 gold pieces and loaded up on lightweight armor and a warhammer for good measure, plus two scrolls of word-of-recall (one to go straight to level 12, one for the return trip), and some rations and oil. With the 100 pieces left over I bought some scrolls of Treasure Detection. I probably wasn't going to be able to equip much better gear with my mediocre strength and slight Elvish build, but I noticed that the stores were now selling scrolls of Enchant Armor and Enchant Weapon. They'd still be there when I was richer, I figured.

91 lbs at 5'9" seems anorexic even for an elf.


In Rogue a Slow Digestion item would be godly. Here it's barely a convenience.

My strategy, henceforth, was to play by this loop:

  • Buy two scrolls of word-of-recall
  • Replenish rations and oil flasks
  • Upgrade gear as much as possible
  • Buy scrolls of Treasure Detection and other toys with leftover money
  • Read a scroll of word-of-recall to return to the lowest visited level
  • If no meaningful progress occurred (such as leveling up, or finding/buying improved gear, stat-upgrading potions, or other permanently useful things) during the last loop, then take the first staircase downward
  • Explore the entire level, using Treasure Detection to find veins of precious metal, killing as much as I can, collecting as much loot as I can find and carry
  • Word-of-recall out at the first sign of trouble or when the level is explored
  • Buy all the scrolls of identify, identify everything, sell everything I don't want to keep for the maximum price
  • If stat-drained, buy potions of restoration if available
  • Repeat the loop


My runs were for the most part uninteresting, and more often than not, a single loop was enough per level. Sleep, retreat, and repeatedly blast with magic missile worked fairly reliably, though eventually I graduated to Frost Bolt and Fire Bolt, and started using Slow Monster once Sleep began to fail me.

I took notes on some of the more interesting encounters.

  • One room had an invisible dexterity-draining nuisance. After dealing with it I made a habit of purchasing scrolls of Detect Invisibility, which turned out to be not as useful as you might hope as it only reveals invisible creatures for a single turn. Deeper there were even level-draining invisible things.
  • Molds come in many varieties and they tend to do bad things to you when you stand near them. Thankfully they can't move, but they sometimes camp near room entrances. Stone-to-mud helps you enter without brushing against them.
  • Disenchanter type monsters, whose attacks can debuff your magic gear.
  • Brigands steal items from your pack. I lost a book of magic this way! Thankfully no spells were lost when I re-bought it.
  • Invisible summoners are nasty guys who are nearly impossible to locate/kill and will swarm you with monsters. They necessitated a retreat/recall every time.
  • Gelatinous Cubes are no good, obviously, because they will trash your armor if they get near you. Thankfully they're quite slow, so I would deal with them by blasting them with moderately powerful spells, then running to safety, resting to recover mana, and returning while employing Detect Monster to avoid an unpleasant surprise. They seem to drop good stuff too.
  • Umber Hulks! They're as bad as they are in Rogue; their confusing gaze renders you unable to effectively fight, cast spells, or read scrolls, and one of my deaths occurred when I descended stairs into a room with an Umber Hulk and a single self-replicating rat.
  • Stone Giants sound powerful, but a single cast of stone-to-mud instantly kills them. Golems too.


Eventually I was able to buy some scrolls of enchant armor and weapons as a regular part of my shopping which I read immediately. The armor enchantment would boost a random piece of armor, and the weapon enchantments would enhance my equipped weapon, though it would sometimes fail as the numbers got higher. I also picked up the final spellbook, which was too advanced for me to learn anything within right away, but gave a glimpse of some powerful spells like "Haste Self," "Teleport Other," and even "Genocide."

By character level 17, my Identify spell's success rate increased to 19%, which sounds poor, but worked often enough that it was worthwhile to use it instead of relying on scrolls, which always sold out too quickly.

Some of the monsters I found on levels 20 through 35 were:

  • Wights and vampires drain your levels on touch, but move slightly slower than you, and some varieties stop to cast spells. They can be beaten without trouble by retreating and firing spells behind you as you gain distance, provided you have enough charted distance behind you (and don't back into a respawned or aggroed monster)
  • Giant Purple Worms look like regular worms, but are incredibly tough, and barf armor-destroying acid all over you. 
  • Spirit Trolls normally aren't too bad, but one time I encountered two of them embedded in the walls of a narrow corridor, where I couldn't hit them, but they could hit me. By the time I realized what was going on, it was too late to save myself.
  • Young Dragons, who resist spells, inflict several hits, and breathe deadly elements. If you can hit them with a cast of Slow Monster then you can kite them and even beat them in melee, but their breath makes things dicey.


I am now at character level 27, and have made multiple unsuccessful attempts at surviving dungeon level 36. I'm starting to encounter Mature Dragons, who are like Young Dragons but stronger and more likely to use their devastating breath attacks. Gray Wraiths are like Wights but have a mana-draining ability at a distance which robs me of my offensive power, and my retreat-and-cast-spells strategy quickly forced me into a corner where another bad thing killed me. Mana in general runs out very quickly; I have 41 points, and my workhorse offensive spell Fire Bolt costs 9, and plenty of monsters need two or more. Magic Missile is probably more efficient per point, but it's just too weak to use against anything that poses a threat unless it's quite far away or immobile. Spells like Sleep and Confuse hardly ever work any more. Slow Monster works on occasion but takes 9 points and usually requires a few tries. I do have access to some spells that I haven't tried much of yet like Polymorph Other, Teleport Other, and Haste Self.


Friday, November 20, 2020

Moria: Too greedily and too deep

I returned to my DOSBox setup to take another stab at Moria. I had already tried playing as a half-troll, powerful in melee but bad at everything else, and a dwarven warrior, skilled at combat, exploration and survival though poor at stealth. Both ran into trouble with stat-draining monsters, especially the Red Naga who drains your utterly critical strength, which is prohibitively expensive to restore at the levels where you're likely to encounter them!

I thought for my third try I'd go for the polar opposite - a halfling mage. Weak as a kitten, I wasn't able to carry much equipment or be of much use in melee combat, but with enough magic power, perhaps I wouldn't need it.

Magic isn't quite like any game I've seen yet. There are four spellbooks in the game of incrementing expertise, and as a mage you start with the beginner's book, which contains these spells:

  • L1: Magic Missile
  • L1: Detect Monsters
  • L1: Phase Door
  • L1: Light Area
  • L3: Cure Light Wounds
  • L3: Find Hidden Traps/Doors
  • L3: Stinking Cloud

Immediately upon starting the game, you may learn any one of the L1 spells. Each time you level up, you may learn another spell within your level, provided you own the book. Further spells must be found in other books, whose availability circulate in the magic shop.

I started with magic missile, knowing I'd rely on it to survive combat. Casting a learned spell costs mana, and I made it a point to recover mana through rest whenever possible. This would mean I'd go through rations and lanterns quickly, but that was okay. I could always buy more.

I did learn very early on that you shouldn't cast magic missile at point blank range. Magic is not a substitute for melee skill; a kobold on the first level survived a close range blast and then one-shotted my level 2 hobbit mage in retaliation.

White worms also posed a problem for my mage, when they hadn't for previous warriors.


These creatures reproduce. My warrior characters could kill them faster than they could reproduce, but for my apprentice mage, this wasn't really an option, as after just a few casts of magic missile I'd need to rest to recharge, allowing them to breed replacements. This was perhaps a blessing in disguise; I could retreat into the tunnel where they couldn't overwhelm me, and score loads of easy XP by poking my head out to blast a few more. I eventually reached level 5 this way and had just enough mana to thin their ranks enough to pass through.

Being a mage also grants some really nice powers that just aren't possible otherwise. By level 3, I learned the incredibly handy Find Hidden Traps/Doors spell, which reveals them within a pretty wide radius, which is not only much better and more effective than searching everywhere, but also reveals staircase locations, saving you from needing to search absolutely everywhere if the staircase was all you wanted to find.

Just like that I know about secret doors in rooms I haven't even been to yet.

Unfortunately, on dungeon level 2, I got blindsided by a giant black bat which quickly chewed right through my HP.

I tried again with an elf, figuring he might stand a slightly better chance of surviving these situations.

With this try, I found a pretty effective way to haggle. Begin by offering 1/12th of the asking price. Feel free to round down or up to a nice round number. It will be rejected and counter-offered. Then offer double your initial bid, then triple, and so on until you meet in the middle. The first few bids might annoy the shopkeeper, which gets you a dialog distinct from the usual haggling banter and possibly ejected from the shop for a few thousand turns if you keep it up, but most likely you'll reach an agreement and save a good amount off the initial asking price.

In case you're curious about optimization, this is what I determined to be the formula for haggling:
Percent * (Current asking price - Your last offer)

"Percent" is an unknown variable dependent on the shopkeeper's disposition, but through trial, error, and logic, it shouldn't be too difficult to determine. The shopkeeper expects you to increase your bid by at least this much, and will get annoyed and possibly throw you out if you don't. The initial bid expectation is mysterious to me (it seems to be a shopkeeper-based percentage of the initial asking price) but I found that this formula will very accurately predict the shopkeeper's tolerance for being lowballed on every subsequent bid. Following it exactly is pretty boring though, so the 1/12th method seems to work well enough.

Selling follows this formula, to determine how much the shopkeeper expects you to lower your offer by:
Percent * (Your last offer - Shopkeeper's current offer)

There's no good way to find out their upper tolerance for the initial offer except to guess and back out. They will always ask you to make the first offer, and always reject it, with offense taken if it was too high.

After a few failed attempts, including one where the dungeon entrance dumped me right next to a monster that I could not kill with my paltry starting mana or fight, I managed to have a character who survived long enough to buy the next spellbook and learn some of its spells.

Magic missile remained my primary damage dealer even as I unlocked more advanced ones. It may not be the most powerful spell - hard to know for sure as the game doesn't tell you how much damage you're dealing - but at only one mana point per cast, it's certainly the most efficient one. Usually I'd be able to pick off monsters from a distance by flinging several magic missiles, dealing lethal damage before they'd get into swatting range. It has a small failure rate, and because it fails before you are prompted to enter a direction, muscle memory would cause me to tap a direction anyway making me walk toward the monster that I intended to zap.

Detect Monsters is another cheap, useful spell, that can do a lot to prevent nasty surprises, but since it only reveals them for a single turn, you must be diligent about casting it frequently.

Guess we're not going that way.


Phase Door is a short-ranged teleportation spell that can get you out of a jam should you get blindsided, but it could also just teleport you deeper into it. Light Area is what it sounds like and is cheap and useful. Stinking Cloud damages groups of enemies in a radius, but at four MP it's pretty expensive for how much damage it does.

In the second spellbook, confusion is a terrific spell should you step through a door and bump right into something nasty in the dark. Sleep I is even better, though it has a higher failure rate, but if it works, you can skedaddle and rest to regain your MP before returning and blasting the sleeping baddie from afar. It's extra satisfying when the sleep victim blocks off a door so that his friends can't follow you. Lightning Bolt just seems like a more powerful Magic Missile, but for its cost of four mana I'd rather just cast Magic Missile four times. Frost Bolt is a whopping six mana and has a somewhat high failure rate, but by the time I got it, there were occasions where I really needed to kill something in a hurry, and couldn't cast sleep and retreat as there was nothing to retreat to. Lastly, Stone to Mud removes a dungeon wall, which isn't terribly useful except as a means of clearing a path to veins of precious metals revealed by a scroll of Find Treasure.

I did eventually save up and buy the third book of magic, and quickly learned Identify thinking it would be a convenient alternative to Identify scrolls, but at the level where I could learn it, the 87% failure rate just made it impractical.

After days of playing cautiously, and having a few close calls saved only by a timely word-of-recall scroll, I decided to start backing up my character on occasion. Hours later, I just wanted to see how far I could go without stumbling into a world of hurt, so I just took the stairs whenever possible without bothering to farm or grind. The answer is level 13, where I emerged right into a pandemonium of rapidly reproducing giant gnats and various other nasties including some invisible, dexterity-draining horrors.

Tuesday, November 17, 2020

VMS Moria


I've manually converted this version's helpfile to standard text, and it contains some information not found in later versions, such as tables for weapons and armor. Read it here:
 

Thanks to Adam Thornton, maintainer of Ancient Computer Mvsevm (and credited film performer), I am able to play a Koeneke-authentic original version of Moria on an emulated VAX/VMS system. Version 4.8 represents the final Pascal codebase before it was rewritten in C as Umoria, and is probably feature-complete. I did notice some differences in just a few minutes of play, though some could be attributed to luck.


  • You can't re-roll stats when generating a character.
  • The # ASCII symbol is used for walls, which makes them much more difficult to read than the IBM graphics symbols used in the DOS version.
  • The general store actually sells picks, though my tunneling ability still seemed fairly useless even with one equipped.
  • Doors sometimes get stuck trying to open them, and then must be bashed open, which can take dozens of tries. This never happened to me in the DOS version.
  • The map command saves the output to a file but does not display it ingame. You can view it in the shell with the "type" command but it's basically unreadable.
  • Resting for a single turn with '5' works. This did nothing in the DOS version.
  • Actions that require directional followups (such as open) do not prompt you for further input.
  • Your character file can be password protected.
  • You can't play during peak hours (7am to 5am PST M-F). If you are still playing at 7am PST on a weekday, you get a warning and a few minutes to save and quit.
  • Some spelling errors.
 

I decided to try playing as a dwarf this time around, who have strong fighting ability, and fairly decent skills apart from stealth. I bought a scroll of word-of-recall, using the haggle system to save a few pieces of gold, and some additional armor. Finding secret doors was, in particular, much easier than as a half-troll. I fought my way down to level 7 in a short order, where I found a nasty surprise.


These lice never did more than 1 damage per hit, but reproduced much faster than I could kill them. So I retreated into the hallway, where they could funnel at me, and I gained two levels from the massacre. They kept coming without end, though, and the experience points gained were slowing to a trickle, so I recalled out, which isn't an instant action; it takes several turns for the spell to activate.

My next trip to level 7 had a few more nonfatal misadventures. A red naga drained my strength multiple, a yellow worm mass drained my constitution, a bad potion drained my dexterity, and a trap drained my strength even further, down to 15.

I figured I would farm gold for awhile on level 6 to save up for a potion of restore strength. I knew this would take awhile; a potion cost nearly 900 gold, a scroll of recall 300, and I was lucky to get 200 gold in a level run. The level and the gold in it could be regenerated by traversing up a set of stairs and down another on the level above.

Alas, I ran into one big problem with this method of playing Moria. When you load a saved character, it is deleted from the disk. The intent is to fight savescumming; saving will write it back to the disk and exit the game. Unfortunately, this means an unstable network connection can, and indeed did, ruin my progress after two good days of play.

Back to the DOS version it is then.

Thursday, November 12, 2020

Game 217: Moria (Roguelike)

Moria (no relation to the Moria on PLATO) is what I might call a "priority ancestor." A game that does not meet whale status, but is critically important as a predecessor to a game that does, but one so far away that I don't want to wait years for that game's phase to start.

Depending on when Jay Fenlayson's Hack first came out - Wikipedia says 1982 but the Nethack Wiki says 1984 - Moria might be the first true Roguelike, apart from Rogue itself. That itself isn't the reason for its importance - Data Driven Gamer isn't concerned with "firsts" as much as influence, but Moria is considered to be the originator of the *band branch of Roguelikes. This branch distinguishes itself from the original Rogue, in which consumable resources are scarce, permanent equipment upgrades are rare, and you're always vulnerable, by instead having farmable resources, a wide variety of gear, a town where you can return to and buy things, and a high power ceiling for the player. Most notably from a commercial standpoint, Blizzard's Diablo was strongly influenced by *bands, though it doesn't fit the formula exactly.


Angband's history document says that Moria's first release was in March 1983, coded in Pascal for VAX/VMS by Robert Alan Koeneke and Jimmey Wayne Todd Jr. at the University of Okahoma. Ideally, I would want to emulate a VAX/VMS system and play this version. I've done it before; in DDG's first year, I did this in order to play a c1977 port of Daniel Lawrence's DND. But although Koeneke's final Pascal codebase has been preserved, I regret that setting up a Pascal environment within an emulated VAX/VMS session and importing, compiling, and running the code is beyond my abilities. The earliest that I can play is a 1987 recode in C by James E. Wilson, which conveniently had a DOS release. Whatever undocumented changes occurred in the four year interim will remain mysteries.

On a related note, there is a DOS game floating around with the filename "MORIA2," which is mostly in French, is designated "Version 1.9.9," copyrighted by a mysterious "AJM86," and predates Wilson's C conversion by a year.


This game is clearly derived from Rogue, but bears little resemblance to Wilson's Moria port, lacking any sort of character creation or town level, and the command list strongly corresponds to Rogue's. Dungeon layout is much more mazelike than either Rogue or Moria. There are vestiges of English prose, which suggests an unfinished translation of a now lost English original. Could this be a port of a very early version of Koeneke's Moria, or is it just another Roguelike that sprung up and happens to share the name? The evidence is frustratingly inconclusive, and I don't feel entirely comfortable classifying Rogue as a 1983 game given that I simply don't know how much advancement occurred between then and the time I began playing.


The first thing in Moria (or at least Wilson's port) that makes it stand out from Rogue is its character creation screen. Rogue just dumped you into the dungeon with a premade character, with HP and strength the only meaningful stats. Here, you choose a race, class, and roll for all six conventional D&D stats. Races determine stat bonuses, available classes, and also skills. For instance, half-trolls are terrific fighters but lousy at everything else, and halflings are bad fighters but awesome at everything else. I decided to make my first character a half-troll warrior.


The next thing you see is a town, serving as a hub for shops where you can buy general supplies, weapons, armor, scrolls, potions, and magic artifacts. It's easy to see how this might have translated to Diablo's Tristram. It's also pretty annoying to navigate, with beggars accosting you, idiots drooling on you, and on occasion rogues pinching your stuff. You can just murder then without penalty, though. As a half-troll, shopkeepers hated me and overcharged, and I couldn't afford anything better than what I already had, so I just went into the dungeon.


Initial impressions are that combat is fairly easy and mindless. I'm sure that doesn't hold up for long, but I fought my way through four levels of the dungeon without ever feeling my life was in danger. One time I got poisoned, but there was no stat loss and the effect didn't last long. Treasures weren't anything great - quite a few objects were broken, like swords and sticks, and I even found some skeletons with no clear use. There were the usual scrolls with nonsense words, colorful potions, none of which had obvious effects when I used/drank them. One dagger was called "Misericorde," which I identified with a scroll, revealing no particular properties to distinguish it from my standard issue "Stiletto" dagger.

Dungeons are also much more complicated than Rogue's fairly simple layouts of nine rooms connected by tunnels. They are bigger than the screen and scroll as you approach the edge of it. As in Rogue, there are often doors concealed in the dead-ends of the tunnels between rooms, and you must repeatedly search to find them. There's an option to view a scaled-down version of the map on your screen, but it's kind of a garbled mess to look at, applying sort of a "nearest-neighbor" approach to consolidating the tiles that mangles the wall geometry, making the map not terribly useful.

It shows staircases clearly but if you've found those you probably don't need a map.

At 200 feet deep, I couldn't find the next staircase down, but I did find one leading up, which is something you don't see at all in Rogue until you find the amulet of Yendor. I decided to take it and work my way back up to town.

Whenever you traverse a staircase, whether you go up or down, Moria always generates a new level for you, with new monsters, new treasures, new rooms and tunnels and traps, and you're plopped down in a random part of it, probably not close to any stairs. Real-world logic that you should be able to immediately turn around and go back down the stairs that you just ascended (or vice-versa) just doesn't apply in Moria.

After going up two levels, I ran into a problem.


How was I supposed to get out of this room? My only thought was that just maybe a secret door was hidden in one of these walls. Unfortunately, half-trolls are bad at searching, and without having a shovel or pickaxe (neither of which had been for sale), everyone is bad at digging.

I did, thankfully, discover the exit by circumferencing the room while searching every step, but this took some time. And eventually found my way back to town, though all I could afford was a short sword and a few bits of armor.

I made my next journey a suicide mission to find out just how deep I could go on brute force alone. I took only staircases going down, adamantly searched for hidden doors whenever plain sight lacked for a way forward (which was very often), and consumed potions and scrolls immediately on finding new ones, under the assumption that bad effects could be more easily dealt with sooner rather than later.

The secret doors proved an even bigger problem in Moria than in Rogue. Levels are much bigger and much more complex. Sometimes you hit a dead-end in a tunnel which often signifies a secret door, but as a half-blind troll it can take upwards of ten searches to be successful, even on these upper levels. Often you've explored every inch of the dungeon that you could see and not found any staircases or any obvious places for secret doors, and then you've got to turn on auto-search and comb the area until you find something. At least food isn't as big a deal in Moria, being cheap and fairly plentiful.

I did eventually get killed, nine levels below the surface, and I took note of some interesting hazards in the meantime:

  • A trap emitted red mist and a message said something to the effect of ruining my armor.
  • A "green mold" monster repeatedly ruined my armor and caused my backpack to emit foul odors.
  • Passing through a corridor a message said I got slimed, but I could not determine the source of this or the effect.
  • Rattlesnakes poisoned and blinded me, but this effect was short-lived.
  • A "red naga" monster damaged my strength several times.
 

What did me in in the end was a yeti, who didn't inflict massive damage with any individual hit, but killed me through dozens of cuts throughout a lengthy battle no doubt prolonged by my weakened state from the red naga.

It's a roguelike. Seeing this a lot is expected.

My takeaway from the experience? Always carry a scroll of word-of-recall in case something bad like this happens.

So far, I am not quite enjoying this as much as I did Rogue. It's certainly fairer and generally seems more winnable, but Rogue had a briskness and sense of urgency that you don't often see in RPGs. Moria feels leisurely in comparison, which isn't a bad thing, but I can easily see this game becoming grindy, low-risk, and boring to mitigate the threat of permadeath, which was never an option in Rogue. Time will tell if this becomes a self-fulfilling prophecy.

I also have to wonder, if I had this much difficulty finding secret doors as a troll a mere nine levels deep, how much worse does it get when I'm close to level 50? Are half-troll fighters even tenable endgame material?

Wednesday, November 11, 2020

Game 216: Dungeon Campaign (and Dragon Maze)

Read the manual for Dungeon Campaign (and Wilderness Campaign) here:
 

I'm taking a detour into the past to play a quickie CRPG of ambiguous importance. I wasn't originally going to bother with Dungeon Campaign; although it's one of the earliest RPG-like games available on personal computers, it isn't clear that this or any of Robert C. Clardy's other Apple II games informed anything of note, even if his 1980 Odyssey was glowingly well received by CGW's Scorpia as late as 1993.

Nevertheless, I've toyed with the idea a few times, and just decided to do it - it's an afternoon's investment at most.

Dungeon Campaign, like all Apple II games of this era, was coded in Integer BASIC and distributed on tapes, though no tape versions seem to be dumped. It is directly based on the game "Dragon Maze," which originally existed as a type-in program in the Apple II 1978 reference manual.

I found quite a few disk copies of Dragon Maze on archive.org, most of them modified from the original, but one was authentic as far as I could tell.

Most copies don't "erase" the picture.


The dragon isn't very smart and will just walk back and forth if he can't move closer to you, but if this happens too long he will jump over a wall.

The trick to winning is to memorize the maze, which annoyingly vanishes the exact moment that it finishes being generated. It will re-reveal itself as you bump into walls, but if you need to do this, the dragon will certainly jump over a wall and chase you into a corner. The dragon starts near the exit, and since there's only one route, so there's no getting around it. You've got to manipulate the dragon to move away from the exit, and preferably get stuck in an alcove somewhere, or get it to jump a wall so that it follows you while you head directly for the exit. Both techniques only work if you know the exact path to the exit as well as enough walls to manipulate the dragon's movement.


It's not a great game, but it's meant more as a learning exercise than an enjoyable experience in itself, so I'm not bothering to rate it.

Game 216: Dungeon Campaign


I am playing a floppy-based re-release which bundles both Dungeon Campaign and Wilderness campaign.


Dungeon Campaign begins by generating maps for four levels, but there's not much point in paying attention to any but the last. Only the map for the fourth level reveals its exit; the rest have staircases that could be anywhere.


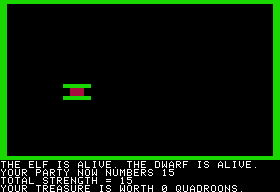
We have 15 adventurers including an elf who warns when traps are near, and a dwarf who updates the map as the dungeon is explored. There are no stats or hitpoints; taking hits in combat or wandering into traps just means people die. The party levels up as a unit and the overall combat effectiveness is equal to this level times the number of surviving adventurers. A melee in which one of the 15 dies but the party gains a level means our overall strength rises from 15 to 28.

You can jump to avoid traps when the elf warns you are near one, but this isn't always possible when a junction or corner is trapped, as happened to me almost right away.

This confusingly worded "trap" sends you to a random part of another level.

The necromancer sent me to level 3, right by the staircase to level 4, where I encountered 79 ghouls and somehow won at the cost of five adventurers, though I don't fully understand why, as I only landed a successful hit once.


The prize was grand, though.

Add caption

Before exiting the dungeon, I went back up to level 3, noticed that one of the rooms was highlighted, and searched it for a bit more treasure. Then I returned to level 4 and left, though on the way a spectre entered and killed one more of us.


I replayed two more times, and made more effort to explore the dungeon. Some notes:

  • I still don't really get how combat works. When you encounter a group of monsters, it has a total power level, but I don't know what it means. You take turns rolling dice and hitting or missing each other. Whenever they hit you, someone dies. You must hit them multiple times to win, but this number is much smaller than the number of monsters in the group.
  • Sometimes you awaken a dragon. It behaves much like the one in Dragon Maze, but if it catches you, then it eats one man and goes away. Climbing stairs de-spawns the dragon.
  • Pit traps aren't so bad; they just get you closer to the exit. Unless you're already on the fourth level, in which case one or two people die.
  • Gas traps cover a small radius, but are harmless if you walk through the spewed gas quickly enough.
  • One time I found a magic sword as a treasure. The magic sword lets you instantly win one combat, at the expense of the sword.
  • Another treasure was a treasure map, which revealed the location of all treasure rooms on the current level.
  • Returning to a previously explored dungeon floor reveals treasure rooms in any locations you've been to before but haven't searched. This doesn't make much sense to me mechanically and may be a bug.
  • The game can crash with an array out of bounds error. This only happened once, and I don't know what causes it.

During my second replay, I gathered 4200 quadroons on the upper levels and got my party to reach level 9, but traps and fights started to take their toll. I escaped with 6 survivors. Was the extra money worth all those lives? Who knows.


GAB rating: Average. It's simplistic and a little weird, but Dungeon Campaign does what it sets out to do; give the experience of a dungeon crawl in the space of a few minutes.

Robert C. Clardy won't be relevant to Data Driven Gamer again until way into the future of 1989 with  J.R.R. Tolkien's War in Middle Earth, and after that not again until 1997 when Synergistic Software produced the Hellfire expansion pack for the original Diablo.

We'll soon return to our regularly scheduled 1983 programming with a series of posts on Moria, the Roguelike that would gradually turn into Angband.

Monday, November 9, 2020

Suspended: Won!

This whole freeze a guy underground for 500 years and wake him up in case of an emergency so he can control a bunch of blind robots to fix it scheme is insane. Contran society seems to really like acronyms, so I'd have called it CCCC, for Contra Cryogenic Catastrophic Contingency. Why is there no means of controlling the robots or systems from the planet surface? Why limit each robot's usefulness by giving it only one sense? Just what is Auda supposed to do down here? And if they can send people down here, why not just have them fix the problem, instead of going to the trouble of replacing me with a clone and hoping it does a better job?

Contra's Underground Complex is also humorously overdesigned, like a satire of overcomplicated and technically unfeasible designs by committee. The planetary controls and monitors on the exact opposite sides of the complex, where the control operator can't see what the effect is. The main computers and their reset device are also on opposite sides of the complex, and the code needed to activate the reset is on the computer side, where the only robot capable of reading it can't go. The two floors are separated by a dropoff to deliberately restrict robots to the second floor, but we're also provided with a portable ramp so that they can descend it, and the robots themselves (other than Iris) all have navigation data for the lower floor. And good job putting the computer room cooling system out of the robots' reach.

All of this whimsical insanity makes perfect sense in context. Contra is very much the embodiment of a zany technocratic dystopia, where society relies on badly engineered plans, machines, and infrastructures, all built by the lowest bidder and maintained by no one.


During my first session, I encountered the following problems:

  • Iris is damaged and can't see.
  • The computer reset mechanism has improper chips inserted and doesn't function.
  • An earthquake loosens cables in the computer room. Planetary weather is out of control. This is the event that starts the game proper.
  • On turn 15, an aftershock damages a coolant device, making the computer room deadly to enter.
  • On turn 75, a third shock damages the controls for traffic and hydroponics.
  • On turn 100, a security team enters the complex.
  • Around turn 160, they disconnect me and put a clone in my place.
 

Once the third shock occurs, the transit system goes out of control and kills people, and the hydroponics monitor shows dropping levels of water, minerals, and lighting, resulting in poor output. The robots refuse to touch the transit controls, and the levers in the hydroponics controls have no effect.

I needed a clue, so I turned to Invisiclues, which suggested using people to shut off the acidic coolant controller, but gave no suggestions on how. I had Auda wait for their intrustion, then follow them and listen.

  • Turn 100: Sterilization chamber.
  • Turn 101: Decontamination chamber.
  • Turn 102: Entry area.
  • Turn 103: Small supply room. They retrieve a toolbag, and decide to take a nap.
  • Turn 105: Activity area.
  • Turn 106: Sleep area. They rest.
  • Turn 128: They awaken. They decide to go to the library for more information.
  • Turn 129: Hallway corner.
  • Turn 130: Hallway branch.
  • Turn 131: Library entrance. Dialog is inaudible.
  • Turn 132: Library core.
  • Turn 134: They agree to replace me.
  • Turn 135: Library entrance.
  • Turn 136: Hallway end. They take car to the biology area.
  • Turn 151: They return.
  • Turn 152: Library entrance.
  • Turn 153: Hallway branch.
  • Turn 154: Hallway corner.
  • Turn 155: Hallway.
  • Turn 156: Access hallway.
  • Turn 157: Sloping corridor.
  • Turn 158: Hallway junction.
  • Turn 159: Bending corridor.
  • Turn 160: Angling corridor.
  • Turn 161: Central corridor. Game over.
 

I tried again but had Poet disrupt their routine by stealing the car to the biology area. Their activity diverged accordingly.

  • Turn 136: They decide to wait for the car.
  • Turn 146: They complain.
  • Turn 166: They complain again.
  • Turn 181: They complain more.
  • Turn 211: They decide to forget about the clone and just disconnect me.
  • Turn 212: Library entrance.


From there, the itineraries converge with a 60 turn delay.

By stealing the toolbag while they sleep, they'll wake up and try to retrieve it from you. I had Auda do this and lead them into the maintenance access, where they saw the acid-spewing pipes overhead. They fixed them and decided to wait and see if that was enough.

I restarted the game and focused on preparing Waldo for the computer room repair job. I had him fix Iris and the computer reset device in the supply rooms. I sent him to the lower level and used the ramp to retrieve the cable-cutter in the humans-only supply room, and then to the biology lab to get the TV camera. I had him replace the ramp and go to the Gamma Repair Room with Sensa to haul Fred out of his aluminum coffin. Turn 100 was approaching, so I had Auda go to the sleep chamber to wait for the humans and then do her thing.

The cooling system was fixed, but Waldo needed two spare cables to finish the job. I had one cut out of Fred and knew of two others; a sixteen-inch cable in the supply room that the manual warns not to use, and a fourteen-inch cable inside the reset device, which electrocutes any robot that tries to disconnect it. Getting this is simple; you just remove a fuse from the device first, get the cable, and replace the fuse.

I sent Waldo into the computer room with the camera and spare cables, broadcasted the reset code to Iris, and replaced the bad cables. The computer announced it was ready for reset codes. Iris punched it into the device - it works fine without the cable just as long you replace the fuse - and the game ended.

All systems returning to normal.
  Weather systems slowly approaching balance.
  Hydroponic systems working at full capacity.
Surface life in recovery mode.

Extrapolation based on current weather systems and food supplies:
  Total recovery in 82 cycles.
  Current surface casualties: 4,277,000
  Projected casualties during recovery: 3,417,000
  Original population: 30,172,000
  Total possible survivors: 22,478,000

This score gives you the possibility of being considered for being burned in effigy. On a scale of 1 (the best) to 7 (the worst), your ranking was 7.

Could I do better by being more efficient? Perhaps I didn't need to waste time on the security team - the robots do not die immediately on entering the hazardous computer room, and although it wouldn't be possible to replace the cables and come back alive, maybe they're expendable. Most importantly, I hadn't been multitasking. Waldo may be the most useful robot, but he can't be in two places at once, and having him do almost all of the manual work couldn't possibly be the most efficient approach.

I sent Waldo to the middle supply room where the spare parts were, Sensa and Poet to the Gamma Repair where Fred was stashed, Whiz to the sub supply room where the ramp was, and Iris to the main supply room where the reset machine was. Auda would be little use; she can't interact with anything she can't hear, which isn't much.

Sensa got there first, and I had her open the cabinet. The rest soon arrived at their destinations. Whiz carried the ramp to the hallway junction. Poet and Sensa moved Fred and I then directed Poet to the hallway junction. As Whiz and Poet walked, Waldo did his repairs, which can be made more efficient by taking multiple objects in a single command, and by using "replace <thing1> with <thing2>" to consolidate get & put actions into one.

The rest involved three robots in motion, doing simultaneous jobs. I needed careful micromanagement to minimize idle turns.

  • Waldo fixes the device, retrieves the cable safely, and goes to the computer room, dying as he replaces the bad cable in the secondary channel.
  • Whiz carries the ramp to the small supply room, retrieves the cable cutter, brings the ramp back to the hallway junction, cuts Fred's cable out, and goes to the computer room, dying as he replaces the bad cable in the secondary channel.
  • Poet retrieves the camera, and once Whiz has replaced the ramp, goes to the computer room to broadcast the reset code, dying soon after that.
 

Victory was achieved faster, but my score wasn't much better.

All systems returning to normal.
  Weather systems slowly approaching balance.
  Hydroponic systems working at full capacity.
Surface life in recovery mode.

Extrapolation based on current weather systems and food supplies:
  Total recovery in 66 cycles.
  Current surface casualties: 1,165,000
  Projected casualties during recovery: 2,101,000
  Original population: 30,172,000
  Total possible survivors: 26,906,000

This score gives you the possibility of being considered for being burned in effigy. On a scale of 1 (the best) to 7 (the worst), your ranking was 7.

What did I have to do differently for a better rank?

From perusing Invisiclues, it turns out the damaged planetary controls are functional, just not accurate. Weather tower two's dial should be set to its maximum value ASAP in order to slow down the damage. The transit controls, which the robots previously refused to touch, must be FLIPPED to operate them. I had to scan a walkthrough to determine that "flip" was the correct verb; touch, press, throw, and move had all failed to impress on them.

I had another go at it, this time using Sensa to man the control stations once Fred was removed. The second weather control tower's dial was set to the highest value, and then I killed the planet's taxi and glider ramp systems. Several turns later, when it seemed that nobody must be using the air transit, I killed that too. Hydroponics adjustment would just have to wait until the third shock, at which point the game was nearly over anyway.

I finished on the 79th turn.

All systems returning to normal.
  Weather systems slowly approaching balance.
  Hydroponic systems working at full capacity.
Surface life in recovery mode.

Extrapolation based on current weather systems and food supplies:
  Total recovery in 3 cycles.
  Current surface casualties: 220,000
  Projected casualties during recovery: 58,000
  Original population: 30,172,000
  Total possible survivors: 29,894,000

This score gives you the possibility of being considered for savior of a planet. On a scale of 1 (the best) to 7 (the worst), your ranking was 3.

Not bad, but better is possible! I had no wish, though, to spend any more time puzzling out the most optimal solution. I followed a walkthrough which solved the game in 71 turns, before any damage to transit or hydroponics occurs, saving thousands of lives. This walkthrough solves all of the puzzles in the same manner as my own solution, but in a different order, and I don't especially care to do the analysis to determine why this one is more efficient.

All systems returning to normal.
  Weather systems slowly approaching balance.
  Hydroponic systems working at full capacity.
Surface life in recovery mode.

Extrapolation based on current weather systems and food supplies:
  Total recovery in 0 cycles.
  Current surface casualties: 8,000
  Projected casualties during recovery: 0
  Original population: 30,172,000
  Total possible survivors: 30,164,000

This score gives you the possibility of being considered for a home in the country and an unlimited bank account. On a scale of 1 (the best) to 7 (the worst), your ranking was 3.

Suspended also features an advanced mode, but it isn't all that interesting - it disables Whiz, causes damage to the transit and hydroponics controls immediately, and the security team enters on turn 80 instead of turn 100, killing you on turn 141. There are no additional challenges; bad stuff just happens sooner. You can also configure a custom difficulty where you define each robot's starting point, alive/dead status, and how soon each of the bad events happen.

There's also an impossible mode. This causes the sun to go nova one turn after the game starts. Cool.


GAB rating: Good. 

I enjoyed Suspended while it lasted. It's a short, compact game, fairly well polished as usual for Infocom, and a big change in style for both Infocom and Berlyn, best thought of as one elaborate, multi-stage puzzle. There's definitely an initial sense of impenetrability here; until you've mastered the multi-robot interface and figured out the game's "script," it can feel like a hopeless situation where things keep blowing up for no reason as you struggle to process what's even going on, let alone piece together how to solve anything. It can take multiple failed playthroughs before you start feeling like you made any progress at all.

For me, the most enjoyable part was figuring out the complex and what you find in it. Every object has four to six different descriptions from the robots that can observe it, plus as many as three more from the computer peripherals that Whiz can query. Sometimes these queries reveal more information than they should, even outright revealing the solution to a puzzle, but too much information is better than too little, and Suspended remains one of Infocom's most challenging games, being one of only four ranked "expert" in difficulty.

What's more is that despite being made by a novelist and a relative newbie to game design, Suspended never feels like it wants to be a novel, and the temptation to use Z-Machine's virtual memory and text compression abilities to expound words at the player must have been immense. That sort of storytelling is thankfully confined to the manual (and to a lesser extent the library computer's History Peripheral), and Berlyn allows ludic narrative to come through naturally through room descriptions, world layout, and ingame events. Even after it becomes clear that the various disasters in Suspended are on a rigidly scripted schedule, there's always a sense of dreadful chaos, as calamities build up and cascade faster than you can put band-aid fixes on the last ones.

Suspended is weird, but in a good, memorable way, and it's fun for awhile, though the replay value isn't as strong as promised. I happily induct it into my ivory deck.

Saturday, November 7, 2020

Game 215: Suspended

Read the manual here:

Can I just say, that horrifying 3D face sticking out of the game box wouldn't make me feel intrigued and want to buy a copy to find out what it's all about. It would make me want to burn the computer store shelf with an acetylene torch and sterilize it with an industrial UV emitter. That is all.

In 1982, sci-fi author and founder of Sentient Software Michael Berlyn joined Infocom and designed Suspended, which was released in February 1983. With Infocom's comparatively advanced Z-machine engine and other resources at his disposal, Suspended could easily overcome the restraints that limited his earlier BASIC-coded adventures at Sentient.

You are a "Central Mentality" - a citizen of planet Contra chosen by lottery to be cryogenically frozen in an underground complex, and to be awakened by monitor computers and tasked with remedial action in case something goes catastrophically wrong on the planet surface during your 500 year tenure. We're warned that the previous CM, Franklin, went berserk when he was awakened without reason, and sabotaged the planet's traffic and weather systems, killing thousands in the resulting chaos.

As a human popsicle, you cannot move or interact with anything directly, but instead control six individual robots by neural link, each with different abilities:

  • Iris, the only robot with optical vision, but whose movement is limited to the complex monitor area. Iris is malfunctioning at the start of the game and must be repaired before becoming useful.
  • Waldo, a manipulator robot with six grasping extensions and sonar.
  • Sensa, who can detect vibrations and ionic activity.
  • Auda, who can hear, and is isolated on the ground floor to the north until you haul a ramp to the junction in the second floor hallway.
  • Poet, who feels with delicate tactile sensors, and tends to output in grandiloquence.
  • Whiz, who identifies objects by RFID, and can interface with the computer terminals to query most of them.
A seventh unnamed robot is somewhere in the complex, sabotaged and hidden by Franklin.


There's a lot of information in the manual to unpack, such as controlling the robots, the various systems and interfaces in the underground complex, and the multiple peripherals available to Whiz.


One big difference between Suspended and other Infocom games, though, is that mapping is not required. A map of the complex is included in the box, and six punch-out tokens represent the robots and their positions. Robots needn't be given compass directions to navigate either; a command such as "sensa, go to gamma repair" will be enough for Sensa to automatically navigate there and notify you when the location is reached, or if an obstacle prevents this.


Upon starting, we are alerted that the planetary systems are deteriorating. Sensa reports a 9.7 tremor that has dislodged cables in the computer room, and Iris reports that her vision is in disrepair. Soon, Sensa reports a 7.3 aftershock that damages cooling systems in the maintenance area. I have Waldo examine Iris, and he says there is a maintenance panel, but it is too delicate to open with standard grasping extensions.

In the main supply room, Waldo describes a medium-sized object with smaller objects sitting in its two depressions. Whiz has a different description; a GG-1 with socketed CX3 and CX4 chips. After some fumbling with the interface, I found out how to have Whiz look these objects up on the technical peripheral - the object is a device used to reset the filtering computers, and the chips are switching processors. In the meantime, a third tremor damaged the other two surface controllers.

Soon later, I was alerted to intruders in the complex. The objects in the middle supply room included an object tagged BA1 containing five different replacement chips, a sixteen-inch cable that a manual addendum warns not to use, and a grasper for Waldo with microsurgery attachments. During this information gathering, Whiz notified me that the intruders were reviving a clone. Then, as I sent Waldo to the weather monitor where Iris awaited repairs, the cryochamber door swung open.

I'm not exactly sure what the plan with the clones is - disconnect me, freeze a clone in my place, and then revive him immediately in order to repair the complex? Why not just send in someone who can do the repairs without being in suspended animation?

Anyway, I had lost my first game, but learned enough to repair Iris. Restarting, I had Waldo install the grasper and open Iris' panel, Poet touch each chip inside and detect the malfunctioning one, and Waldo pluck it out and replace with the corresponding spare. Iris could see again, though being confined to a small corner of the complex, other robots would need to bring her objects to look at.

Even with vision, it's useful to have objects examined by multiple robots. For instance, in the main supply room, the robots describe a machine in such manners:

  • Iris: Sitting near the wall is a machine which has a little orange button on its face. Beside the button are two small sockets, one red and one yellow. A burned chip sits in the red socket, and a fried chip sits in the yellow socket.
  • Waldo: Sonar detects two small depressions beside a raised spot in the object. A disfigured device sits in the first depression, and a bubbly device sits in the second depression.
  • Sensa: A strange apparatus sits before me, processing electrons internally. This device seems active, though some internal mechanisms are exposed. There are two receptacles, designed to hold small circuitry, and a button beside them. A ruined device sits in the plus receptacle, and a seized device sits in the negative socket.
  • Poet: A processor sits on the floor, munching and spitting electrons. Button, button, who's got the button while the socks ablaze with color. A brain tres sits in the primo socket, and a brain quart sits in the secondary socket.
  • Auda: I can hear the slight noise of machinery operating here.
  • Whiz: A GG-1 sits here, barely operating. A CX3 chip sits in the S1, and a CX4 chip sits in the S2.
 

Whiz can get further information from the computer peripherals.

  • Historical/GG1: This mechanism was provided for resetting the Filtering Computers.
  • Advisory/GG1: Once the panel is opened (by pressing the button), the eight code circles will be revealed. If the Filtering Computers are operational and balanced, keying in the two codes will result in a system reset.
  • Technical/GG1: This machine holds the 8 circles used to reset the Filtering Computers.
  • Technical/CX3: This chip is a switching processor (CX3).
  • Technical/CX4: This chip is a replacement switching processor (CX4).
 

Evidently, Franklin put the wrong chips in this machine and ruined them. But by putting the correct color-coded chips into their proper sockets, the machine can be opened, revealing codes inside the circles. It wasn't yet clear to me what to do with the codes, though.

I took some time to explore each room in the complex, reloading to the point where I fixed Iris whenever I ran out of time.

The weather monitors show numbers without units, which is a big goof for anyone proposing to be into science. Planet temperature is 34 and winds are 46, which I must assume are Fahrenheit and mp/h. There's a torrential sleet that later becomes a blinding snowstorm. Weather towers 1 and 3 report stable pressures of "55," and if that's in inHg, it's like being 28 feet underwater. Weather tower 2 reports "32" and it drops fast.

The central chamber by the monitors houses a column with a door visible only to Iris, pulsing with electricity visible to Sensa. Whiz identifies this as "CPU," and queries to the peripherals reveal that it houses the robots' control unit, e.g. myself. You really don't want to open the door.

Transit monitors seem normal, with no casualties. Glide ramps run at 30mph, which seems a little dangerous to embark and disembark from, but I don't know what's normal around here. Hydroponics monitors seem okay too.

The corridors are mostly uninteresting. The hallway junction on the first floor has a small step to the north heading to the lower level where Auda is located, but robots can't climb stairs. You must get a ramp from the supply rooms and place it here to connect the floors.

The three repair rooms house a conveyor belt, and advisory peripheral says that object placed on the north end will emerge repaired on the south end. I tested this on Iris's busted scanning processor, and while this did activate the conveyor belt, it was not repaired. Too delicate, perhaps? A cabinet openable by Sensa houses the remains of Fred, but I could not find a way to move him onto the repair belt.

The eastern section where the filtering computers are kept is trouble; any robot entering this region dies soon after from an acidic mist. Nevertheless, I found that in the "primary channel" between FCs alpha and Beta, there were four cables, one of which could be taken without electrocuting the robot. A plug tagged "PL-1" had no data available, and a sign "ACS" has the reset code - but we'd need to find a way to show the sign to Iris. The "secondary channel" between Beta and Gamma FCs were the same.

The weather control area had three dials, all set to 55. I tested the first and third; they were operational and caused the tower pressures to slowly change accordingly. The hydroponics control room had levers set to more meaningless numbers, which corresponded to water, minerals, and lighting according to the technical peripheral. The transit control area had three switches, with no indicators or measurements.

On the ground floor, the hallway end has a vehicle that takes a robot to the biology area, where my clones are kept in cryogenic storage. A lever is out of the robots reach, and a TV camera lies on a table in the lab. By taking it to the eastern area, plugging it in, and pointing it at the sign, I could see that it says FOOBAR, though at the cost of one robot's life. Easily undone with a loaded save.

Working northward, the library core is not compatible with robots and contains nothing of interest. The maintenance access contains a leaking coolant controller, spraying acid upward into the computer room. 

A series of rooms in the north, off limits to robots (not that this stops them), represent a recreation area. A plaque in the westmost room, a sterilization chamber, has a bronze plaque that Iris can read if it's brought to her but is merely a Frobozzco ad with no useful information. A decontamination room contains an ultraviolet showerhead. The entry area is featureless. A supply room holds an unreachable cable cutting tool and an unopenable cabinet. The activities area and sleep chamber here are featureless to the robots.

At this point, I've seen pretty much the whole complex and have an idea of what's in it. The apparent challenge right now is to find a way to fix the cooling system so that my robots can enter the computer room and reconnect the cables.

Most popular posts