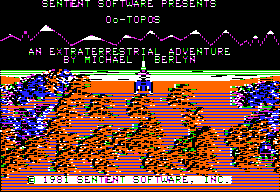
Thursday, October 29, 2020

Oo-Topos: Won!

Oo-Topos is winnable now! Almost a week before I started playing it, a new copy was put into the 4am collection at Archive.org. This version shows "V0.1.2" on the title screen and fixes the bug that made the first version unwinnable. If I'm not mistaken, it's a bit faster too, though still pretty slow.

 
One of the recurring problems in Oo-Topos is that certain actions will trigger hostile enemies to pursue you forever until you find a way to deal with them. Entering a gravcar area spawns a guard whose tenacity basically made up for his lousy aim. Accumulating treasure spawns an alien mummy who won't kill you, but will constantly and randomly show up and take things from you. And on the beach where your ship lies in pieces, there's an alien crab that follows you everywhere and eventually kills you with a poisonous bite (Mike, crabs don't bite, they pinch, and poison is ingested).

Previously, an encounter with the "tras" at the bottom of a deep bit showed me that combat is pretty random, and not necessarily in your favor. The needler weapon that I found there proved to be its doom, but luck alone, as far as I could tell, determined whether I would kill it before it killed me. This non-determinism not only makes finding these solutions unsatisfying, but also violates an unwritten rule of trust. My weapons had failed to kill before - does that mean I was using the wrong approach, or that I was unlucky? Adventure was guilty of this with its dwarves, but this only happened with the dwarves, and your attacks usually worked. Zork was okay about this because the encounter with the troll was so lopsided in your favor and yet dynamic enough to teach you that combat has a random element. But here, it's just worrying, and I felt compelled to rely much on saving/loading to retry.
 
The rule here, which is only known to me in retrospect, is that these enemies are killed with their own weapons. And after you do, the weapons serve no other purpose. The alien near the start is killed with his own laser gun, and this always works. The tras at the bottom of the pit is killed with the needler found there. On the same note, crabbette by your ship sometimes tosses a pouch of poison right at you. You just pick it up and type "kill crabbette" until it works.


The encounter with the alien by the gravcar was ridiculous.


So first of all, the intended solution is, once again, to kill the alien with its own weapon. If you don't have the dart that it initially throws at you, then your attack will fail and it will take away your laser or needler. If you do have it, then "kill guard" is specific enough.

But the text says that he vanishes. This is wrong - you can attack right away, though you must specify "guard." Typing "kill alien" or "shoot alien" produces the message "I DON'T SEE ANY ALIEN HERE," which I found pretty confusing until I realized the game expected a different noun. Missing with the dart does not remove it for your inventory for some reason - are we just stabbing with the dart or something?

Back at the bottom of the pit where I killed a tras with a needler, a cold door went east to a cold storage room. No problem here - an ice-covered chest sat here instead of an ice-covered box.

In the first version this is as far as you go.


Opening while wearing gloves reveals the serum, which is not spoiled by removal from its temperature-controlled environment

I began the tedious process of collecting everything I could and bringing it back to the ship. Most of these items, I figured, were either cargo or needed for repairing the ship, and it would be handy to have a staging ground for the rest of these items, even if the ship was quite far away from all the action. I'd try to solve what puzzles I could while doing this, but the focus would be on consolidating everything.
 
There's a six-item inventory limit, effectively five since much of the game is set in darkness where you can't survive without the light rod, making the constant trekking back and forth pretty time consuming even with the magic word shortcuts. Making it even worse, the game has a tendency to randomly pause for several seconds after entering commands, and there doesn't seem to be any pattern to it. It's not always accessing the disk either, though it does that a lot too.

In the upper floor of the prison, a pair of goggles outside the trapped alcove claimed to allow me to "see all" when worn, but I could not walk while wearing them. So I went into the alcove, where the door slammed shut behind me, and when I wore the goggles and looked, I saw a vibroaxe, which I used to chop my way back out. In this area I also found a 4-D mirror and a phase-matter shifter that could be taken while wearing gloves. These had interesting descriptions - the 4-D mirror said it revealed my past, present, and future, and the shifter said "to phase in matter shake well." I couldn't find a use for the mirror, but the shifter when shaken on the roof caused a ramp down to the jungle to materialize, significantly shortening the trip back to the ship.

During my next trip I collected the ship's energy converter, a library crystal (containing all human knowledge), and a betamax, the last of which attracted the alien mummy's attention, who took both the crystal and the betamax. A field nullifier found in the hydroponic garden maze opens up a fairly unnecessary shortcut between the white room and the tunnel west of the garden, and the ship's water purifying system is found nearby it. On the way back to the ship I picked up a piece of cloth and a plasma sphere that had been gifted to earth from the council - these too were taken by the mummy. In their place I hauled back a seamless, unopenable box, and the ship's repair manual.
 
Returning to the fly room and jungle I recovered some more precious cargo for earth - a PSI cube, elixer (sic) of youth, double helix repairer, an emerald flower, an atom transmuter, a 6502 processor and some miscellaneous relics that had been on loan to the council. All were taken by the mummy. Here, I also recovered the ship's navigation chip from a dangerous life form by feeding it seeds found nearby. On the way back I took the last few loose items - a harmonica, a bag of diamond dewdrops, a jade seahorse, and ruby seashell.
 
At this point, only a few known problems remained unsolved.
  • How do you get the universal translator from the robot?
  • How do you get past the forcefield near the gravcar?
  • How do you get the gyro from the creature in the ampitheater?
  • How do you get past the apparition in the flickering corridor?
  • How do you open the seamless box?
  • What do you do about the alien mummy? And can the treasures be recovered?
  • How do you fix the ship?


On that last problem, I found the game did not recognize the words "repair" or "fix," but responded to "build ship" with "I can't do that yet," which may indicate it didn't understand my request, or that I indeed can do that later, but not until I have more parts. If the latter, then there's no indication at all on what parts are needed. "Read manual," bizarrely, produces "I can't read the manual." I'd revisit this later when I had more parts.

I tried chopping the seamless box with my axe, but was told you couldn't. Opening it gave the message "It would be a lot easier if I could find a seam," so I tried wearing the goggles, and then it opened easily, revealing a compass from the ship's nav system inside, as if that was useful in space.

I tried seeing if the goggles would help me get past the apparition somehow, as it seemed to phase in and out of reality. They did not. They did, however, allow me to spot a jewel in a nearby room with blinding strobe lights.

I examined the unused items, and noted that the flask was acid-proof and also etched with inscrutable markings. Returning near the start, I found that if I emptied the flask and filled it with acid from the nearby room (hope the flask didn't have anything important in it!), I could kill the robot by pouring acid on it and take the translator. This did not allow me to read the writing on the flask, but I could read the plaque in the gravcar, and after doing this (it just said "good for one-way trip NE"), I found I could travel northeast through the force fields to the tunnels - yet another shortcut that I didn't especially need.

Reviewing my stock of items, I found that I had yet to find a use for the caged snarl ("its lungs can expand exponentially" reveals the game when it is examined), or any use for the vibroaxe except to escape from the room where I found it, so I took both to see if either could help me with my outstanding problems. I found no further use for the axe, but dropping the snarl in the room with the gyro caused it to sit in the large creature's mouth, and I got the gyro.

I soon discovered that you could fill the flask with water from the pool, and pour it on the apparition to kill it. The door to its north contained all the treasures it had stolen, and the door to its south had a 4-D wrench that phased out of existence when touched, and another magic word - TAKA<->LEVA - giving a convenient shortcut back to the beach. Wearing the goggles allowed me to take the wrench, and I brought the rest of the valuables back to my ship in short order.

My hunch about the "BUILD" command was right. It works, but you must be holding the wrench and manual, and these items must be on the ground in front of you:
  • Tachyon-power cylinder
  • Stabilizing gyro
  • Compass
  • Navigation chip
  • Oxygen recirculator
  • Water system
  • Energy converter


My ship finished, I underwent the tedious process of moving my 40-odd item collection into the hold, six items at a time, and then went up to the bridge and took off by heading "up" once more.


One last job to do. I retrieved everything from the hold again, six items at a time, dropping them onto the bulkhead floor. I typed "score" and it said I had 130 points, over 611 turns, with no fanfare or acknowledgement that I had found or done everything. After a brief review of the code I concluded there wasn't any, so I didn't bother playing any longer to determine if I had missed anything. I'm satisfied that this is the only closure that you get. In fact, you can "win" by returning without anything, not even the serum. The only difference in acknowledgement would be your lower score.

I did put together how the scoring system works. First of all, there are 46 points scored by completing certain actions:
  • Shoot alien with laser: 2 points
  • Shoot tras with needler: 2 points
  • Kill crabbette with pouch: 2 points
  • Kill guard with dart: 2 points
  • Chop partition with axe: 4 points
  • Shake shifter on roof: 4 points
  • Feed huja with seeds: 4 points
  • Pour flask of acid on robot: 4 points
  • Read plaque with translator: 4 points
  • Drop snarl near creature: 4 points
  • Pour flask of water on apparition: 4 points
  • Build ship: 10 points
 
The rest of the points are from recovering inventory items. I had 42 items, and each is worth 2 points when brought to the floor of the loading bay. Prior to this, you'll get 2 points for each treasure in your inventory, and 1 point for each non-treasure in your inventory. Delivering all 42 items (not counting the seven needed to repair your ship) is worth 84 points, for a total of 130, unless I'm missing something.
 
My final Trizbort map had 141 rooms, making it a bit bigger than Colossal Cave Adventure, and certainly the largest BASIC adventure game that I've played yet.


GAB rating: Average. Jason Dyer describes this as a sci-fi version of adventure, and this seems about right. I enjoyed the exploration aspect when I wasn't stuck in mazes, but sweet Xenu does this game overdo it on the mazes, with five boring MOTLP mazes that all but mandate mapping out with spreadsheets and item breadcrumbs.

To Oo-Topos' credit, I enjoyed its writing more than I enjoyed Adventure's. Its best feature is that most of the items give amusing little descriptions or anecdotes when examined, which is a feature we take for granted now, but was far from universal in 1981. Even Zork didn't have this as consistently. And apart from the lame luck-based combat puzzles, where three times you need to kill an enemy with the very weapon it throws at your feet and the fourth time you kill it with a weapon that's already there, the puzzles are pretty alright. They're a bit easy and I solved the game without external help (other than Dyers' warning), but with a simple BASIC engine you're not going to get terribly sophisticated puzzles anyway, and figuring out what to do through intuition, process of elimination, or deducing the meaning of a clue in an item description was pretty satisfying.
 
I did not enjoy the mazes, the tedious item hauling in the endgame, or how it doesn't acknowledge when you're done, and got irritated by a number of previously mentioned failings. In the end, Oo-Topos is more interesting than Adventure, but also more flawed, and ultimately I can't say it's better or worse than that ur-Adventure it so closely models.

My final map:


Monday, October 26, 2020

Oo-Topos: The other side of the tracks

During my initial run at Oo-Topos, I had explored 77 rooms of this strange alien planet, solved very few of its mysteries, and left a few stones unturned. My final adventure of this run took me through a one-way vactrain leading to a confusing maze called the "fly room."

As it turns out, with the exception of that room and whatever else lay beyond the vactrain tube, I had already explored most of the map available to me without solving puzzles. The only further rooms uncovered by my post-hoc thoroughness were a pool of water near the garden and an oubliette below the catwalks where a rainbow-colored cloth sat.

The fly room itself is a six-room area floating above the top of a staircase. It isn't truly a maze, and can be visualized as the interior of a six-sided cube where unusual gravity permits walking on any side, and the compass points become relative directions. Within each side is a portal that you can enter by going "down," leading to yet more areas.

The west side of the fly room opens into a small security room with a pressure suit and a viewscreen, through which we can see a cold storage room where the serum is kept.

The top side, on which a seamless box is found, opens to a pyramid, which can't be entered but a PSI cube rests at the top. Inside, mosaic patterns show a ramp extending from the prison roof to the jungle below, and a bar of silver can be found. Taking it causes an alien mummy to pop up, curse you, and take your valuables (which at this point consisted only of the silver bar).

The north side opens to a bending tunnel that exits to the jungle, another maze. With 16 rooms, most of them having seven or eight exits, this is the biggest one yet, and made tricky because while not all of the rooms have the same name, several of them do, with three rooms called "jungle," four called "dense jungle," and three with a variation of "jungle path." Without using items as breadcrumbs, you might travel north from "dense jungle," arrive in "dense jungle," and have no way of knowing if that was a different dense jungle than the one you left or not. Gathering enough breadcrumbs is another problem in itself - you can only carry six items at a time, and finding your way back to the tunnel so you can collect more isn't trivial, as the non-othographic layout means you can't simply reverse your steps if you're lost in the middle of the jungle. And then there's the problem of getting back to the other side of the one-way vactrain.
 
Finishing the jungle map was my greatest challenge yet, and yet once mapped, it's pretty elegantly laid out. While there's nothing at the end of the maze except for some thorned bushes, within the maze I found a double helix healer at the top of a tree, a navigation chip, some Terran relics, some seeds, and an emerald flower. A pit south of the start held a 6502 processor and a path to a gravtube dumping me back into the fly room, and a path north of the start was left unexplored.

The bottom side of the fly room opens to a dead-end with the words "Tugo-tusta" on the wall. Typing these words teleports you to the solarium and back, which was how I got more items to use as breadcrumbs.

The east side leads to another pit. At the bottom is a fearsome beast called a "tras," and a needler weapon by its feet. I tried shooting it, but it dodged, and the tras attacked, which I automatically dodged. I walked away into a room full of bookcases but only one book - a repair manual for intergalactic class ships, written in English. The tras followed and blocked my only way out, so lacking any other evident options, I shot it again, this time killing it. Another room accessible here is a steel door to a room that's too cold to enter, which must be where the serum is kept.

I returned to the unexplored path, which bent around the prison, and led east to another maze, one made of shifting vegetation, beach, and sea, where I found the stripped hull of my ship lying in the center. This maze was smaller than the jungle, but no less confusing, and to make matters worse, entering spawned a "crabbette" which followed me around everywhere, even leaving the beach, and each turn would have a small chance of killing me with a venomous bite. Shooting it with the needler did no good either.

For real?


After mapping it out with ample use of item breadcrumbs, I was pretty satisfied that I had charted most of the game. At 135 rooms and counting, Oo-Topos may be the biggest microcomputer text adventure game I've played yet, edging out Cranston Manor Adventure's 132 and Colossal Cave Adventure's 127. Only MDL Zork and its 161 rooms dwarfs it, and Oo-Topos may prove to be bigger still.

My next challenge is to solve Oo-Topos' puzzles proper. To repair the ship, overcome the obstacles, and maybe even fix that bug that makes it impossible to get the serum.

My map so far - note that to keep the mazes readable, I have eliminated many of the redundant passages:

Friday, October 23, 2020

Game 213: Oo-Topos

Thanks to Jason Dyer at Renga in Blue, I've had advance warning that Oo-Topos is unwinnable. I've skimmed over most of his postings to minimize spoilers, but at some point late in the game, you'll find a box containing the game's big MacGuffin, and there's no way to refer to it due to an apparent bug. Oo-Topos is programmed in BASIC, so maybe I can find a way to fix it, and I'll update this post if I manage to.
 
Edit - the 4am collection version is winnable. I didn't find this out until I started my third and final post, so all screenshots are taken from an earlier version.

Our next whale, Suspended, is another sci-fi Infocom text adventure, designed by newcomer Michael Berlyn, who would design two more of their classics and go on to work with Interplay (Tass Times in Tonetown), Naughty Dog (Keef the Thief), and Accolade, and then found his own company with Marc Blank which produced Syphon Filter and Bubsy 3D for the Playstation.

Before Suspended, Berlyn had authored two published novels, and co-founded Sentient Software with his wife to self-publish his earliest adventure games. The first, Oo-Topos, would later be remade with graphics by Polarware (publisher of Transylvania), but I will be playing the original.

The only graphics in the game.


Read the manual here:
 
 
For a game that tries to sell itself on its author's sci-fi credentials, Oo-Topos plot is about as thin as most games of its era. You're shipwrecked on an uncharted planet, and imprisoned by its natives, who have stripped your ship for parts and taken its cargo, including a direly needed serum for a Space Plague. You have to escape (surprisingly easy), explore the planet, find your ship and all the parts and cargo, repair it and leave.

As always, I began by Trizborting out a map of the game, which is on the large side for an early microcomputer adventure. Starcross had 86 rooms, and so far I've mapped 77 rooms in Oo-Topos, with little idea of how many more there might be. There's been very little gating so far either - I could simply walk out of the prison, and aside from a nearby encounter in a cul-de-sac where a panicked alien drops his gun, and you must grab it and shoot him to leave, I haven't solved a single inventory puzzle in my explorations so far that was needed to explore what I've charted. And I know there's more to chart before I need to start figuring out how to open figuratively locked doors.

The exploration phase had been fairly conventional, with the usual set of challenges:
  • Ten potential exits from each room; eight compass points plus up and down
  • Room descriptions that do not always describe valid exits
  • One-way passages, and passages that connect non-orthographically
  • Multiple MOTLP's
  • Dark regions that need a light source
 
 
One bit of mercy is that although much of the planet is dark, the light source (a "light rod" which I found before stumbling into any dark rooms and can be used with the unintuitive command "ON ROD") doesn't seem to expire. During my playthrough so far it didn't give any warnings of running out, anyway.

It didn't take long to realize that Oo-Topos is just Colossal Cave Adventure with the thinnest veneer of sci-fi. Aliens with laserguns replace dwarves with axes. Gravtubes replace vertical shafts. Ship components replace treasure. Certain rooms respond to magic teleportation words. Upon death the game offers to resurrect you, which brings you back to the start and scatters your items making the option pointless. There's even a maze of twisting little passages, all different, where the layout is completely nonsensical and the room descriptions differ by word permutations.


After breaking out of prison, there's a hub room with exits in eight directions, two of them leading to the game's first MOTLP. It's a simple three room "maze," but you would get hopelessly lost in it without breadcrumbs, as all three rooms are described as "narrow twisty hallway," and each room has five or six exits that simply loop back into itself. Finding your way out will either lead back into the hub, or into a tiny room containing a wire cage and a passage upwards. To the southeast is a stone room where acid drips from the walls. To the north is a smelly room with suspended platforms and a table covered in food scraps and a flask of oil. To the west is a set of staircases leading upward as well, in which I found a gold ring, and a universal translator protected by a laser-immune robot. This hub room also contains a tachyon cylinder which cannot yet be taken as it's dangerously radioactive.

In the upper region of this area, we find:
  • A two headed "snarl" that can be captured in the wire cage.
  • A raised dais where the light rod can be found, and a dead alien (who apparently carried my tachyon cylinder here) lies on the floor.
  • A gravtube leading back down to the hub room, or upward to a secret crawl where a "library crystal" can be found, and a stabilizing gyro is guarded by a creature immune to the laser gun.
  • An inoperable gravcar, in which an indecipherable plaque probably provides instructions if translated.
  • A mirrored passage in which a "4-D mirror" and a pair of blue goggles are found. Exiting to the northeast causes a partition behind you to slide shut, which trapped me and forced a restart.
  • A white room containing a matter shifter placed beneath a deadly ionizing beam, and an impassible forcefield blocking the north exit.
 
Entering the gravcar area seems to spawn a hostile alien with bad aim, who follows you around everywhere and keeps shooting at you, but shooting back simply causes him to take your laser gun. And eventually he will shoot and not miss.

Another gravtube here leads up to a tower solarium, from which we can walk east to a rooftop overlooking a jungle in one direction and a beach in another, and then go south to another gravtube to a forking tunnel. To the west it widens up and we find gloves and another inoperable gravcar. To the east is the aforementioned hydroponic garden maze. Exits to the northeast and southeast go to an area that loops around the hydroponic garden maze and connects to its eastern side, making the garden maze pointless to explore.

Going northeast from the forking tunnel, we walk through a clear plastic passageway and can see catwalks to the south, and the hydroponic garden below. A discarded Betamax cassette lies in the midsection here. A staircase leads down to a room with blinking strobe lights, and a hot, dry corridor, in which an apparition flickers in and out of existence, blocking access to doors do the north and south. At the end of this corridor are the catwalks, from which we can go northwest through a shaft back to the forking tunnel, or east to a kitchen and onward to the other side of the hydroponic garden maze where we find a field nullifier, or we can go north or west.

To the west, a one-way vactrain leads to a staircase, and at the top of it is another MOTLP, a "room" with identical floors, ceilings, and walls, and gravity that allows walking on each with no indication of which way is up.


At this point, I was fatigued of mapping mazes, and called it a day.
 
Outstanding challenges:
  • Will wearing the gloves allow me to take the cylinder and/or matter shifter?
  • What purpose does the acid room serve?
  • How do I get the translator from the robot?
  • How do I get the gyro from the large creature in the ampitheater?
  • How do you deal with the alien guard by the gravcar in the corridor?
  • Is there a purpose to the alcove in the mirror room, or a way out?
  • How do you get through the force fields found in the white room and flickering corridor?
  • Is there a way to descend directly from the rooftop?
  • How do I get past the apparition in the flickering corridor?

My Trizbort map so far. Note that in the hydroponic garden, I have cut out most of the passages in order to keep it readable.

Wednesday, October 21, 2020

Game 212: Mappy

Decades ago, I rented an NES game called Mappy Land, an intentionally cute platformer about an athropomorphic mouse evading cats in a variety of settings. In retrospect, I suspect this game wasn't all that good, but it was one of the first platformers I ever played that wasn't Super Mario Bros. Some years later, when I came into possession of a copy of Microsoft Revenge of Arcade, I tried out Mappy, wrongly thinking this was the same game, and quit once I realized that Mappy had only one setting which would be repeated with variations in the stage layout.
 
Cutesy aesthetic aside, Mappy plays like another variant on the Pac-Man formula that Namco often returns to one way or another. You're a policeman tasked with recovering stolen property from a gang of kittens; your natural predators even though they're smaller than you. Mappy has no sidearm, no pepper spray, no handcuffs, zipties, or cords, doesn't use the little baton he carries, and has no means of detaining or subduing the literal cat burglars. Except for slamming doors in their faces.


The big obvious difference between Mappy and Pac-Man is the perspective, with Mappy taking on the format of the side-view platformer that was becoming all the rage in the early 80's, though without any jumping or ladders, verticality doesn't play quite as big a role here. Your only means of ascending or descending floors are trampoline shafts throughout the level, which also provide invulnerability from the Meowky gang until you leave the shaft, which you must do before the trampoline breaks.

Your other means of defense are the doors, which can be opened and shut from surprisingly far away, and can knock down pursuing cats if opened or shut right into them. Later levels introduce bells at the top of the trampoline shafts which can be knocked down the shaft, stunning any cats there, though the stun is so short relative to the time it takes to do this that it is more useful for scoring points than buying you time. Certain doors also emit a shockwave that can blow multiple cats off the screen, potentially scoring big points, especially if the gang boss Goro is among them. Goro himself is actually the least dangerous cat, as rather than pursuing you, he mostly just runs around and does his own thing. Sometimes he hides behind objects, and if you can snatch them very quickly (and unless you anticipate his move you probably can't), it's worth 1000 points.

Further bonus points can also be collected by recovering the loot in an optimal sequence. Each level has two radios, two televisions, two computers, two paintings, and two safes, and early on you will want to collect them in that order; the loot is worth ascending values, and each pair you collect in a row increases a multiplier. Done perfectly, the final safe, worth 500 points normally, will be worth 3,000 points instead. Later on, when the cats can outrun you and stage time limits are tight, you probably want to focus on collecting the loot as quickly as possible, but you'll still want to grab pairs when the opportunity presents itself, and may want to save the safes for last if you can.

Mappy also features bonus rounds challenging you to quickly pop all of the balloons in a trampoline-filled level, finishing with a big one that Goro hides behind for a bonus. I could never find a way to pop them all in time, and learned to settle for popping most of them as long as I got Goro in the end.

My best attempt reached level 10 and scored almost 68,000 points. Around this point I hit a wall, as I couldn't keep outmaneuvering the cats reliably enough. I'd also, thanks to the scrolling format, get blindsided by cats popping in from off-screen, which felt rather unfair.

GAB rating: Average. Mappy's an okay time waster, looks great, and is perfectly functional and deeper than it looks, but it gets monotonous pretty fast.

Sunday, October 18, 2020

Jumpman: Won! (plus Jumpman #1)


I did it! I've beaten Jumpman's final and toughest skyscraper. I can't say I completed it quite fairly - I used five save states here in accordance with my rule on one save per half hour of earnest play - but with all of Jumpman's nasty tricks and occasionally broken platforming mechanics, I can't say its challenge was totally fair either.
 
The advanced tier spans levels 19 through 30, and I noted that my save states were on levels 21, 22, 23, 24, and 26. I refused to save unless I had just beaten a level without losing any lives, expecting I'd need as many as I could stockpile, and I was right. Only levels 20, 25, and 26 were easy enough to beat on a single life immediately following a perfect run of the previous one. Once I had reached 26 with a full set of lives, plus one bonus life from scoring points, I was able to finish the remaining five on that set, concluding with an ultimate "Grand Puzzle" which I survived on my last life, but didn't exactly solve.

Prior to this posting, there were no complete playthroughs of Jumpman in its original Atari incarnation, only of the Commodore 64 port. And so, I decided to record a playthrough of the full 30 floor Grand Loop, using save states freely, and with no attempt to conceal them.


Here's commentary on each of the advanced levels, which are all over the place difficulty-wise. For each level, I've also counted the number of tries it took me to complete it during this grand loop run. Note that during the grand loop run, I had already beaten all of the levels at least once before, and levels 19-26 several times each, so this count does not reflect all the failures sustained figuring out each level for the first time.


Level 19's gimmick is a moving ladder. Nothing terribly tricky here - stray bullets make your life a bit more dangerous, and to be honest you're much safer on the ladder than you are near the edges of the screen.

Tries: 1


Level 20 is a cruel puzzle where the terrain shifts and reshapes as you pick up the bombs. Getting them in the wrong order can easily render the level impossible, and the right order can only be learned through trial and error.

The ropes hanging from the center-right girder are a source of much peril too.

Tries: 2


Level 21 is a pretty standard affair of ropes, ladders, bullets, and disappearing girders. A lot of action near the edges of the screen makes the offscreen bullets especially dangerous, and ropes so close together mean trouble for Jumpman's collision detection.

Tries: 1


I hate level 22. You are dogged by freezing projectiles which can't be outran or outmaneuvered. Getting hit by one is practically inevitable, and the most common outcome is death by homing bullet. The second most common outcome is that you get re-frozen by another one, prolonging your paralysis, and then death by homing bullet. Sometimes you thaw in time to survive.
 
I attribute my eventual victory here to luck. The frost projectiles were very cooperative in taking avoidable trajectories. On my thirty first attempt.

Tries: 31


Level 23 is fun. As soon as you collect a bomb, an evil Jumpman starts following, and shadows every move you make until he catches up and kills you. The next two bombs spawn more evil Jumpmen, until a line of three follow in pursuit. Bombs also tend to destroy your way up, though Jumpman's hoist ability is not to be forgotten or underestimated.
 
Once again, this is not a level you can expect to beat on your first attempt, but once you understand what's going on here there are several solutions. Ultimately you need to traverse the whole level without backtracking too much. One trick is to spend the first several seconds pacing back and forth to buy time before touching the first bomb, but don't do this too long or they'll spawn right behind you. The Atari only has so much RAM available to keep track of your moves, after all. Another solution is to go for the top bombs first and work your way downward, but you'll need to plan carefully so that you don't touch anyone going up on your way down.


Arggh! So many ropes! So many bullets! So many chances to slip and die! During my first advanced run, level 24 gave me even more trouble than 22 did. And yet somehow, during my grand loop run, I beat it on my second attempt. I doubt I could repeat this miracle if I tried, and I don't intend to.

Tries: 2


Level 25 has a fog of war concealing everything, so tread lightly. There are at least three possible layouts here, and all of them will force you to make a few leaps of faith, but once you know the layouts, this one isn't too bad. At least there aren't any moving elements here.

Tries: 1


Level 26 is another combat zone, but this time it's a cinch. Evil Jumpmen patrol the ladders haphazardly and shoot at you. You can shoot back too, but it's better if you don't, because they'll just respawn right where the bomb is, and you don't want that.

Tries: 1


Ultimate fun time with killer robots in level 27! They're aggressive. They're unpredictable. And they're faster than you. For extra fun, try jumping over an approaching robot, only to have it halt or reverse its direction as it passes under you and kills you on landing!

By some miracle, I managed to beat this without losing a life, which wasn't really necessary at this late stage of the game. It took quite a few tries, and some very fortunate cooperation on the part of the robots during the successful attempt.

Tries: 9


Level 28 alternates between making the bombs invisible and making the level invisible each time you collect a bomb. It's not too difficult as long as you follow this rule: before collecting any bomb, have a plan to collect the next one.

From here on, the try counts will be higher. Being so close to the end of the game, I didn't need to keep replaying these levels again and again as I did the earlier ones, and therefore was less familiar with them during my grand loop run.
 
Tries: 6


Level 29 has a downward elevator, and a design that encourages you to collect bombs at the bottom first and work your way upward. Bombs on the bottom floor can only be reached by the elevator. Aggressive bullets and very little maneuvering room make for a difficult stage.

Tries: 7


Finally, one last grand puzzle! By now you probably don't care about scoring the jackpot and just want to finish the game, as I did when I reached this for the first time, in which case beating the level isn't hard at all. But with a save state to fall back on, I tried to see if I could discover Jumpman's final mystery.

Playing it normally, you may notice that the rectangle moving around the stage, which normally kills you, changes color at a point. Touch it when it does - and you must be standing in a very specific part of the stage to survive what happens next, and you're teleported to the real final stage.


And this last stage is the ultimate in trial and error. As if it didn't take enough trial and error to figure out how to reach this secret zone, being in the wrong spot while teleported will kill you, and death here means the end of the game. And if that wasn't bad enough, only four of the bombs here can be taken safely. The rest just destroy the girder below you, killing Jumpman and ending the game. Trial and error is the only way to deduce which ones to take, and each error, be it teleporting into the stage wrong, collecting one of the wrong bombs, or getting hit by a bullet means ending the game and re-completing the whole advanced tier of stages again if you want to try again (and aren't using save states).

Tries: 12


GAB rating: Above average. It pains me to deny Jumpman entry to the ivory deck. A far cry from the sluggish, monochrome BASIC Dunjonquests from the Freeman/Connelley era of Epyx, Jumpman is fast, colorful, challenging, endlessly inventive, and controls responsively and almost perfectly. But almost isn't good enough in a game so unforgiving.

I didn't mind the merciless deathtraps, the trial and error gameplay, the cheap deaths from stray bullets, or even the occasional unreasonably difficult level. That's what extra lives are for, and Jumpman is generous enough with them that you could overcome all that through determination and skill - at first the lives mean seven chances to figure out each level, and as you gradually master each of them, they come to mean seven allowances for slip-ups and otherwise unpreventable deaths.
 
But the tipping point came from death by control hiccups, by far the most common one being of those damned ropes that Jumpman keeps slipping from. I feel my level by level commentary critically understates just how bad it is - with so many deaths caused by collision detection problems on ropes and ladders, I spent far too much time having to restart and replay previously beaten levels, which quickly got unenjoyable. I think that without these control problems and everything else being the same, I could have finished intermediate in half the time it took, and possibly even beaten the advanced tier fairly (that final secret room notwithstanding).

For what it's worth, I played the cartridge-based sequel Jumpman Junior for a bit, and found that it did not have the rope problems of its predecessor.

I also played the more popular Commodore 64 port briefly, playing the advanced levels as far as I could, and found these differences:
  • Loading takes nearly two minutes, compared to the 20 seconds needed on Atari.
  • The title screen animation is completely different.
  • Sprites are multi-colored.
  • Animated level transitions are missing, and replaced instead with a brief loading screen showing the level's name.
  • The moving ladder in level 19 is shorter and has a wild zig-zagging pattern.
  • Bullets sometimes fly diagonally at you from the corners.
  • Level 20 has some tweaks to make it a bit fairer, such as girders that disappear in front of you rather than underneath you.
  • Jumpman's hoisting hitbox is a bit tighter, which renders some level solutions nonviable.
  • When getting frozen in level 22, you thaw out MUCH faster. I beat it on my first try.
  • There can be up to seven evil Jumpmen following you in level 23.
  • Level 25 does not have a fog of war, and instead simply makes everything invisible until you touch it, making things much more difficult.
  • The cool game over animation where the level collapses around you is missing.


Perhaps the biggest thing, though, is that like Jumpman Junior, the rope issues are mostly fixed. It's still possible to fall from them by touching the joystick too soon, but those deaths felt like my fault rather than a fault of the engine. Would I have rated Jumpman better if I had played the Commodore 64 version instead? I suspect I would, but can't say for certain. I generally play the most original incarnation available, and in Jumpman's case, that was the Atari version, whose rope collision detection soured me just enough that I can't quite say I enjoyed my time here.


There's also a beta version called Jumpman #1, which I tried. It's obviously an unfinished game - there's a high score board that you can't ever put your own score on, the visuals and controls are unpolished, Jumpman's falling intolerance is somehow even worse, and his wild pratfall isn't programmed yet; he just falls to the bottom of the screen and turns into a stone cross.
 
But the set of levels, of which there are six, are for the most part quite different from anything you see in the final product.


Level 1 feels like an early version of Jumpman's introductory stage. Getting bombs in the wrong order will destroy the ladders and leave you stranded in the upper half, which wasn't a possibility in the final version.


Level 2 has no obvious analog to the final product. Here, bombs will destroy ladder segments and even girders, making it necessary to find a sequence that allows collecting them all.


Level 3 is where things start to get hilariously unfair. Bombs will radically alter the layout of the stage, and it's very easy to make things impossible. An early version of the freezing projectile appears here as well, but instead of freezing you it just slows you down, and only while you're inside its hitbox.


Level 4 bears some resemblance to Jumpman's penultimate stage with the descending elevator, but the final product has been heavily modified if it is indeed based on this. As with other stages, the bombs can really screw you up. Jumpman's shortened fall tolerance hurts you a lot here too.


Level 5 is obviously the basis of that intermediate stage with the exploding jumps, which are seen here too. Once again, the stage is more unforgiving than the final product (which itself was one of the least forgiving stages in the final game) thanks to even more bomb effects on the landscape.


Finally, level 6 is a combat stage, and seems like it may be a very early concept of what would become the dragon level.
 
I haven't seen any footage on Youtube of a complete playthrough, so I made one. Save states were used liberally here.

Thursday, October 15, 2020

Game 211: Jumpman

You got I Wanna Be the Guy'd, dude.


This was what a friend said as I demoed Jumpman for the Atari 400, and got brained by a falling girder within the first few seconds of starting intermediate difficulty. A pretty apt comparison, actually, even if the later fangame is much more fully realized of what TV Tropes calls Platform Hell. It's got unfairly difficult deathtraps. It's got emergent slapstick comedy. It's got constantly changing rules. It's got almost unrelenting difficulty. It's got homages to classic arcade games like Donkey Kong and Space Invaders. In one level, Jumpman even pulls a very IWBTG-like move of having Donkey Kong barrels rolling around the stage and occasionally rolling up the ladders.

Being released in 1983 well before Super Mario Bros. and its followers codified the (often unfairly) difficult 8-bit platformer, Jumpman nevertheless parodies, deconstructs, abuses, and subverts conventions of the nascent genre in astonishingly creative ways, featuring 30 levels and a new gimmick in most of them.


Although Jumpman obviously invites comparisons to Donkey Kong - the title itself a reference to Mario's initial moniker in its NA regional release - it even more strongly recalls Miner 2049er, almost to the point where I am certain this was a major influence. When I reviewed that game for the 1982 phase, I noted its greater emphasis on platforming, puzzles, gimmicks, gadgets, and its ten levels, greatly expanded from Donkey Kong's four. Jumpman has all this but even more so.


Rather than having an end goal to reach, Jumpman places bombs everywhere for you to collect before moving onto the next, often changing the landscape or triggering events as you gather them, sometimes in ways that can strand you or render the level state nonviable if collected in the wrong order. There's both a big puzzle element and a harsh trial and error one as you gradually discover and perfect the solution to each level.

Thankfully, Jumpman doesn't expect you to beat all 30 levels in a sitting. They are divided into three tiers of difficulty, each of which may be tackled and completed independently. The first eight constitute beginner, the next ten intermediate, and the final twelve advanced. For the truly masochistic, a "grand loop" mode does indeed challenge you to finish the entire game on a single set of lives.

I was able to beat beginner and intermediate modes fairly, although intermediate tested my resolve. Jumpman gives you a seemingly generous seven lives, with the potential to earn a few extras by scoring points, but they don't last long. With each new level that I reached for the first time, I effectively had up to seven chances to figure it out, minus one for each screw-up or unlucky pratfall suffered along the way in the previously conquered ones. I had to restart to the level with the falling girders dozens of times. And yet with each replay, I got better at the levels I had beaten, was able to beat once baffling stages more and more consistently, and kept getting further and further into the campaign until eventually I finished level 18.


Level 1 serves its purpose as an introductory stage with all of the basic mechanics that will be seen throughout the game.

The innocuous looking girder on the bottom floor illustrates two of Jumpman's idiosyncrasies.


The first is that platforms can be climbed. This is crucial to quite a few levels, as simply touching a girder, even in mid-air, will cause Jumpman to hoist himself up, and mastering this will allow you to reach platforms that seem out of his reach.

The second is that Jumpman has no tolerance for ledge drops at all. He can survive a reasonable fall when jumping, but the lemming march will kill at an altitude of more than a pixel. It's distressingly easy to die by accident this way, either by forgetting about this limitation, or by slipping off an edge after a narrow jump or maneuver.

This first level also introduces the recurring hazard of stray bullets, which are slow and infrequent here, but become a real nuisance later on. Among Jumpman's most unfair deaths are when bullets strike you from offscreen with barely any warning - you can hear the bang, but have no time to react or perhaps nowhere safe to move to quickly enough.


Level 2 has killer robots, who mercifully stay put until you collect a bomb. Each one collected causes them to move to a new location and stay there until the next is retrieved. Nothing terribly difficult as long as you stay out of their way - they will not pursue you deliberately. Yet.


Level 3 has randomly falling bombs (do not collect these), but more importantly, collecting the normal bombs will remove segments of the level. For the first time, completing the level can be made easier or more difficult depending on the order you collect them in, and the optimal sequence is unknowable without playing through it multiple times beforehand.
 
The rope here is climbed downward rather than upward, and the distinction can be told from the pixels that extend past the top of the girder it hangs from.


Level 4 is fairly easy and features a unique form of stray bullet which won't kill you instantly, but instead compels you to jump in a random direction which may or may not become a fatal leap.


Level 5 has a roost of vampire bats who will begin to awaken once you start collecting bombs, and flit around the level in your general direction. They aren't fast, but evading them forever is impossible and jumping over them is difficult. Their AI, which is slightly more intelligent than the stray bullets, can be manipulated to make your life easier.

The top bomb here opens a pit directly below it, making for a nasty deathtrap should you attempt to grab it by jumping directly up from the girder below it.


Level 6 has Space Invaders, and replaces your jump with a gun which may be fired in eight directions. You don't need to jump, thankfully, and this stage is very easy. I beat it multiple times without even realizing that you could shoot.


Level 7 is dubbed "Grand Puzzle." Here, you don't need to collect all of the bombs to finish, but will score 500 points for each of the four bombs on the top two girders. How do you reach them? It's a puzzle. And you probably won't solve it on your first attempt.


Level 8 concludes the beginner tier, and features an incomplete level which populates itself with additional girders, ladders, ropes, and bombs as you collect what's already there. Here there are both upward and downward ropes, the former of which are a frequent cause of grief throughout the game, as dodgy collision detection concerning them can make Jumpman lose his grip and fall to his death.

I didn't need to master this particular level, as when you beat it, its set of levels is complete. Hence I could power through it once with a stock of remaining lives and had little reason to replay it.

Cleared the easiest skyscraper.

It took me a few tries to clear Beginner, but I managed without much overall difficulty. Intermediate is another story.


As mentioned, the intermediate tier begins with malevolent scaffolding that falls on you, and you can't reasonably predict where, or react quickly enough when it does. To make matters worse, the debris on the ground from the falling girders presents a tripping hazard of a sort, as "dropping" from an elevation more than a pixel is deadly, and there are stray bullets too. With enough replays - and you'll be replaying this level a LOT if you play through the intermediate tier fairly - you'll eventually memorize the falling patterns and find a safe path through the level.


Level 10 just gets even more evil. The gimmick here is that jumping causes an explosion beneath Jumpman's feet, but that's almost inconsequential compared to the fact that collecting bombs in the wrong order can make the stage nearly unwinnable by placing new girders in your way. In this screenshot, the lower-right bomb is covered by one which wasn't there previously, which can now only be removed by tediously blasting it with your jumping explosions, a task made dangerous by the stray bullets.

Again, with replays, you'll find an optimal bomb-collecting sequence which avoids problems like that. That said, this is one of many levels from now on where Jumpman has an annoying tendency to get "stuck" on ladders, grabbing them without being right in their center and unable to climb them or do anything but jump away, possibly to his death, or get hit by a stray bullet.


Level 11 has bombs that randomly move away as you approach, and also stray bullets. There's a potential for an extremely annoying experience, but this is to be honest one of the easiest levels in this tier.


Level 12 has three robots patrolling the area who move somewhat randomly but trend toward pursuing your location. It's difficult to just jump over one, and with bad luck and/or bad planning they may box you into a nigh-inescapable situation. Unpredictable behavior may also cause you to jump right into a robot instead of over it. They can't cross gaps, fortunately. I've replayed this one quite a few times, and usually lost a life or two, but on occasion everything would go perfectly, the robots would stay out of my way, and I'd clear the level without a hitch.


Level 13 features falling hailstones which bounce left or right randomly as they land on platforms and ladders. Climbing the ladders on the sides isn't much of a problem when you realize that once a hailstone bounces to its side, it will stay in its downward trajectory until it hits the bottom, making the ladders fairly safe except near the top. Negotiating the central area is dicier - you'll just have to play with Gaussian distribution to figure out where you're most likely to be safe, and even if you play the odds right there's no guarantee of survival.


Level 14 gave me so much trouble, for so long. The joystick button now, instead of jumping, hurls javelins, which is a cool change of pace. There's only one bomb, one linear winding path downward to reach it, and dragons, which run the path in the opposite direction, must be slain with perfectly thrown javelins. Throw one too late, though, and it will sail right over the dragon's head, and now you're wyrm food because the dragons move just as fast as you and you can't possibly retreat far enough to make the requisite distance.

Even when I got the timing down, I ran into a problem on the platform second from the bottom - the dragons just respawn so quickly that there's barely enough time to reach and descend the last ladder, and when you do, no way to reach the bomb!

I noticed that after killing several dragons, the terrain started to level a bit. Was this a sign that the dragons are finite, and perhaps that once the girders are totally flat, they'll stop spawning? Nope, it wasn't. They keep coming.

I stumbled on the solution by accident. You can jump here after all. Just hold up and hit the fire button to jump straight up. With correct timing, you'll jump over a charging dragon, and can proceed onward to the bomb.


Level 15 is another "Grand Puzzle," and here, to score maximum points, you must figure out how to pilfer each of the valuable treasures without being killed by the trap walls. Once again, the solution is deduced from careful observation and trial and error The level can also be finished by ignoring the treasures and collecting bombs, but that's no fun.


Moving platforms and stray bullets await you in level 16. This one's a bit of a breather, but you can still be killed by unlucky bullets while climbing ladders. Or by forgetting that Jumpman can't fall, or realizing too late that he doesn't move with the platforms automatically.


Level 17 has three dragons that hone in on your direction right from the start. The manual claims that every stage can be beaten without dying once, but I can't see how that's possible here, even with save states. Climb up the ladder and they ascend and kill you. Don't climb up the ladder and they swoop right at you and kill you. The dragons can't descend at all, except for wrapping around from the top of the screen to the bottom. Thankfully, there are only two levels left in the intermediate tier, and I was able to eventually reach this with enough lives left to power through it and the last one.


Finally, level 18 brings on the barrels and lots of ropes. Jumpman's troubled relationship with rope collision detection is among the greatest hazard here. The barrels and bullets are unpredictable, but so is whether or not Jumpman climbs up the ropes he touches, or slips from them and dies. As with levels 8 and 17, beating this one was mainly a matter of reaching it with enough lives to spare.


As of this post, I've beaten more than half of the twelve advanced levels, but not entirely without the use of save states. My next post will cover them and summarize my thoughts on this game.

Most popular posts