Thursday, February 24, 2022

Ports of Entry: Evryware

Unknown lead platform:


Sierra Championship Boxing

Possibly released for PC in 1983. Certainly no later than 1985.

Released for Commodore 64, and Macintosh in 1985.

Released for Apple II in 1986.


An interview with Barry and Dave Murry states that this was published for PC in 1983. But it makes no mention of other platforms, and contradicts both Mobygames and the ingame copyright date, which says 1985. My best guess is that the extant PC version is a re-release with an updated copyright, but this assumption still leaves some questions unanswered.

The interview does state, in no ambiguous terms, that this predates The Ancient Art of War, and it would be weird, though not impossible, if they remembered that incorrectly.


Select chronology: 

 
Title Lead platform Date Contemporary ports
Interactive Fiction: Six Micro Stories
Heath/Zenith 1980 1980 ports to Apple II and TRS-80 by Adventure International
Interactive Fiction: Dragons of Hong Kong
Heath/Zenith 1981 1981 ports to Apple II and TRS-80 by Adventure International
Sierra Championship Boxing
??? c1983
Unknown release date for PC
1985 releases on C64 and Macintosh
1986 release on Apple II
The Ancient Art of War
DOS 1984 c1984 port to Apple II
1985 port to Macintosh
The Ancient Art of War at Sea
DOS
1987-8 Same-year releases on Apple II and PC
1988 releases on Macintosh and PC-88
Manhunter: New York
DOS 1988 1988 ports to Apple II and Apple IIgs
1989 ports to Amiga, Atari ST, and Macintosh
Manhunter 2: San Francisco
DOS 1989-9 1989 ports to Atari ST and Macintosh
1990 port to Amiga
1982 port to PC
The Ancient Art of War in the Skies
DOS 1992 1993 ports to Amiga and Atari ST
SpaceKids
DOS 1995
Space Dude
DOS 1996

Friday, February 18, 2022

Game 308: Seastalker

Read the manual here:
 
Get Frotz (if native Windows execution is your wish) here:
http://www.davidkinder.co.uk/frotz.html
 

Seastalker, a collaboration between children's author Jim Lawrence and Stu Galley of Infocom's The Witness from the previous year, holds a couple of interesting distinctions.

  • It's the final game to come in Infocom's folio format packaging. All subsequent releases, including re-releases, would be in gray boxes more typical of the industry.
  • It is the only Infocom game to carry the "Junior" difficulty rating. That designation would be replaced by "Introductory" with 1985's Wishbringer.
  • It is the first Infocom game to support the Apple Macintosh, and with it, comes support for proportional fonts (I ran into trouble with Infidel when Frotz was set to use one).
  • It's the first Infocom game to support Curses-like text output functionality, allowing individual characters to be changed on the screen rather than just printing new lines and scrolling.
  • Despite being one of the smallest Infocom games, at just 30 rooms (tied with The Witness), it is the most complexly coded one yet, with over 14,000 opcodes. All prior games had about 6,000-9,000.
 

There's something down there, something terrifying. Now you've got to face it... because now only you can save the Aquadome - the world's first undersea research station. So states the packaging of Seastalker, promising mystery, thrills, adventure, and tests of skill and courage.

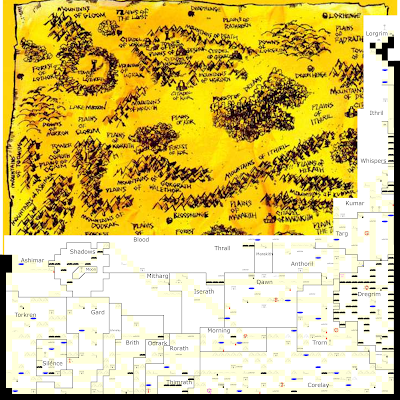
Inside the folio is a nautical chart of the bay, a set of dual-sided "infocards" with information about the characters and equipment on one side and Invisiclues on the other, a red-filmed "decoder" used to read them, a "Scimitar Logbook," and a "Discovery Squad" sticker.

The Scimitar Logbook is Seastalker's manual, in which a letter from the president personally congratulates us, a Tom Swift-like protagonist, for engineering the Scimitar, a highly advanced two-seater submarine, and our consequent acceptance into the ultra-prestigious marine research institute Discovery Squad. Following that, we have blueprints and instructions on operating the Scimitar, the usual instructions, and maps of the lab and Aquadome areas, which you typically didn't get in the manual.

There is a playtip that I strongly suggest following, that I wish I had known before playing myself. When the game suggests that you read a clue card, do it. The scanned cards at MOCAGH don't provide a great way of reading the clue sides, but these ones do. Toward the beginning of the game you don't really need them, and in fact, the mere prompting will spoil puzzles that were easy anyway by revealing contextual clues in keywords. But later on, they will reveal critical information that the game keeps from you, such as that an oxygen kit is found under your seat. And there's dialog that makes absolutely no sense unless the clue you are prompted to read in the middle of the conversation is assumed to be information dispensed by the character you are speaking to.

My initial playthrough, in which I did not use the clue cards at all, was quite a bit more confused than my final one, and I replayed and rewrote large portions of this post after I realized the true importance of the clue cards. Consequently, this post is somewhat of a false narrative, combining the experience of both my first playthrough, in which I discovered things for the first time but did not use the clue cards at all, and my final one, in which I always read the clue cards, but otherwise made an attempt to form decisions as if I were playing for the first time, not knowing what awaited me.


Upon loading Seastalker, you're prompted to enter your name so that the story can be personalized.

SEASTALKER: CAPTAIN AHAB AND THE ULTRAMARINE BIOCEPTOR
Junior-level interactive fiction from Infocom
Copyright (c) 1984 Infocom, Inc. All rights reserved.
SEASTALKER is a trademark of Infocom, Inc.
Revision number 16 / Serial number 850603

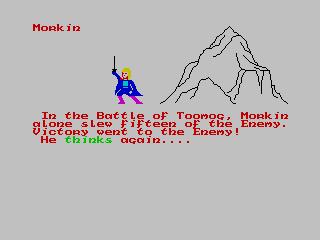
"Captain, snap out of it!" cries Tip Randall, bursting into your laboratory. "The alert signal is on!"
You look up from your plans for the SCIMITAR, a top-secret submarine that's still being tested. It's designed for capturing marine life on the ocean floor. You notice the alarm bell on the videophone ringing. Someone's trying to reach you over the private videophone network of Inventions Unlimited!

(lab center)
You're at your workbench in the center of your laboratory, a small part of the Ahab Research Lab in the town of Frobton. The videophone screen looms overhead, with its alarm bell ringing.
Tip is here.
A microphone is sitting on your workbench.

Okay, Captain, what do you want to do now?
>


The caller is Commander Bly, head of the Aquadome, sending a distress message. The facility is under attack from an enormous sea monster, nicknamed "The Snark" by their divers.

As with earlier Infocom games, you can't really converse with these characters, only give them commands, though "Bly, tell me about the monster" works as a line of inquiry. After questioning her and Tip some, I learned that the Scimitar, moored at the lab, can reach the Aquadome by autopilot, but hasn't been tested yet. And then the phone conked out.

At Tip's suggestion, I went to the Computestor console and turned it on.

"Symptoms: no picture, no sound.
Possible causes:
1) Failure of the transmitter at source.
2) A short in the undersea coaxial cable linking transmitter to the Ahab Research Lab, if signal is coming from Aquadome.
3) Sunspot interference or satellite malfunction if transmitter is at earth's surface.
4) Failure of the video receiver.
5) Overload in the Electrical Panel (circuit breaker popped).
6) Sabotage (circuit breaker open)."


Ok, so some of those causes are things I can't do anything about, especially given the urgency of the situation. But it would be nice if the Computestor could rule some of those things out.

Even though maps are included in the manual, I Trizborted out the lab as I always do. It's part of the fun, and I trust my own maps more. As I explored, Tip followed around, and occasionally the game would not-too-subtly suggest I look at the hint cards, as if it were getting impatient with my methods and eager to get on with it already.

The main lab area is a five-room arrangement with north, east, south, and west rooms encircled around a center, with spare electronics, mechanical parts, and chemicals haphazardly stacked on the shelves in several likely OSHA violations. To the south, a walkway loops around the Scimitar's access hatch. To the east is a corridor leading to the office of lab assistant Sharon Kemp, a useless storage closet, and an electric panel which, as the Computestor suggested as a possibility, had been tripped. Tip, surprised, said we had not overloaded the breaker, which left sabotage as the other possibility. I inspected Kemp's office, couldn't find anything suspicious, but she wasn't there.

Resetting the breaker fixed the video phone, but the line was dead, and Bly wasn't answering my return call. Time to head out in the Scimitar, but first I looked at the Computestor again.

"Symptom: hydrojet won't start.
Possible causes:
1) The catalyst capsule is not inserted in the reactor.
2) The reactor is not turned on.
3) The test tank is not filled."


I had seen the catalyst capsule on a shelf in the walkway. After grabbing it and putting it in the reactor, I started up the Scimitar; a process that takes quite a few steps, but the game is gentle enough to walk you through whenever you do something wrong. As opposed to, you know, killing you like these games are known to do.

>look at control panel
MAIN OPERATING CONTROLS:
reactor        : closed
reactor starter: off
tank control   : empty
gate control   : closed
engine starter : off
throttle       : closed
joystick       : southwest
depth control  : 0 meters
autopilot      : off

>start reactor
Electrical systems now activated.
(Your score just went up by 5 points!)

>open gate
You'd better fill the test tank first, unless you want to go surfing!

>fill tank
The sea water quickly fills the tank, up to the level of the walkway.

>open gate
Opened (by remote control).

>start scimitar
The engine is off!

>start engine
You can immediately hear the powerful thrum of the hydrojet turbine.
(Your score just went up by 5 points!)

>start scimitar
You can do this by setting the throttle to the speed you want (slow, medium, or fast) and by moving the joystick in the compass direction you wish to go.

>slow
You shouldn't leave the tank with the hatch open!

>close hatch
Okay, the entry hatch is now closed.

>slow
Okay, now that the throttle is set, try pushing the joystick to the east.

>push joystick east
The SCIMITAR glides smoothly out of the tank onto the surface of Frobton Bay. You're heading east at 1 sea square per turn.
(Your score just went up by 5 points!)
(This might be a good time to use the command: SAVE.) 

>


Oh boy! Are we gonna try something dangerous now?

By setting the sonar display to automatic, we can anchor it at the top of the screen, where it updates every turn while the text display below it scrolls normally, cutting off at the top of its designated partition.


Setting the depth to 5 meters to avoid surface boats, a patch of shoal suddenly became visible on the sonar, which I changed course to avoid.

Using the included bay map, I piloted the Scimitar around the shoal and toward the seawall opening, soon passing through it and into open ocean. I turned on autopilot to reach the Aquadome.

The troubles continued, as a temperature gauge indicated dangerous levels of overheating. A readout display showed the culprit was overcharged lasers in the operational computers, and that I'd need to access the crawlspace to correct their voltage. Why do the computers have lasers?

I stopped the engine, and tried to open the access panel, but the game told me to read the sign first. I did, and it said I'd need a special "ultra wrench" to open it.

It prompted me to read two clues at this point. The first one was to look at Tip's magazine. I did, and found an article concerning Dr. Jerome Thorpe's experiments with genetic engineering. The article also told me he was engaged to Sharon Kemp, and that the creatures created by his experiments may be responsive to ultrasonic pulses. His normal biography on the Infocard, incidentally, paints him as an obvious villain. Notably, both the biography and the article mention AMINO-HYDROPHASE molecules.

The second clue told me that Tip had a "universal tool." This is something you just wouldn't know without looking at the clue cards. So I asked Tip for the tool and he gave it to me, letting me get into the crawl space and fix the voltage regulator.

After re-engaging the engine, the autopilot took me the rest of the way.

The ocean has been getting darker as you dive toward the Aquadome, turning from blue-green to dark green to a dull gray-green. It's becoming duskier and murkier with every minute.

A yellow cone of light now illumines the water ahead. The SCIMITAR's brass search light was automatically switched on by an electronic eye, now that you're too deep for the sun to light the water.

Colorful sea life swims through the brass search light beam: a playful dolphin, a school of herring... Oh, oh! Here comes a hammerhead shark. And now a huge manta ray is gracefully gliding and flapping toward you.

A crooning noise comes over the hydrophone loudspeaker, punctuated by sighs and moans and a few weird whistles.

"There's a blip on the sonarscope at three o'clock!" yells Tip. "Aim the brass search light to starboard, Captain!"


I did, and saw a curious whale swim by.

Finally, the Scimitar arrived, and docked at the Aquadome. Commander Bly welcomed me in the reception area, asked to speak with me in private, to the dismay of crewman Mick Antrim, and then she, I, and everyone else started gasping for air. The game alerted me that we would suffocate in 10 turns.

I headed to the center of the dome, where the air supply tower operated, and the access tool needed to get inside was conspicuously absent. It could be opened with my tool instead, and inside, a loose, unnamed object lay at the base, but I ran out of time guessing the verbiage needed to take it and put it back in the assembly.

At this desperate moment, Doc Horvak runs from the Aquadome office. He says, "I never wanted it to go this far! I sabotaged the Air Supply System to embarrass Commander Bly, but now I can't find the electrolyte relay to fix it!"
As Doc breaks down in tears and Bly suffocates, you realize there's no point in continuing your mission.


It was right there where you left it! Did he fail to find it because I picked it up first?

Reloading, I repaired it in time, and Bly told me about her suspicions in her office. After the Snark attack, she inspected the sonar system and found it had been tampered with, showing a black box that she removed from it. I opened it up with my tool, and found its purpose was to interfere with the sonar pattern. I noticed, then that the Fram Bolt Wrench, which had been removed from the air supply tower, was under her desk!

Bly wanted me to equip the Scimitar with some armaments and hunt the Snark, and I agreed, but remained cautious of the saboteur, which might have been Antrim, or Horvak, or even Bly. Two clues were prompted, telling me to equip the Scimitar with the "bazooka," a pneumatically launched device intended to extract samples from geologic formations, and to have Horvak fashion me a dart gun for the Snark.

We went to the lab with Horvak, who told me that high concentrations of "AH molecules" were detected after the first attack. Tip, overhearing, reminded me about the magazine.

I showed Horvak the magazine, and a weird sequence of events unfolded.
  • Horvak, now understanding what we were up against, offered to synthesize an anti-Snark drug which could be administered by dart gun.
  • Bly cautioned me to arm the sub more heavily in case I encounter Thorpe.
  • The game told me that Tip had an idea.
  • The game suggested that I read a clue, which read "try the bazooka."
  • Someone said "Shall I have it mounted on the other sensor claw of the SCIMITAR?" This is one of those situations that I found so confusing initially, as Horvak, Bly, and Tip were all in the room, and while "it" almost certainly refers to the bazooka, nobody ingame had mentioned one yet. But if "try the bazooka" was intended to be Tip's idea, communicated to you via clue card rather than ingame dialog, then this exchange suddenly makes sense. The wording, though, makes it sound like reading the clue is optional. I said yes.
  • Tip suggested calibrating the sonar scope to a finer grid that would be accurate to five meters per coordinate point, and adjusting the throttle control to match.
  • Tip ran off. Antrim announced he was going to check out my submarine and ducked out of sight faster than I could utter "oh no you don't."
  • Tip returned, and informed me that he installed the fine-grid on the sonar and throttle, and "the bazooka." Which again, nobody had mentioned.
  • Horvak brought back the dart gun and Tip installed it on the other extensor claw.


I took this opportunity to explore the Aquadome and map it out, and Tip spoke to me when we were alone, suggesting that Antrim was not the traitor and that his reaction proved it, but I couldn't get him to elaborate.

While exploring the rooms, I entered the men's dormitory, and cut open Dr. Horvak's footlocker with my tool, revealing a diary and a photo of Commander Bly! Reading the diary proved his intent to win her over... by sabotaging the air supply, endangering the crew, and cutting through her frigid demeanor by proving her fallibility. Right. Nothing of interest was in the women's dorm. I showed the diary to Bly, who didn't act surprised at all.

I returned to the Scimitar and started the engine. An alarm went off, and crewman Siegel alerted us to two large sonar blips approaching Aquadome. As the docking tank filled, the Snark, big as a house, approached Aquadome. And while I fumbled with the parser to try to figure out how to fire the dart, the Snark broke through the exterior dome, drowning everyone. Including me for some reason.


I reloaded and went through the motions again, this time skipping the exploration/mapping and heading straight to the Scimitar once it had been armed. I left, headed north around the Aquadome, and a few turns later, the Aquadome called in distress, under attack from the Snark and too far away for me to do anything. Reloading again, I tried waiting around, in the submarine, and nothing happened for hundreds of turns, but the moment I started moving, it instantly attacked and destroyed the Aquadome again. And on yet another attempt, I accidentally steered the Scimitar right back into the Aquadome, where Antrim started doing unexplained work on the ship, preventing me from leaving. Waiting around for a few dozen turns had no apparent effect.

A bit ashamed that I was stuck in a kid's game, I turned to a walkthrough.

What you do here is head southeast. I have no idea how you're supposed to know that. But I did, and Tip sighted a cloud of silt just out of sonar range. I maintained the course, and spotted two objects - the Snark, and a "sea cat" - a bottom-crawling vehicle stolen from Ahab Labs. Dr. Thorpe then called me on the sonar phone to gloat that he and Sharon, seated with him, would sink my sub with a torpedo, and finish off the Aquadome with his synthetic monster. His motivation, he continued, was to possess an ore deposit. But then Sharon knocked him out with a wrench.

The sonar shows the monster's location, the villain reveals himself, and the traitorous assistant redeems herself, all with minimal input from myself.

I closed in on the Snark, but overshot, and followed it in close pursuit as I tried to aim the dart gun at it. Thorpe recovered and continued his threats.

Hidden clue #2 redundantly tells you to do exactly what Tip just said to.

I took out the Snark first, but as it sank, it gave Thorpe a clear shot at me, sinking the Scimitar. I reloaded, and this time maneuvered around the Snark, right behind Thorpe.


I aimed and fired the "bazooka." This disabled his vessel, knocking him out as his head hit the console, and Sharon took over, using the sonar pulses to guide the Snark back to its cavern. The mission was a success, but Tip admonished me for failing to locate the traitor, and I had only scored 82 points.


I replayed, following a walkthrough for a little bit. There were a few points of divergence from the previous playthrough:

  • At Ahab Lab, after closing the breaker, I went into Kemp's office and found her going through her filing cabinet, startling her. When asked about the breaker, she denied any mischief.
  • I fixed the voltage regulator before launching the Scimitar, and overheating did not become a problem, and read Tip's magazine during the open ocean journey.
  • I retrieved the oxygen gear from the Scimitar before disembarking this time and used it before fixing the tower, though I'm not sure how necessary this is considering that Bly will suffocate before you do.
  • I asked Bly about a few extra topics, such as the black box, the wrench, and Horvak.


The critical point of divergence, though, is that after Bly summons you to her office, and after noticing the wrench, leave the office before she starts speaking of the Snark hunt and takes you to the lab. Then we have a chat with Tip, which, critically will not happen after meeting Bly in the lab, but also will not happen until after she tells you about the black box, and only when you and Tip are alone.

Tip says quietly, "Captain, did Commander Bly mention any troublemakers among the Aquadome crew?" >


You were there, Tip. She didn't, but answering "no" ends the conversation and presumably with it the traitor subplot. So we must answer yes.

"Do you suspect Mick Antrim or Doc Horvak or Marv Siegel?" >


What a weirdly specific combination! Antrim's a little sus, even though Tip said he proved his innocence. Horvak is certainly guilty of reckless endangerment, but I think Tip is referring to whoever tried to sabotage the sonar and Horvak isn't implicated in that. And I know nothing about Siegel. But once again, you must answer 'y' to proceed or else you've softlocked this sub plot.

"Marv maintains the Aquadome sonar equipment," Tip says, "and we'll need it to warn us if the Snark comes back. Didn't Zoe say something is wrong with it?" >y
"Captain, do you think someone tampered with it?" >y
"Does Marv suspect you've discovered signs of tampering?" >n
"Then I have an idea how to trap Marv and find out if he's the traitor!"


Asking Tip about his idea just refers me to Infocard #1, clue #3, which says to put the black box back on the sonar and to ask Siegel to check on it. I did, and he came back with the device, either proving he is not the traitor, or proving he knows we're on to him.

A few turns later, Antrim came back, and told me he could have an Emergency Survival Unit installed in the Scimitar, and I agreed. This is something that did not happen in the previous playthrough. This device jabs you with a hypodermic needle if it senses you've lost consciousness.

I went over to inspect the work, and the game told me to read a clue card, telling me to inspect the unit. I did, and discovered it had been tampered with, and Tip told me to have Horvak analyze it. He did, and told me it was filled with arsenic. What is the saboteur trying to do, make sure I die in 12 hours?

Bill Greenup was the one who installed the seat unit, so I showed him the syringe, and he dashed for the Scimitar. Bly ordered me into her office, where I shut off the docking gate (following the lead of a clue prompt), trapping him in the Scimitar until security could apprehend him.


From here, I went to the lab, and completed the game as I had before. There was no difference to the ending except the omission of Tip's line about not catching the traitor and the 100/100 score.


A post-completion side note - during one run of the Aquadome sequence, I discovered that, instead of letting Tip install the bazooka during the lab sequence, it's possible to pick it up yourself in a storage room. There's no indication that you'll find one there, but if you look for it specifically, you'll find it. However, when you tell Bly you have a weapon, and she asks you to show her, I couldn't get the parser to understand I wanted to show her the bazooka.

>show bazooka to bly
(You'll find that information in your SEASTALKER package.)


Another note - I wasn't satisfied with not knowing how you're supposed to figure out that the Snark is to the southeast of the Aquadome, so I read an Invisiclue. You're meant to ask Bly about it, though in doing so, you're prompted to read a hidden clue, which tells you it was seen to the southeast. This further cements my theory that sometimes the hidden clues serve as stand-in for character dialog, and you are expected to read them when prompted, despite the wording that implies this is optional.


GAB rating: Below average. This was, honestly, one of Infocom's weaker efforts so far. I like the concept well enough; an adventure for the 9-12 crowd in the spirit of juvenile sci-fi sounds like a good idea on paper, if it struck that delicate balance of being accessible to the intended age group without infantilizing. And while it does err a bit too strongly on the side of accessibility, the main culprit being just how much of the game involves following directions from other characters with little chance given to figure anything out yourself, I've seen worse in terms of patronizing tutorials, even in games meant for adults. The writing isn't quite up to Infocom's usual quality, perhaps due to the increased reliance on characters without having the memory or disk space to develop any of them beyond two-dimensional tropes (or perhaps thanks to employing a writer who was inexperienced with these limitations), but is still leagues better than the competition of the day.

What really sinks Seastalker is its inconsistency. Though this isn't evident at first, the game cannot decide whether its clue cards are optional or not. Most of them are optional, unnecessary, even, but a few of them are required to solve puzzles or even to make sense of a scene, and not knowing this spoiled my initial playthrough. Yet, right from the get-go, the opening railroads you, telling you exactly what to do, giving you unsolicited clues that you really don't need in order to solve its easy puzzles.

Once you reach the Aquadome and have any sort of freedom to perform actions in a non-linear sequence, it becomes shockingly easy to break the game's script and make it go off the rails. You're bombarded with questions and interruptions at certain junctions, events can trigger nonsensically, and by following the game's lead too closely, which you've had to do the entire time up until this point, important events can fail to trigger at all, locking you out of a total victory. The whole segment is so unintentionally wacky that I'm not even sure if it's possible to get every event there to occur in a completely sensible manner.

It's an interesting game, for sure, the early parts (including the feelies) are reasonably successful at capturing the feel of a preteen adventure novel even if it goes just a bit too far with the hand-holding, the split-screen sonar mode is pretty cool, and the showdown at the end is a highlight, but none of this outweighs the bad times I had trying to figure out how to navigate its brittle script in the middle or the frustration of having to frequently second-guess its intentions.
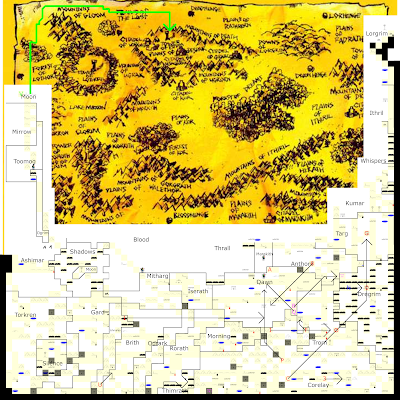
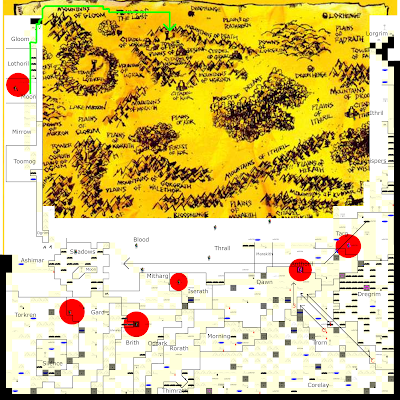

My Trizbort map:

Saturday, February 12, 2022

Ports of Entry: Strategic Simulations

Unknown lead platform:


The Battle of Shiloh

Released for Apple II, Atari 8-bit, and TRS-80 on 1981 by Tactical Design Group


One could intuitively assume that because SSI clearly favored the Apple II as a lead development platform, even for outsourced projects like Computer Quarterback, that The Battle of Shiloh by their internal Tactical Design Group would be an Apple-first effort as well. The Apple version's graphics were, at least, optimized for the Apple II's 6-color display, and not converted from the abstract tile-based Atari version, or from the TRS-80 version which had none.

But there are some things different about the Tactical Design Group games that prevent me from being too certain. These games, which also include Tigers in the Snow, Battle for Normandy, Knights of the Desert, and Breakthrough in the Ardennes, were multiplatform from the start, all but Ardennes supporting Apple, Atari, and TRS-80 from the start, all three programs usually credited to David Landrey, and all but Shiloh being ported to PC and C64 soon after the initial releases. Designer David Landrey's prior experience were three TRS-80-exclusive wargames, and the TRS-80 versions of Shiloh and Tigers in the Snow differ significantly in gameplay according to The Wargaming Scribe. This gives some credibility to the counter-theory that TRS-80 is the original design, and the Apple II and Atari versions are simultaneously-released ports that added graphics.

These observations apply to all other games by Tactical Design Group and will not be repeated.


The Battle of the Bulge: Tigers in the Snow

First released for Apple II, Atari 8-bit, and TRS-80 on 1981 by Tactical Design Group

Ported to PC on 1982 by Edward Haar


Battle for Normandy

First released for Apple II and TRS-80 on 1982 by Tactical Design Group

Ported to Atari 8-bit in 1982 by Dale Disharoon

Ported to PC in 1983 by Edward Haar


Knights of the Desert

First released for Apple II, Atari 8-bit, and TRS-80 on 1983 by Tactical Design Group

Ported to C64 in 1983

Ported to PC in 1983 by Edward Haar


Questron

First released for Apple II on April 1984

Released for C64 on 1984

Ported to Atari 8-bit on 1984 by John C. Dougherty


An Apple II->C64 conversion seems probable given the earlier release date and SSI's evident platform preference at the time. Hauge's list credits Charles W. Dougherty with the C64 version and John C. Dougherty an Atari conversion, but does not say if C64 or Apple II was Charles' original design.


Colonial Conquest

First released for Atari 8-bit and C64 on August 1985

Released for Apple II on April 1986


Roadwar 2000

First released for Apple II in September 1986

Released for Commodore 64 in October 1986 

Ported to PC in March 1987 by Edward Haar

Ported to Atari ST in March 1987 by Westwood Associates

Ported to Amiga in June 1987 by Westwood Associates

Ported to Apple IIgs in December 1987 by Westwood Associates


Curse of the Azure Bonds

First released for Commodore 64 and PC in July 1989

Released for Apple II in September 1989

Ported to Amiga and Macintosh in 1990 by MicroMagic


Pool of Radiance, the first Gold Box game, is known to have been first written for the Commodore 64 and later rewritten in Pascal for 16-bit computers. Most Gold Box games support C64, but every Gold Box game runs on DOS. My thinking is that at some point, the lead platform switched from C64 to DOS, and game-specific engine features were backported to C64 assembly. This may have happened as early as this game.


Champions of Krynn

First released on PC in January 1990

Released for Amiga, Apple II, and C64 in January 1990.


The C64 version credits Paul Murray and James Jenning with "Commodore 64 programming" and also credits Westwood Associates with additional development, and the Amiga version credits Norm Kroger with "Amiga programming," but the PC version credits Russ Brown and Scot Bayless with just "programming." This, along with the release order, suggests to me that PC is the base platform and Amiga and C64 are conversions.


Buck Rogers: Countdown to Doomsday

First released on Amiga, C64, and PC in 1990.


The credits situation is similar to Champions of Krynn, leading me to the same probable conjecture. The PC version also features 256-color VGA graphics, exceeding the specs of any other platform.


Secret of the Silver Blades

First released on C64 and PC in 1990.

Ported to Amiga and Macintosh in 1991 by MicroMagic


Death Knights of Krynn

First released on Amiga, C64, and PC in 1991.


The Dark Queen of Krynn

First released on Amiga, Macintosh, and PC in 1992.


This game is credited to MicroMagic, whose previous credits are mainly of creating the Amiga and Macintosh conversions of Gold Box games. It's possible, then, that the Amiga or Macintosh are the original designs for this particular game.


Select chronology: 


BASIC era:


Title Lead platform Date Contemporary ports
Computer Bismarck Apple II
1980-1 1980 port to TRS-80, possibly by John Lyon
Computer Air Combat Apple II 1980
Computer Ambush Apple II 1980
Computer Conflict Apple II 1980
Computer Napoleonics: The Battle
of Waterloo
Apple II 1980
The Battle of Shiloh ??? 1981 Simultaneous releases on Apple II, Atari 8-bit, and TRS-80
The Battle of the Bulge: Tigers in
the Snow
??? 1981 Simultaneous releases on Apple II, Atari 8-bit, and TRS-80
1982 port to PC by Edward Haar
Cartels & Cutthroat$ Apple II 1981
Computer Quarterback Apple II 1981 1981 port to Atari 8-bit
Computer Baseball Apple II 1981
Battle for Normandy ??? 1982 Simultaneous releases on Apple II and TRS-80
1982 port to Atari 8-bit by Dale Disharoon
1983 port to PC by Edward Haar
Knights of the Desert ??? 1983 Simultaneous releases on Apple II, Atari 8-bit, and TRS-80
1983 ports to C64 and PC
50 Mission Crush Commodore 64 1984 1984 ports to Apple II and Atari 8-bit by Keith Brors
Gemstone Warrior Apple II 1984 1985 ports to Atari 8-bit and FM-7
Questron ??? 1984-4 Same-year releases on Apple II and C64
Same-year port to Atari 8-bit by John C. Dougherty
 

Late 8-bit era:


Title Lead platform Date Contemporary ports
Kampfgruppe Apple II
1985 1985 ports to Atari 8-bit and C64
Colonial Conquest ??? 1985-8 Simultaneous releases on Atari 8-bit and C64
1986 release on Apple II
Phantasie Apple II 1985 1985 port to C64 by Logical Design Works
1986 ports to Atari ST and various Japanese computers
Phantasie II Apple II 1986-3
Wizard's Crown Apple II
1986-3 1986 ports to Atari 8-bit, and C64
1987 ports to Atari ST and PC
Roadwar 2000 ??? 1986-9 Same-year releases on Apple II and C64
1987 ports to various 16-bit computers
Phantasie III: The Wrath of Nikademus Apple II 1987-3 1987 ports to Amiga, Atari ST, and C64 by Westwood Associates
1988 ports to PC and various Japanese computers
Demon's Winter Apple II 1988-8 1989 ports to various computers
 

Gold Box era:


Title Lead platform Date Contemporary ports
Pool of Radiance Commodore 64 1988-10 1988 port to PC
1989 ports to various computers
Curse of the Azure Bonds ??? 1989-7 Same-quarter releases on Apple II, C64, and PC
1990 ports to Amiga and Macintosh by MicroMagic
Champions of Krynn ??? 1990-1 Same-year releases on Amiga, Apple II, C64, and PC
Buck Rogers: Countdown to Doomsday ??? 1990 Same-year releases on Amiga, C64, and PC
Secret of the Silver Blades ??? 1990 Same-year releases on C64 and PC
1991 ports to Amiga and Macintosh by MicroMagic
Pools of Darkness DOS 1991 1992 ports to Amiga and Macintosh
Death Knights of Krynn ??? 1991 Same-year releases on Amiga, C64, and PC
The Dark Queen of Krynn ??? 1992 Same-year releases on Amiga, Macintosh, and PC
 

Post-Gold Box era:

 
Title Lead platform Date Contemporary ports
Eye of the Beholder III: Assault on Myth Drannor DOS 1993 1994 port to PC-98
Dark Sun: Shattered Lands DOS 1993
Panzer General DOS 1994 1995 ports to 3DO and PC-98
Fantasy General DOS 1996-3
Panzer General II Windows 1997-10

Sunday, February 6, 2022

The Lords of Midnight: Won!

With some grasp on how things work in this game, and a better, if not quite complete map of the land of Midnight, I played out a complete, and successful game.

Phase 1 would be to recruit as much manpower as quickly as possible, with priority given to the known lords, for the more lords are recruited, the more efficiently they can spread out and recruit men to their armies. Meanwhile, I'd have Morkin try to sneak around and try to grab the ice crown.


Luxor, Morkin, Corleth, and Rorthron all start at the Tower of the Moon, hidden deep within the Forest of Shadows.

I figured Morkin's best way of evading Doomdark's armies was to cross the mountains of Ashimar all the way north by northwest, hug the western edge of the map and ride north, then east across the Mountains of Gloom, cross the Plains of the Lost, and then slip through the Mountains of Death from the North into the Tower of Doom's backdoor, and perhaps then he could ride all the way to Lorgrim's domain to dispose of it.

Meanwhile, I'd have everyone else focus on recruitment in the charted lands to the south. The rules on who can recruit who are a little unclear, but from what I could tell, work something like this:

  • The Free (e.g. Luxor) may only recruit the Free.
  • The Fey (e.g. Corleth) may recruit the Fey. Thimrath, deep in the south of the map, had been the only other Fey lord I encountered so far.
  • The Wise (e.g. Rorthron) may recruit any lord, but may not recruit armies.
  • Morkin may not recruit lords nor armies.


Corleth's priority would obviously be to find Thimrath first, represented by the purple Q. Unfortunately, in my mapping efforts, I had been neglectful in identifying keeps of Fey and Free, and would have trouble raising armies for them. But they would be useful in exploring the uncharted lands in Mitharg, Iserath, and Dawn, being fleeter of foot than their man counterparts.

Luxor, I figured, could recruit Lord Thimrath, represented by the I, and Rorthron to Dawn, represented by the 8. From there, they could branch out and recruit the rest of the lords, hitting keeps and citadels along the way.


On day 2, Corleth came across Lord Brith, who I had seen before and been unable to recruit in the past game, but this time was perfectly able to. To be fair, in the last game his keep was under a brutal siege. I sent him southeast while Luxor continued his path southwest.

On day 4, Morkin, up north and approaching the Mountains of Toomog, found a nasty surprise.

The manual said these guys couldn't cross the mountains!
 

'Hide' is not an option for Morkin, the one lord who really needs it, while 'To Battle!' is, even though he can never recruit an army. Instead I ducked into the adjacent mountain range and prayed they wouldn't follow.


It didn't work. Fifteen kills isn't bad, but 985 remained, and to make things worse, Morkin got pushed farther into the mountains, right up against some ice trolls, which I fought and then fled due north, away from the army.

Some observations I made over the next few days as I continued to carry out my plan:

  • Lord Gard, found at his citadel to the southeast, could not recruit men at a keep to the north in his domain. I assume that this is because his army, consisting of 1,200 warriors and 1,000 riders, was full. I sent him exploring east.
  • While exploring east, a lith dispensed comically useless advice.
    Ya don't say.
  • After recruiting Lord Dawn, I sent him on a long journey to the domain of Targ, but recruiting Lord Utarg there wasn't an option for some reason. Nor could Lord Athoril, who I found and recruited nearby.

By day nine, Doomdark's forces began to break through, and an army of 1,180 riders were spotted at Dawn, with more certainly on the way.

The situational map:


My plans:

  • C - Luxor, with 900 exhausted warriors, journeys northeast through Corelay in an attempt to reach and recruit Utarg before Doomdark does.
  • V - Morkin, travels north through the Domain of Moon in an attempt to slip through Doomdark's armies.
  • B - Corleth the Fey, with 200 exhausted warriors, journeys northwest toward Dregrim to recruit more of his kind.
  • N - Rorthron the Wise enters Dregrim to recruit Lord Dregrim at his citadel.
  • 1 - Gard, with 1,200 warriors and 1,000 riders, tired, heads east toward Dawn to fight.
  • 3 - Xajorkith, with 200 warriors and 800 riders, fresh, heads east through Corelay to recruit more.
  • 8 - Dawn, with 900 warriors and 500 riders, slightly tired, recruits more in his domain.
  • Q - Thimrath the Fey, with 400 warriors and 600 riders, slightly tired, heads northwest through Dawn to fight.
  • U - Brith, with 700 warriors and 600 riders, quite tired, recruits more in his domain.
  • I - Rorath, with 400 warriors and 800 riders, quite tired, heads east into Trorn to recruit Lord Trorn.
  • P - Morning, with 1,200 warriors and 300 riders, fresh, heads northwest into Dawn to fight.
  • A - Athoril, with 300 warriors and 800 riders, fresh, fights Doomdark's army at the keep of Dawn while waiting for reinforcements.
  • F - Mitharg, with 1,200 warriors and 500 riders, quite tired, heads northwest toward Dawn to fight.


The results of the night:

  • Armies caught up with Morkin, driving him to a location called "Moonhenge" where he could recruit Fawkrin! Morkin, however, was "utterly exhausted" and unable to go anywhere. I had Fawkrin suicidally engage the army to try to buy Morkin some time.
  • At Dawn, Lord Athorils army slew 800 enemies and lost 485 men, leaving him with 615 riders to face Doomdark's 1,470.
  • An unseen battle raged on the Plains of Blood.


In the day:

  • Rorthron recruited Dregrim, and I decided to sent Rorthron up north to try to recruit Utarg while Luxor instead sought reinforcements throughout Corelay. Dregrim, already able to recruit a full army's worth of warriors, headed back west toward dawn.
  • Xajorkith was unable to recruit men in Corelay and then I realized I misread his strength; he had 1,200 warriors, not 200. It's an easy mistake to make, given that the game insists on being cute and spelling out numbers in word form. I redirected him toward Dawn and let Luxor press onward to recruit throughout Corelay instead.
  • The rest of the lords continued with their plans, and those with tired soldiers stopped for a drink at lakes on the way to bring their stamina back up to "utterly invigorated." Sadly, each lake is only good for one drink.


Morkin and Fawkrin remained pinned down by Doomdark's armies, somehow both still surviving, and multiple unseen battles unfolded not just in the Plains of Blood, but in the domains of Shimeril, Shadows, Thrall, and Ithril.

Over the next two days, by some miracle, Doomdark's armies in the northwest, numbering at almost 3,000 riders, turned their attention toward Fawkrin, leaving Morkin free to continue his path north, where he found some much-needed Waters of Life among a row of mysterious liths, and a Cup of Dreams in a snowhall to the north of it. Fawkrin survived this, somehow, killing five of their numbers before retreating. His job would now be to slow them down as long as possible while Morkin rode onward. Athoril was able to hold on to his post at Dawn until backup arrived, and drove his besiegers out, but this was no time to celebrate, as Doomdark's armies continued to advance on other regions, mostly unopposed. Rorthron made it to Utarg's citadel and recruited him, even as a nearby keep fell to Doomdark's hordes.

Athoril and his allies pushed east against approaching armies, while Luxor continued toward the farthest reaches of Corelay for recruits.

By day 13, I had visited most of the keeps in the southern domains and taken all the men I could, and was actively engaging Doomdark's troops on the front lines.


  • Luxor (C), Xajorkith (3), Torn (O), headed northwest toward Dawn, the epicenter of the action.
  • Morkin (V) had reached the Mountains of Gloom unopposed and began heading east toward his destination. Fawkrin (H) bitterly fought against 2,950 of Doomdark's riders in the Domain of Moon.
  • Rorhtron (N) headed southwest to scout the border.
  • In Targ,
    • Doomdark commanded 905 riders.
    • Corleth commanded 200 warriors and 200 riders, fresh.
    • Utarg commanded 1,200 riders.
  • In northeast Dawn,
    • Doomdark held a keep with 40 warriors and 70 riders.
    • Lord Dawn commanded 1,160 warriors and 485 riders, but were nearly exhausted.
    • Dregrim commanded 975 warriors and 210 riders, tired.
    • Thimrath the Fey commanded 360 warriors and 585 riders, very tired.
    • Morning commanded 1,200 warriors and 300 riders, fresh.
    • Athoril commanded 230 warriors and 345 riders, tired.
    • Mitharg commanded 1,185 warriors and 495 riders, tired.
  • In Iserath,
    • Doomdark assaulted a citadel with 1,390 riders.
    • Gard commanded 1,065 warriors and 930 riders, fresh, but his courage was faltering.
    • Shimeril, not yet recruited, commanded 420 warriors and 410 riders, invigorated.
  • In Gard,
    • Doomdark's occupied a citadel with 540 warriors and 20 riders.
    • Brith commanded 870 warriors and 580 riders, invigorated. But Brith himself was reduced to a blubbering coward by Doomdark's ice-fear magic, and unable to attack, only camp outside.


Results - total victory in Targ and Dawn. Iserath held through the night, but reinforcements of nearly 4,000 warriors approached. Gard and Brith looked to be total losses, with the meager forces there failing and Doomdark's reinforcements incoming.

At this point, I didn't fancy my odds of a defensive strategy. Perhaps I could whittle down Doomdark's forces by annihilating his armies wherever I could outnumber them, as I had in Targ and Dawn, and retreating wherever I could not, but I had no idea how many troops he had in total, I was running out of places to reinforce and refresh my tiring armies, and the ice-fear wasn't getting any weaker.

So, I had everyone but Morkin, Rorthron, and Fawkrin press on through the Forest of Thrall, over the Mountains of Ithrill, and toward Ushgarak, with Doomdark's armies nipping at their heels every step of the way. Nearly every keep they passed was overtaken, and they walked around, but nevertheless still recruited a few more lords along on the way. If Doomdark conquered an undefended Xajorkith, so be it - as long as Luxor and Morkin both live, the game goes on. Morkin, meanwhile, continued his quest in relative peace.

Lord Marakith, found at his citadel in Marakith, was the first to arrive at Doomdark's doorstep across the Plains of Kor, which was littered with benefit-granting Liths, including multiple time-resetting Cups of Dreams. A clue was found here too, that Lake Mirrow could also destroy the Ice Crown. An intimidating force of 4,800 warriors and 2,400 riders guarded the final citadel. Marakith camped outside the citadel and waited for the rest of the lords to catch up.

Morkin, crossing the Plains of the Lost, had one last obstacle to his destination; the Mountains of Death. The Tower of Doom, holding the Ice Crown, was somewhere within. Fawkrin, at last, perished in battle, having taken out 70 of Doomdark's men singlehandedly over the course of many days. Rorthron, too, fell, ambushed by armies while crossing the Plains of Blood in search of recruits.

Morkin, crossing the Mountains of Death, sees the Tower of Doom in the distance.

As Morkin slowly made his way through this maze of ice and rock, all of my armies gathered across the Plains of Kor, walking through a mountain range to avoid a costly siege on the Citadel of Kor, and camped outside Ushgarak. All of my armies except Brith's, who got wiped on the Plains of Blood as Lord Brith pissed himself in utter terror, and, alarmingly, of Luxor, who lagged behind his followers in the difficult terrain of Corelay, and found himself under attack by multiple armies and too exhausted to flee or fight back effectively. If he fell, my military plans would be shot, and Morkin would be my last hope.

Morkin grabbed the Ice Crown, unguarded, and rode like the wind due east across the frigid plains toward Lorgrim, aided by a Cup of Dreams found in an igloo. My armies, Luxor excepted, gathered outside Ushgarak.


The army stats - the numbers tally warriors/riders.

  • Doomdark: 7,070/7,185
  • Corleth: 200/200, tired, very bold
  • Gard: 630/710, utterly tired, afraid
  • Xajorkith: 1,200/800, slightly tired, afraid
  • Dregrim: 790/125, very invigorated, slightly afraid
  • Thimrath: 350/560, slightly tired, very bold
  • Rorath: 410/840, very invigorated, very afraid
  • Athoril: 245/270, exhausted, very afraid
  • Mitharg: 1,185/460, very tired, very afraid
  • Utarg: 0/1,200, invigorated, slightly afraid


Incapacitated armies:

  • Dawn: 1,200/470, tired, utterly afraid
  • Trorn: 730/335, quite tired, utterly afraid
  • Morning: 1,190/290, slightly tired, utterly afraid 
  • Herath: 790/485, invigorated, utterly afraid


That's 5,010 warriors and 5,165 riders. Not terrific odds for a mostly tired army attacking a citadel, but with Luxor under attack, I had no time to spare, and went all in on the siege while the lords too scared to attack waited at the rearguard.

The results:

  • Doomdark: 6,585/5,720 survivors
  • Corleth: 75 kills, 400 deaths. No survivors except Corleth himself.
  • Gard: 205 kills, 1,205 deaths. 135 exhausted riders survived.
  • Xajorkith: 560 kills, 1,270 deaths. 405/325 survivors, tired.
  • Dregrim: 345 kills, 700 deaths. 215 invigorated warriors survived.
  • Thimrath: 320 kills, 900 deaths. 10 quite tired riders survived.
  • Rorath: 505 kills, 825 deaths. 425 invigorated riders survived.
  • Athoril: 70 kills, 515 deaths. No survivors except Athoril himself.
  • Mitharg: 350 kills, 1,300 deaths. 345 utterly tired warriors survived.
  • Utarg: 520 kills, 460 deaths. 740 slightly tired riders survived.


Utarg alone had a slightly respectable k/d ratio.

For all that blood, Doomdark still had well over ten thousand defenders, an utter disaster. The situation was clearly hopeless. I'm not sure whether or not Luxor's presence would have tipped the odds enough to win - if his aura had granted all of the armies enough courage to join the fight, then we would have slightly outnumbered them. And perhaps, with that courage and a few days of rest, everyone would have fought more effectively too. But then, I don't really understand how the fight mechanics work either. For instance, does it consider the entire combined fighting force, or does it merely resolve each combat result independently, e.g., resolving the outcome of Corleth vs. Doomdark's entire 14,000-strong garrison before moving on to Gard vs. everyone Corleth didn't kill? And if the latter, then how are you supposed to ever win, given that nobody can have more than 2,400 men?

Morkin continued toward Logrim, and Doomdark finished off the rest of the armies, killing Corleth, Gard, and Xajorkith. On day 24 of the solstice, Morkin completed his quest.

Morkin spots the Tower of Lorgrim through a crack in the northeast glacier

Lord Lorgrim awaits.


Anticlimax!


I'll admit that this victory felt a bit lucky, and I have to wonder if my disastrous military campaign made any kind of difference to the outcome. I had utterly failed at protecting Xajorkith. Morkin could have been killed as early as day 4, and I have no idea how improbable it is that he wasn't. Nor do I have any idea if he might have been killed by patrolling armies in the Mountains of Death - I didn't see any, but the region is stupidly close to the Citadel of Ushgarak, where my armies didn't seem to be much of a distraction to Doomdark.

And I have no clue what it takes to earn a military victory. Much of the map remained unexplored, especially up north, and I'm sure there were many more lords and soldiers to recruit, but how does one explore it under the threat of Doomdark's warpath? Would the forces I had assembled with the knowledge gathered from two previous playthroughs had been enough, had I used them more cleverly, or used a different strategy entirely?

GAB rating: Above average. I admire Singleton's vision, if not necessarily his originality in worldbuilding. With a fairly weak computer, even at the time, The Lords of Midnight feels vast in scope, in a way that it wouldn't have had it been presented as a top-down strategy game. He accomplished much, with relatively little to work with. Maybe even more impressively, the game doesn't look half bad despite the system's two-tone limitations.

However, its strength in immersive presentation is also its greatest weakness - this is more of a wargame than an open world adventure, and as a wargame, it's far too difficult to assess the situation by stitching together intelligence from a dozen or so ground-eye perspectives and a crude map. The messages you receive between rounds about the Foul's advances give only the vaguest idea of where Doomdark's armies are, and zero indication of their numbers, and the only way to get a more precise report is if a lord you control happens to be within fighting distance of an enemy and you manually observe and query in every compass direction. As an open world adventure, there's just not enough to do.

And if the game actually expects you to be able to recruit every single lord without telling you exactly where to find them, forcing you to painstakingly search every square of the land while under the pressure of Doomdark's invasion, well, that's insane.

I could also point out the tons of quirks that get in the way of gameplay, like the difficulty in parsing status reports such as "Corleth the Fey lost five hundred and sixty five riders and slew one thousand two hundred and fifteen of the enemy." Or how badly named the "think" command is when it's so essential for gathering critical details. Or how the game often does nothing to alert you when a lord runs into trouble, or even dies. Or how the generic message "he thinks again" can mean anything from "you are dead" to "you attempted an illegal move and we're not explaining why."

Ultimately, I respect The Lords of Midnight as a landmark title, and as a significant accomplishment in technology and design, but didn't enjoy playing it very much, and can't unequivocally recommend it.


Screenshots hosted at Mobygames
 

The Lords of Midnight was followed by a sequel, Doomdark's Revenge, later in 1984, and shortly after Singleton's death in 2012, remade as mobile games with an art style that faithfully recreates Singleton's desolate landscapes in HD vectors and adds quality of life improvements such as a dynamic ingame map. A planned third game, Eye of the Moon, was never finished. The remakes are available for free at GOG.


My final map:


Thursday, February 3, 2022

The Lords of Midnight: Second midnight

Adventure and strategy are genres at odds. Adventures, which may include RPGs under a broad umbrella, are generally intimate experiences where the protagonist serves as your personal avatar into a virtual world. Strategy trends more abstract and disconnected, with characters as mere tokens and currency to move and spend in pursuit of your goals. Adventures ask you to solve problems woven into the fabric of a world crafted to entertain and challenge you. Strategy games' worlds are canvasses where the challenges develop organically, and if you aren't in control of the situation, then your opponent probably is. Games that pursue both aspects almost invariably favor one over the other.

The Lords of Midnight, then, favors the strategy aspect. Despite looking like a blobber CRPG, there is no individual character development, no puzzles, no mazes, and no dungeons. Even with the possibility of winning the game by commanding Morkin alone, there's little to reinforce your role as Morkin so much as that you are commanding him and ignoring the rest of your assets, and that approach seems foolish. One could reimagine this as a conventional top-down wargame with virtually no gameplay changes, making it more like Empire than Ultima. The only tangible effect of the first person perspective is to obscure information from you, though intangibly, it helps you form a personal connection to Luxor, Morkin, Corleth, and Rothron, who would are otherwise mere gameplay pieces to move across a board, and it enhances immersion. You can, for instance, make an arduous hike through the mountains, unable to see what lies beyond, until a valley opens up and the plains ahead stretch out for miles, with mysterious towers and ruins or inviting villages dotting the landscape. Or you might go into the woods, seeing only the tip of a mighty citadel poking over the canopy, spend valuable time plotting a route to it that avoids wolves, only to suddenly run face-to-face with a thousand-strong army all by your lonesome.

I still don't have a strategy for beating Doomdark, the inlay topology map of Midnight is semi-legible and woefully incomplete, showing not even one of the landmarks I encountered apart from the Tower of the Moon where you start, and I barely understood what the various landmarks even do.

But I do know that points of interest can be seen from a distance, and even in the thick of dense terrain, in your periphery, which diminishes the importance of "lawnmowing." Apart from wild horses and monsters, you're not going to get spontaneous encounters in the snow. I figured my four lords could each scout a path three tiles wide, effectively searching twelve rows of the map at a time for points of interest.

Corleth, the fastest lord, will take the southernmost lane.

I had also came to appreciate that combat in Midnight is random, deadly, unrewarding, and so far, completely avoidable, as you can easily see monsters before entering their tiles. Even Rothron, who went undefeated in my first session, soon turned out was far from invulnerable. I would ensure everyone walk around the various wolves, trolls, and dragons that festered Midnight, unless they happened to locate a magic weapon suited to the task (e.g. Wolfslayer for wolves, Dragonslayer for dragons, etc).

Right off the bat, though, I checked to see what happens when you perform a "seek" action at the Tower of the Moon.

That was unexpected. Pointless, but unexpected.

The towers, it turns out, dispense random clues, but only once and are silent after. I tried restarting the game a few times to see what this one would say, and most of the time it was just "seek the Citadel of Dawn to find Lord Dawn" and so and so. In one instance, it told me that "Logrim the Wise can destroy the Ice Crown."


Corleth, exploring southeast, found a fifth lord, "Lord Rorath," guarding a keep of 250 riders. Corleth had an action to recruit him, adding him as a directly controllable character, and he had the option to withdraw most of the riders from the keep.


Luxor and Morkin passed through the "Domain of Silence," passing by several villages and lakes, which I could find no purpose for except resting and regaining vigor. In Morkin's lane, I found a citadel with a "Lord Gard," but Morkin could not interact.

I continued exploring, sending Rorath northwest to recruit Gard. Corleth, on the southernmost lane, recruited "Thimrath the Fey," who I sent northwest to explore, and in a few days, ran into trouble.

Uh-oh.

The "think" command was handy here. Doomdark's army consisted of 160 riders, and the keep they assaulted was defended by 120. Lord Brith was there, and commanded 260 warriors, and 485 riders. I hoped Brith was still on our side. Thimrath himself commanded 400 warriors and 800 riders, but could do nothing more this day. Corleth continued eastward, where I found and recruited Lord Xajorkith at Doomdark's ultimate goal, knowing this meant military failure should one of his armies arrive at it, undefended.

The next day, Thimrath had a context-sensitive action available: "To Battle!" Before taking it, I employed "think" to see what had happened. Doomdark's army grew to 385 riders, the kee's shrank to 85, and Brith was slightly smaller at 215 warriors, 460 riders. I entered battle, and this moved Thimrath into the keep, but had no other immediate effect. Meanwhile, Rorath made it to Lord Gard's Keep and recruited him and a few hundred riders, bringing a total of eight lords to Luxor's command.

Dawn broke and Thimrath was victorious, not that the game would tell you that until you specifically query his situation with the "think" command.


Victory! But there was no time to rest; another, larger army of a thousand riders approached from the southwest, and Thimrath, being Fey, could not recruit Brith though he seemed to be friendly. Thimrath stood his ground as the rest of the lords, too far away to make a timely defense, continued exploring.

Rorath, meanwhile, encountered an army in the western mountains. His army was slightly larger, but already tired from the journey. I reluctantly sent them to battle.

The battle results - Rorath, tired and strongly affected by ice-fear, lost far more men than he slew, leaving him with 580 riders, and facing down a reinforced army of 1,715. He would need to retreat, but where? A keep to the north looked inviting, but as he approached, he saw an army of 250 warriors, plus another 50 in reserve. His men would have to earn their shelter. Gard, nearby, would approach from the west.

Thimrath fared far better, slaying nearly 700 of Doomdark's horde while losing 210 of his own, though Doomdark's somehow grew bigger, going up to 1,400 riders, while Brith's army and the keep's reserve dwindled. Once again, they stood ground.

Rorthron, still exploring his lane east, found Lord Morning under attack at his keep, with 1,300 men to Doomdark's 955, but with the ice-fear affecting him strongly, it didn't look great for him, nor for Rorthron who had no army and exhausted his turn reaching the keep. Xajorkith, though, could bring his sizable reinforcements, which brought decisive victory at Morning.


Gard's army battled Doomdark at an advantage, killing a good thousand at a loss of 300, and his survivors slightly outnumbered Doomdark's. Rorath, victorious at the keep, replenished some of his rank and took a much needed rest.

Thimrath, though, lost most of his forces, leaving only 225 riders, and Doomdark's army had grown to over 4,000 men. Lord Brith's army was annihilated. Thimrath, obviously, abandoned the keep, and Lord Brith, to Doomdark.

Corleth, meanwhile, reached the eastern edge of Midnight and started exploring north along the perimeter. Morning and Xajorkith continued to push northwest against Doomdark's army.


Days of fighting, and the armies started to falter. Thimrath died trying to take a moderately defended keep with his remaining forces. Lord Gard fell as well, for reasons I failed to keep track of. Rorath's riders were too tired to fight and had to camp outside a keep that they could otherwise storm. Xajorkith lost his entire army at Shimeril, and nearly 1,500 of Doomdark's troops remained garrisoned in or around it, while Morning lost most of his army and his nerve, rendering him and his survivors useless in battle. The war seemed to be a lost cause, but I could still explore.


I explored and diligently mapped, and in the meantime, realizing my Excel chart was basically illegible, transcribed it to a GIMP template. The keeps, once reliable outposts for recruiting more soldiers, were mostly overrun by Doomdark's hordes, and I lacked the option to fight, even when I outnumbered them. The citadel at Xajorkith fell, a victory for Doomdark, and soon after, Lord Xajorkith himself fell to an unseen enemy in the Downs of Mitharg, south of the Plains of Blood.

I gained a few allies as my mapping took me east of Xajorkith, including the barbarian king Utarg, but Doomdark's magic had grown so powerful that they were useless in combat, and only good for my mapping efforts.

My initial team of four eventually completed their lanes, and turned north, running parallel to Corleth's trail. Corleth's gait far outpaced the others, passing through the domain of Targ, the mountains of Kumar, the Forest of Whispers, the Plains of Ithril, and finally, arrived in the northeast corner of the map, the frozen wastes of Logrim, an enclave hidden through a narrow crack in an impenetrable glacier. Logrim the Wise, and the means to destroy the ice crown, presumably could be found here.

Rothron, around this time, found a clue at a tower advising that Fawkrin also had the ability to destroy the crown.

And then, sometime around Day 30, the game informed me that Morkin had been killed in the mountains of Kumar, to an army that I hadn't even seen the day before. Game over.


Victory through military might seems pretty difficult, but then, I hadn't given this approach a serious effort yet. Now that I have a better grasp on the land's layout and the locations of various keeps and citadels, if mainly in the south, I can better try to recruit forces and coordinate an effective counterassault. I don't really see how Morkin is supposed to be able to grab the crown by himself given the difficulty of knowing where Doomdark's armies are, but then again you never know until you try.


My map so far - yellow tiles indicate explored terrain. Region boundaries are approximations.

Lords are represented by letters and numbers, color coded by race, which seems to be mainly useful for determining who can recruit who. For all lords except the starting four, both starting and ending positions are present.

  • C - Luxor, exploring a ruin in Targ.
  • V - Morkin, killed in the mountains of Kumar.
  • B - Corleth the Fey, exploring a snowhall in Lorgrim.
  • N - Rorthron the Wise, exploring a cavern in Kumar.
  • 1 - Gard, killed in Ashimar.
  • 3 - Xajorkith, recruited from his citadel in Corelay, killed while passing through Mitharg.
  • 8 - Dawn, exploring the Forest of Thrall.
  • 0 - Dregrim, exploring the southern Forest of Thrall.
  • Q - Thimrath the Fey, killed defending the Keep of Gard.
  • I - Rorath, killed while encamped in the mountains outside the Keep of Gard.
  • O - Trorn, killed passing through the plains of Dawn.
  • P - Morning, passing through the Plains of the Moon.
  • G - Utarg, exploring Trorn.

Most popular posts