Friday, October 29, 2021

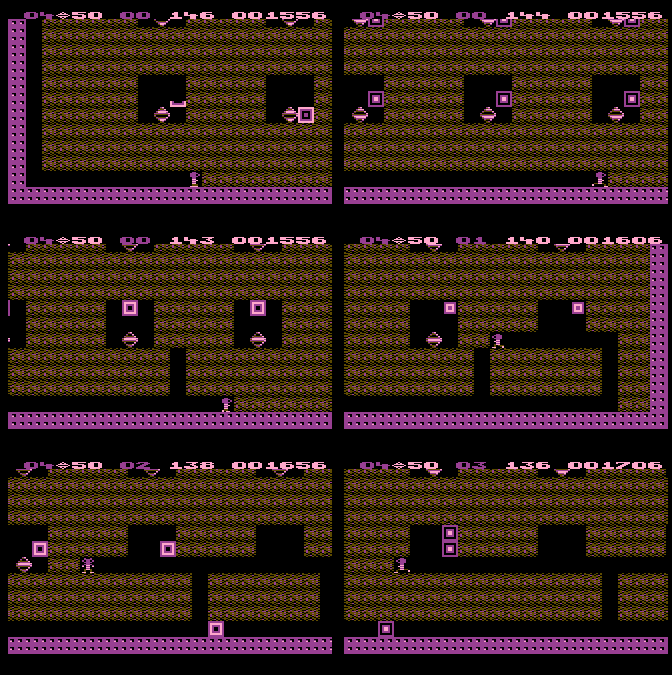
Game 293: Boulder Dash

I first heard of Boulder Dash in the mid-90's when Java games were all the rage on the Internet, and such a clone had been listed on a web ring. Ever a lover of puzzle games, this maze-digging, boulder-dropping, gem-collecting logic game grabbed my attention with its promise of creator-designed puzzles, and frustrated me with its arcade elements and chaotic yet deterministic falling boulders, but nevertheless, its manic and excessive style entertained me far more than the zen-like purity of the many Sokoban-style games available online had.

Thanks to time spent browsing Mobygames, I can better appreciate that Boulder Dash has its origins in a 1984 8-bit computer game, and thanks to DDG, I have a reason to play the original Atari version.

There are sixteen caves, designated 'A' through 'P', and following my rules permitting a save every half hour of play, I finished them all in seven segments. Sixteen levels might not sound like a lot compared to, say, Lode Runner's 150, but most of them are hard. And for reasons I'll explain later, I don't really feel like every death I suffered was completely my fault, though with practice and sheer muscle memory, I'm sure a single-segment run is doable. The game does seem to be aware of its high difficulty, and includes a level select function, so that you needn't beat fifteen levels in a row just to see the sixteenth. Unlike Lode Runner, a game that also offers one as you'd have to be insane to play it start to finish, you can't start at just any level - only caves 'A', 'E', 'I', and 'M' are selectable, and the rest have to be reached beating the preceding ones in the allotted tries. A good decision, I think, as it keeps the limited lives meaningful.


At first glance, things seems very much like Dig Dug with a character who looks like Waldo if he suffered a teleporter accident involving a carpenter ant. Its dirt-digging and boulder-dropping mechanics with a perspective that can't quite decide whether it's in profile or overhead are very reminiscent. Before long, it becomes clear that Boulder Dash is much more puzzle-oriented, and more resembles the somewhat obscure and enigmatic arcade game The Pit, whose earliest (and lost) incarnation predates all of these games.

Each level is a maze full of gems, boulders, and other interacting widgets, and the slightest dig can set off an avalanche of falling rocks or otherwise kick of a chain reaction that can totally rearrange the level layout, possibly opening paths to inaccessible veins, but may also block crucial passages off permanently, or trap you in a cave-in, or just drop a heavy boulder (or diamond, if the god of irony is bored) on your head. The physics are simple and for the most part deterministic, but it's the interactions between the many stage elements that makes it hard to predict what will happen, and challenging to find a solution.
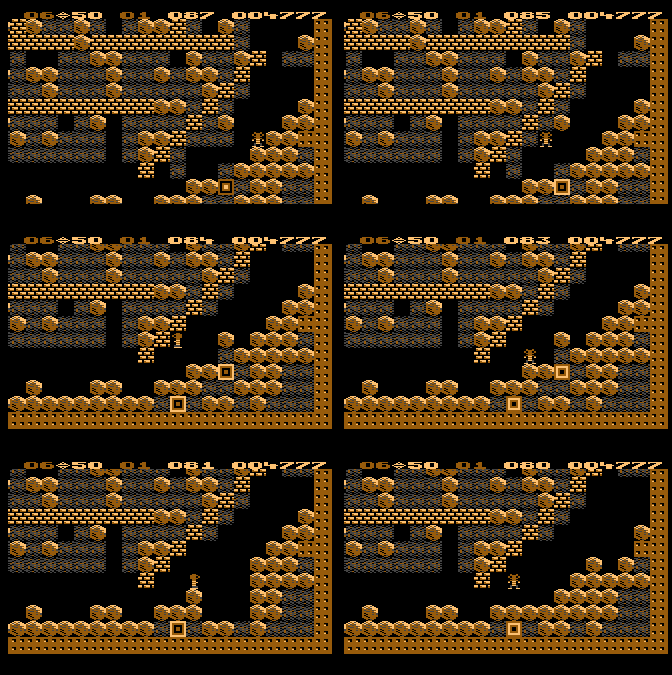
Clearing a path to the exit. It will open once I get enough gems.
 

There's an interesting comparison to Sokoban here, another tile-based puzzle game of similar vintage, and the differences are more interesting than the similarities. Both involve deterministic mechanics, creator-designed levels, and pushable objects. But Sokoban speaks to a much more minimalist design sensibility, apart from the set of levels with destructible walls (which later versions wisely removed). Sokoban, and Lode Runner too to some extent, are all about maximizing macro complexity with a minimal number of atomic building blocks. It is simple in Sokoban to predict what will happen in a single move - the challenge is predicting which actions won't screw you up several moves later, but the perfect information makes it possible.

Boulder Dash, being as far from a zen-like minimalist design as Ontario is from Japan, has as many gadgets, traps, and baddies as they could fit into the baseline 32KB of memory and often doesn't give you time to consider the full extent of what pushing a single boulder might do. Often, the affected portion of the stage is much larger than what can be shown on the screen. Making a mad dash through a gauntlet of boulders and hoping they dislodge and pile up in a favorable way is frequently a viable tactic, if you have nimble fingers.

Speaking of which, Boulder Dash's biggest flaw is that the controls can be laggy, and this got me killed about as often as my own carelessness did. Sometimes Rockford reacts immediately to your input, and sometimes you need to hold the joystick position for a fraction of a second before he acts. But sometimes he moves two spaces instead of one because, in anticipation of lag, you hold the joystick for a fraction second, and he moves immediately. It is infuriating to plan out a three-step hop and skip where you tunnel under a boulder, dig down, and move out out the way, only for that crucial last step to fail and your run ends with a rock on your head. In spite of this, doing long, serpentine dances through winding tunnels is pretty doable and responsive if you can find the rhythm - it was the short maneuvers of one to three spaces that often failed.

What I think is going on is that approximately every 150ms, the engine polls your joystick and then moves Rockford one space in the direction it is pushed. Sometimes lightly tapping the joystick moves you one space, and sometimes it does nothing at all - if you tap it for less than 150ms, releasing it just before an input tick, then nothing happens. But if you keep it held a bit longer, just to ensure Rockford does move then you risk moving two spaces in the event that an input tick happens immediately and a second one occurs 150ms after that. I believe some form of input buffering would have gone a long way toward improving Rockford's controls.

That said, Boulder Dash's puzzles lend themselves incredibly well to having a variety of solutions, and I'm sure that a skilled and dedicated player could find ones that minimize these risks and execute them reliably enough to complete all sixteen caves in a single session, if not a single life. My approach, in which I'd stubbornly stick with any solution until I made it work, would take a lot more practice and muscle memory to go start to finish like that, but nevertheless, I can't help but feel a bit angry when flawed controls get me killed.


Caves 'A' and 'B' are pretty simple - the first is a wide and linear path of dirt without too many boulders, and the second is grid of small cells, one of which holds a deadly firefly that you needn't disturb. But cave 'C' introduces a huge difficulty spike - not only did I lose my first life here, but I ran out of lives repeatedly, having to restart the game each time until my half hour was up, at which point I made my first save.


So many boulders occupying such narrow passages, and the ticking clock means you can't take your sweet time in clearing up all the maneuvering space you might want! Only 25% of the level is visible at any given moment too, so unless your visual memory is quite excellent, dislodging a set of boulders in one place could very well block off an important passage somewhere below, offscreen. Working your way from bottom to top seems safe, but there's never enough time to be as methodical as one might wish.


Cave 'D' introduces butterflies who patrol the cavern in a predictable right-hand rule pattern. They are deadly to touch but explode and release diamonds when killed. It's an easy level, though it pays to plan your moves so that the sometimes tricky input timing works for you rather than against you. Since they follow the right-hand wall, it's easier to kill them as they ascend a wall on the right than as they descend one on the left. When gathering, don't make the mistake, as I repeatedly did, of forgetting that diamonds can fall and kill you just as easily as boulders - snatch them from the top of the pile, not the bottom.


After every four caves is a bonus round, a chance to earn an extra life. This first one is a simple test of timing.


Cave 'E' reintroduces fireflies, but now you have no choice but to contend with them. Fireflies are left-hand wall followers, and explode when killed, but leave no diamonds when killed. It's not a particularly challenging level as long as you enter each pocket from the right.


Pockets of fireflies and diamonds flank a basin of dirt and boulders in cave 'F'. You've got to free at least four of them, and have a plan to kill or evade them as you snatch the diamonds and run for the exit.


As you enter cave 'G', you'll hear strange bubbling noises. This is the amoeba, which is nonlethal (to you) but will grow uncontrollably, and if it reaches critical mass, explodes into a mass of boulders. Explore as you might, there aren't enough gems to be found here to reach your quota.

The trick, mentioned in the manual, is to trap the amoeba with boulders on all sides except one, leaving a tiny opening where Rockford will be positioned. Once it grows into the entire space, it will suffocate and turn into diamonds, and you'll be poised to enter its husk and collect them.


Cave 'H' features a magic wall that transforms boulders into gems, but it won't reveal itself until you trigger it, and it doesn't last long - you've got to drop ten boulders on it and ensure there's space below for the diamonds before it reverts to a normal wall. It's an easy level when you know where it is, but the first time you're likely to trigger it by accident and then run out of time.


Cave 'I' has massive veins diamonds overhanging two big empty wells and expects you to collect a whopping 75 of them. But you could run out of time waiting for everything to drain. Be efficient and "unplug" both dirt stoppers at once.


'K' is a pretty nasty maze, impossibly dense with boulders. It takes trial and error to find a way through that gets all of the diamonds without trapping yourself.


Cave 'L' is another that you are unlikely to finish on your first attempt. If you're like me, you won't notice the hermetically-sealed rooms to the right of your starting position, and tunnel up and to the right over them. Then, when you reach the other side, and see fireflies trapped in pockets of dirt, you'll realize the real challenge is freeing them, not getting killed by them, and crushing them against the walls of these rooms with boulders. Then, if you're like me, you'll try to do that, open their prisons up willy-nilly and try to smash them with the nearest boulder, and probably fail repeatedly and get frustrated. But if you're smarter, you can make this task much easier by planning ahead.


The amoeba returns in cave 'M', and this time it hangs from the ceiling and can't be buried under rocks like before. But a colony of butterflies, if properly manipulated so that they reach it, will explode and yield showers of diamonds. Don't forget that they too can crush you.


Cave 'N' has a simple problem. Six butterflies, six boulders, each one freeing a firefly when dropped. You only need to kill four of the butterflies to get enough gems, and the fireflies can be dealt with by carefully digging mazes for them to get lost in. It's a very open-ended level that probably has a lot of room for discovering creative solutions.


Cave 'O' is the penultimate stage, and appears to be bereft of gems, until you discover that it has another one of those magic walls that turns boulders into diamonds. Once you know this, the stage isn't all that difficult - just dig plenty of space below the wall, then prime a landslide above the wall without triggering it prematurely, and let it all out - if your landslide is big enough, the magic wall should function for just long enough to transform the 15 required boulders. Just don't accidentally bury the exit under the boulders like I did.
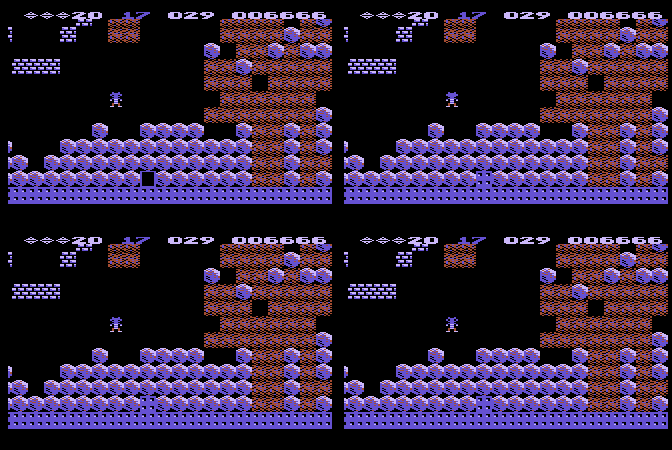
DAMNIT.

Finally, there's cave 'P,' appropriately the most difficult cave in the game.


Arghh, it's another magic wall stage! This time, you've got to dig out the fireflies, blow them up to destroy the walls so that you can get inside the two pockets of dirt, clear it out, and then quickly drop rocks onto both of them at once. There are a lot of ways you can screw it up, and once again, if getting the timing right is overly tricky, you'd do well to try to figure out another approach. I, being more stubborn than smart, figured this out eventually, but not before countless frustrating retries.


There's a bonus round afterward that plays a cruel trick with yet more magic wall shenanigans, but at this point I was past caring.


The game then returns you to cave 'A' and increases the difficulty by raising the gameplay speed and lowering your time, and this repeats up to a maximum of level 5, at which point it just loops infinitely. But I'm okay with not doing that.


GAB rating: Good. Despite my misgivings about the controls, and the sheer frustration of suffering the resulting failures, I like this game as much as its Java clones, if not more so. Puzzling out solutions was fun, executing them properly was satisfying, and aside from the spike in cave C, Boulder Dash is paced really well, introducing new concepts every few levels, building on them in subsequent ones, and ending before wearing out its welcome. I have no doubt that the included levels have only begun to explore the puzzle possibilities, which I think is proven by the sheer number of hacked pirate versions offering homemade level sets, not to mention all of its clones, of both commercial and shareware distribution.

First Star would release a level pack sequel in 1985, and in 1986, an official level editor titled Boulder Dash Construction Kit, alongside an obscure third game which featured a sci-fi setting and saw no release outside of Europe. Later releases would include remakes on NES and Game Boy, an arcade version and sequel, releases for XBox Live Arcade, mobile, handhelds, and most recently, a Boulder Dash Deluxe simultaneously released on Steam and Atari 2600, the latter in a very scaled-down but somehow functional form.

Monday, October 25, 2021

Games 291-292: First Star's first games

Coming up next in the whale watch is Boulder Dash, one of two games that its developer First Star Software is best known for. The other, Spy vs Spy, appears later the same year. This post concerns the earliest games by First Star's most directly involved founder, Fernando Herrera.

Scan by Atarimania

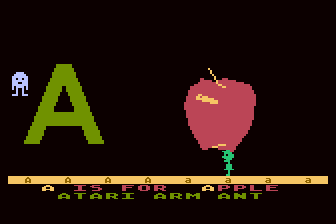
With a background in architecture and industrial engineering, Herrera was an early adopter of Atari computers, quickly learning how to write software, which he published through Swifty Software, a one-man publishing house operating as a Long Island schoolteacher's side hustle. First creating programmer's tools, and then a vector-based graphics editor, the program that caught Atari's attention and kickstarted his career was My First Alphabet, a BASIC program that he originally wrote for his 3 year old son, who had suffered from cataracts since birth. My First Alphabet was added to the APX catalog in late 1981, and won the first Atari Star Award, a quarterly cash prize of $25,000 awarded in recognition of the best submission to the catalog. With this award came publicity, prestige, more sales, and inspired the namesake of the company Herrera would soon found.

And ass-kissing.

As for My First Alphabet, there's not much point in evaluating it with a critical eye. The engine draws pictures of things line-by-line, in the same style as Sierra's adventures, and prompts you to type the letter that the thing begins with. Sometimes, instead of letters, you have to count glasses of milk and type the corresponding number key. Correct keypresses are rewarded with shows of color and music. Some children's software holds adult appeal, but this one doesn't, and I can't imagine it impressing any toddlers today.

One curiosity is that the main menu holds a "graphics editor" option, which prompts you to insert disk 2. The original release through Swifty Software would have come with this disk, and the APX catalog sold it separately, but alas, neither version has been dumped, so it remains unavailable.

My First Alphabet was re-released as a regular Atari product the following year, and this version features mostly different pictures and things - for instance, instead of an apple, there's an animated airplane, instead of counting glasses of milk, you count clowns, and the "graphics editor" option is removed.


In 1982, Herrera submitted one of his games from Swifty's arcade lineup to APX, to less acclaim, but perhaps more substance for the modern gamer to digest.


Game 291: Space Chase


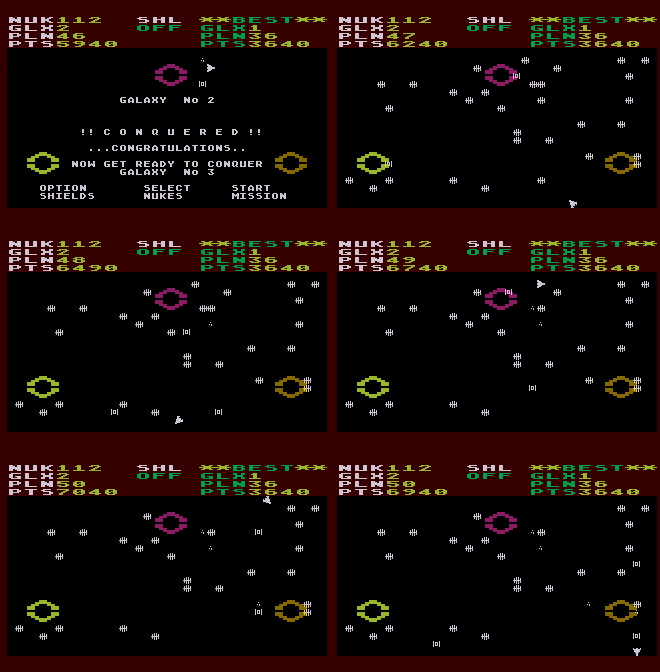
For a change of pace, your goal is to conquer the galaxy rather than to save it. To do this, you fly your ship over every planet in the galaxy while chased by pursuing TIE fighters, and if one of them touches you, then as the game says, only cosmic dust will be left. You can get them off your tail by dropping nuke mines, but they respawn infinitely. In most cases, it's better to fly off the edge of the screen and wrap around to the other side, forcing them to approach you by the long route. Planets may also be destroyed by accidentally or purposefully allowing TIE Fighters to fly over them, which removes them from the screen but also denies you points for conquering them.

In between levels, you can restock nukes, setting your stock to either 125, 25, 5, or 1, but I can't see much reason why you'd want to set it to anything but 125, even if they aren't all that useful. You may also turn your shields on and off, but all your shields do is protect you from your own nukes, while also cutting your points earned in half. I don't think I ever touched my own nukes even once.

GAB rating: Below average, and that's generous. Space Chase is amateurish stuff, too simple to sustain interest for long, and looks and plays pretty rough. But I've seen worse, even from professional channels.


Later that year, Herrera partnered with Hollywood producers Richard Spitalny and Billy Blake, and founded First Star Software, a name referencing Atari's Star Award.


Game 292: Astro Chase


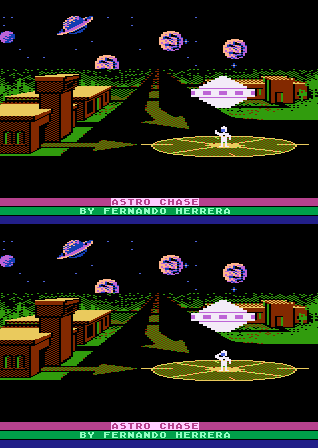
SINGLE THRUST PROPULSION could cause a minor revolution in programming video games and computer games, boasts the back of the box. What does it mean? It means you can move in one direction while shooting in another, but it also means you have no way to make your ship stop moving, ever. Robotron: 2084 did the same thing much more elegantly the same year, and didn't feel the need to self-aggrandize the feature or even call attention to it, simply allowing the dual joystick' labels to inform you of their respective purposes.


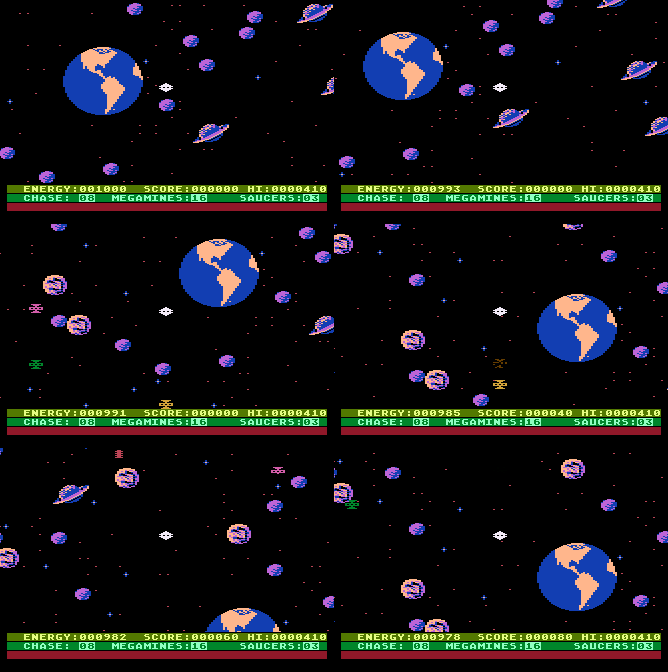
Astro Chase certainly looks nice, anyway. You couldn't beat the Atari for color depth until several years after its release, and Herrera puts it to good use in a way that isn't comparable to anything I've seen from its era, even in arcades. Cut-scenes in between sets of waves return you to earth, where ticker-tape parades may or may not march in your honor, depending on how far you get.

The game plays like a multi-scrolling but otherwise simplified Defender, where you have to protect the earth from 32 waves of Mega Mines and increasingly powerful interceptors. You can start on any wave from 1 to 24, but if you really want to win, you'll need to start on the easiest rounds to rack up as many extra lives as possible. That said, if even one mine gets through, the earth is destroyed and you lose them all.

Navigating the stage can be pretty frustrating, as an invisible force-field keeps you from straying far from earth, which is a good thing, but the fact that it's invisible means you get bounced back without warning while trying to pursue a mine just out of reach. Equally frustrating are the difficult to spot stars, which serve as obstacles even though perspective rules would dictate that they are several astronomical units away from the plane of action.

Energy is limited but replenishable in a suitably annoying way - refuelling stations placed in the far corners of the playing field mean you risk Terran annihilation by merely visiting them, and the longer you stand by, filling up your reserves, the more you risk the earth's destruction in your absence. Better to refuel at the end of a wave when there's only one mine left and you have some idea of where it is. You can get virtually unlimited energy, but one hit from an enemy and you lose it all except for the standard 1000 units that you'll always spawn with.

GAB rating: Average. Ultimately, Astro Chase didn't entertain me nearly enough to stick with it all the way to the end, and the twitchy controls and odd gameplay mechanics made for a bit of a learning curve, but I did have some fun for the brief period of time between getting its controls and exhausting its gameplay possibilities.


Coming up next is Boulder Dash, the first game of 1984 that I'm genuinely excited to play for the first time.

Sunday, October 17, 2021

Games 289-290: Lancaster & Will Harvey's Music Construction Set

Likely thanks to the fact that Electronic Arts, much like Microprose to Sid Meier, plastered his name on the boxes of nearly all of the games he designed, I recognize Will Harvey's name and can list most of his works (The Immortal, Zany Golf, Marble Madness C64, etc.), but until now I haven't played any of them.

This post is about his first two games; Lancaster, which he developed independently at the age of 16, and Will Harvey's Music Construction Set, which he made the following year for EA, becoming one of their biggest hits of 1984.

Game 289: Lancaster

Why "Lancaster?" I don't believe this game, ostensibly a Galaxian-style shooter, has anything in particular to do with any real-world municipality called Lancaster, nor the English dynasty, or any of the ships, aircraft, weapons, or sports teams named after either of these things.

The premise - strange, bubble-blowing bugs invade the earth, and you shoot lasers at them. These bubbles, colorful and deadly to the touch, bounce around the arena and will eventually hatch into more bugs, and there's nothing you can do to prevent this, though you can control this somewhat by shooting at them yourself to force them to hatch one at a time, so that you don't have to deal with a dozen hatchlings all at once. There's also a color-based metagame where you can destroy the colorful bricks below you by dropping the corresponding bubble on top of them, and be rewarded with an extra ship each time you clear the row, but it's hard to do this while dodging bugs, and the controls involved are clunky.

I made it to level 7 before losing my last life. The below video starts at level 6 so as not to bore you to death with the easy starting levels.


Lancaster is best played in MAME for its superior joystick support, but as of this writing, MAME corrupts the WOZ file whenever it tries to save your high scores. When you play with a corrupted WOZ file, the game freezes when it reaches the high score screen. So keep a backup.

Tech-wise, Lancaster moves at a decent framerate and speed considering the platform. At roughly 15fps, it's hardly on par with Atari or Commodore 64 games, but for arcade action on the Apple II, this is about as good as it gets. Weirdly, there appears to be some sort of tile-based attribute clash going on when the bubbles overlap each other, even though this isn't an Apple II hardware feature! Lancaster also features ingame music through Mockingboard support, which is something I've never seen before outside of the Ultima series. And it's also one of the few games I've seen to support analog joystick input, though the execution leaves something to be desired.

The controls in general are a bit strange. I've seen worse, but these aren't great. First of all, the joystick doesn't even register until you press the fire button once, which is a bit confusing if you don't know this and are just trying to start the game, and wonder why your ship won't move. Analog movement feels pretty choppy when you aren't pushing the stick all the way in a direction, and the deadzone where you don't move at all is huge, while the zone for moving but slowly is small and unstable-feeling. It winds up feeling more like having a 16-direction stick than true analog control.

The secondary fire button is used to grasp the bubbles, which is useful not only for breaking bricks below but also for lifting and bouncing them so they can be shot at from underneath. The controls for this are very fiddly and make it nearly impossible to grasp them while moving, even though this is clearly meant to be possible. The timing window for grabbing them is measured in frames, your position must be exact, being just a little bit off can cause you to collide with the bubble instead and kill you, and you must resist the urge to hold the secondary button and just lightly tap it instead, because the joystick stops responding when it is held down.

The row of bricks can also be moved, but this too is quite unintuitive to execute, and I rarely bothered except for when all of the bugs onscreen were dead. By holding and then releasing fire, the bricks will follow the horizontal direction of your joystick. Firing again will release them from this mode, and if they're moving when you do this, they'll continue moving at the same speed and direction. It doesn't feel very natural, and it's not something you can easily concentrate on while avoiding bugs. I'd mostly focus on this task once there was nothing left on the screen but bubbles.

GAB rating: Below Average. Lancaster is a poor man's Galaxian with weird controls and gameplay gimmicks that don't mesh well.


Game 290: Will Harvey's Music Construction Set

Not a game in the conventional sense, Music Construction Set was, like many of the most successful computer software products, conceived as a bespoke solution to a problem that its own programmer faced rather than as a consumer-facing product. Harvey's problem was adding a score to Lancaster, and for that purpose developed a tool to transcribe sheet music into the computer, along with code to play it back without consuming too many of the precious CPU cycles needed for gameplay.

When Electronic Arts contracted Harvey, they were more interested in this composition tool than the game it was meant for, and after their usual supervised dotting of the i's, crossing of the t's, outsourcing conversions for Atari, Commodore, and IBM computers, and packaging it in an album-style slipcase, Will Harvey's Music Construction Set became one of their biggest hits of the year.

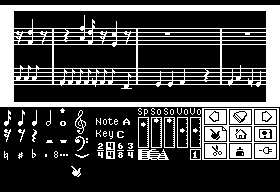
MCS for Apple II doesn't really use color and looks better in monochrome.

The end product is a mouse-driven, WYSIWYG product very much on-brand with Pinball Construction Set, acquired and published by EA the previous year. Notes and rests are dragged onto the two staff lines, which by default represent treble and bass piano, and a third row of accidentals, dots, ties, and octave brackets modify your pitches and durations. Further controls adjust your song's time signature and key, and slider bars adjust its tempo and the individual volumes and instrument samples for the two staves. The manual expects that you understand musical staff notation, but offers a pretty decent introductory lesson on music theory, explaining not just what each component does, but why it's there and how you'd want to use it.

Emulation, unfortunately, is a bit of a problem. Only MAME currently emulates the Echo II+ sound card needed for six-voice output and Apple mouse, which were unusual peripherals for the system, but MAME still has a tendency to freeze up when accessing Apple II disk images. AppleWin is stabler, but you'd be limited to Mockingboard sound and keyboard input.

As with Pinball Construction Set, MAME ate my work before I could complete it, but I got some footage of the construction set in action building my unfinished bagatelle. Jump to the last 30 seconds of the video if you just want to hear the product in the state as close to complete as it got.


In addition to Echo II and Mockingboard support, which allow six simultaneous voices over two instruments, MCS can also play on an external stereo system by using the computer's cassette port, but the sound quality is quite lousy and limited to four voices. The Apple buzzer can be used too, but this is also limited to four voices, and display won't scroll during playback as the computer's CPU time is wholly consumed by the playback process. MCS can also print out your sheet music if you have a supported printer, but printer support is limited to a handful, none of them especially common for Apple users to own.

Included on this disk as sample scores to listen to and tinker with are:

  • Scherzo from Mendelssohn's Midsummer Night's Dream
  • Pachelbel's Canon
  • Flight of the Bumblebee
  • Bach's Two Part Invention No. 8
  • Mozart's Piano Sonata No. 6, Allegro D Major movement
  • Turkey in the Straw
  • Tears on my Apple, an original by EA composer Douglas Fulton
 

I won't give this one a GAB rating, as not being a game it defies that kind of quantification, but nevertheless, this is a solid and impressive product for its time, with an elegant and intuitive interface and quite a bit more power and flexibility than you'd probably think was possible on a 48KB computer. More than that, it's fun.

Friday, October 15, 2021

Sorcerer: Won!

During my first session of Sorcerer, I had learned of Belboz's mysterious disappearance, and magically traced his location to a dangerous world across the ocean, over the ruins of a previously unseen portion of the old underground empire. I had mostly mapped it out, but had few clues on where to find Belboz, or on what challenges had to be completed.

In my inventory, I possessed:

  • Belboz's journal
  • A magic amulet, attuned to Belboz's location, glowing faintly
  • The amulet's jewelry box
  • A small key which had unlocked the journal
  • An issue of Popular Enchanting magazine
  • An orange vial containing a vilstu potion, which obviates the need to breathe
  • A light-emitting calendar for the year 957 GUE with postcard pictures of the empire
  • My spellbook


My spells were:

  • Gaspar - self-resurrection
  • Meef - wilts plants
  • Gnusto - inscribes scrolls into the spellbook
  • Vezza - view the future
  • Pulver - dry liquids
  • Izyuk - fly
  • Yomin - probe minds
  • Rezrov - open locks
  • Frotz - illuminate
 

In the deadly arrival area that had been foreshadowed by the prologue dream, I used Pulver to vaporize the river. This opened up a path to a cave, but in accordance with Sorcerer's cruel nature, you get one chance to wade through the correct path in the river bed - go through a wrong direction or just stand there looking and the river will return and thrash you against the rocks. Gaspar won't do any good either - return to the river bank again and it will give way each time, dumping you in.

The hidden cave past the river contained a pile of bat guano, a "fweep" scroll to turn into a bat, and a "blort" potion to enable sight in dark places - seemingly redundant with Frotz, but perhaps it would be useful in a situation where conventional magic is unavailable. A hole here dropped down into the castle's dungeon, from which I could exit into the underground.

Previously, I had mapped out a 3D maze of invisible walls and deadly drops, and been stuck near the end of it by a shaft too high to ascend with my Izyuk spell, but Fweep, it turns out, lasts much longer, and also allows you to "see" the walls of the maze by sonar. I'd find that clever if I hadn't already wasted so much time mapping out the maze with no knowledge that the Fweep spell even exists. The downside is that you must leave your inventory items behind as a bat, but you can memorize multiple casts of Fweep ahead of time so that it can be cast without your spellbook. That said, if it wears off when you're in a room with no floor, and it will wear off without any warning, you'll die.

At the end of the glass maze, a "swanzo" scroll awaited near a hole, which I dropped it down, as the bat can't lift it. This triggered something in the maze that caused the panels to rearrange themselves, and as I entered to re-map its new layout, a slavering dorn beast chased me through! Thankfully, the rooms without floors are just as deadly to it as they are to you in your non-bat form, and the chase was very soon cut short when it followed me into one.

Back at the entrance, I collected my stuff as a human and went into the stone hut, where the swanzo scroll lay in the chimney. Bearing the description "exorcise an inhabiting presence," I Gnusto'd it into my book.

Now, what can I exorcise? My first thought was, maybe whatever keeps me from searching the cannon in the fort could be exorcised. It couldn't, but then I had the bright idea to drop the pile of bat guano inside, which worked just fine as an exorcising agent. I found a single-use scroll of "Yonk" inside, which augments magical power. I also realized that although I could not climb the flagpole in the courtyard, I could lower the flag, which concealed a "fooble" potion for enhancing strength. But I couldn't leave alive - the only way back was past the river bank, which now gave way whenever I set foot there. Then I realized, Izyuk would let me pass without actually setting foot there.

I went to the theme park, which I could enter by taking my Zorkmid back from the sleeping gnome, and drank the fooble potion to let me win a ball toss game on the midway. This earned me a scroll of "malyon" to give life to inanimate objects. I tried using it on the dragon carving, which reacted slightly, so I tried again, yonking it first. The carving came to life and moved out of the wall, revealing a passage!

Past the carving room, a coal mine opened up south to a lagoon, where my meef spell made vegetation recede, opening a path to a lair of mutant grues who feared no light. Diving below, I found a grue repellent kit, but this ruined my spellbook. Clearly this was an endgame area, and my amulet was pulsating. Continuing to explore, I found that past the grue lair, three ornate doors led to three different dooms. Belboz himself napped behind one, and exorcising him would cause the demon possessing him to take my body instead. The other two led to voids of eternal torture.

Reloading to the coal mine, I sucked down my vilstu potion for breath, and a stranger - meant to be me in the future - burst into the room through a coal chute and told me "the combination is 257." This unlocked a combination locked door to the mineshaft, and to a familiar puzzle of years past.

Here, a mini-MOTLP looped up to the top of the coal chute, where I could slide back down to the start, but just as in MDL Zork, a rope found here, when secured to a timber placed at the top of the chute, can be climbed down into an eerily lit room halfway down. If I'm not mistaken, this is the last puzzle from MDL Zork that had not been recycled into a commercial microcomputer game. The prize this time is a time travel scroll, which when cast, subtly changes the room and results in a "vardik" scroll being hidden in a kerosene lamp, which shields your mind from an evil spirit. However, no objects may be taken into the past this way, and you need your spellbook.

The solution, of course, is to give it to your future self, then do the time warp, get the vardik scroll, and after meeting your past self, give him the combination and get your spellbook back. Figuring that out was easier than executing it, as the vilstu potion seems to expire, and your immediately after, in exactly as many turns as it takes to perform all of these actions.

With this vardik scroll acquired, and with my knowledge of what lay ahead in the lagoon, I made through the grue lair, into Belboz's room, and exorcised the demon with its protection.


>swanzo belboz
A wispy translucent shape rises from the body of Belboz. It speaks in a voice so deep that your whole body seems to hear it. "Foolish Charlatan! I am forced to flee that weak, old body -- I shall take your own, instead! Already I have sucked all knowledge, all secrets from that ancient Enchanter. Now begins an epoch of evil transcending even your worst nightmares; a reign of terror that will last a thousand thousand years!" The shape blows toward you on a cold wind.

Jeearr surrounds you like a cloud and begins to contract. Suddenly, it strikes your invisible protection and recoils as if burned. "No!" it cries. "Such a guileless Enchanter developing a mind shield?" The cloud is thinner, the voice fainter. "It cannot be! I cannot survive ... without a host." The demon roils in agony, then thins and dissipates. There is a final scream of pain, then silence.

Belboz moans softly, and begins stirring. He sees you and rises, instantly alert. After posing a few well-chosen questions, he casts a brief but unfamiliar spell.

An instant later, your grue suit has vanished and you are standing in the Chamber of the Circle. The Circle of Enchanters is assembled. Belboz speaks. "Once again, this young Enchanter has done a matchless service to the Guild and to the entire kingdom, displaying resourcefulness and imagination worthy of the greatest of Enchanters. I grow old, and must soon step down as Head of the Circle. But let it be known that a successor has been found."

Your score is 400 of a possible 400, in 450 moves. This puts you in the class of Leader of the Circle of Enchanters.

Here ends the second chapter of the Enchanter saga, in which, by virtue of your skills, you have been appointed as the next leader of the Circle of Enchanters. The final adventure awaits you as the Enchanter series concludes.

You hear a distant bellow. "What happened to my morgia plant?"


GAB Rating: Average. Sorcerer's missing something. Overall it works as a game and features some decent puzzles, although the portions inclined to kill you arbitrarily and frequently got tiresome, and the inclusion of the Gaspar spell to resurrect yourself is rarely more convenient than simply reloading a saved game. The potential to have to restart the entire game because you didn't send for a promotional Vilstu potion at the very start, not needed until nearly at the end of the game, also feels pointlessly cruel, and I'm glad I had that puzzle incidentally spoiled for me as I looked up the solution to another one. Sorcerer also goes way overboard on the red herrings - Rezrov, Yomin, and Blort seem to have no purpose whatsoever.

But I think what really holds Sorcerer back for me is the plot and worldbuilding, which I found completely forgettable, certainly not up to the atmospheric qualities of Enchanter and Zork III. Coming from Planetfall, where Steve Meretzky broke ground in in-universe storytelling, it's a disappointment that Sorcerer's world, apart from the small Guild of Enchanters area, serves no kind of lore purpose, existing solely for the purpose of containing traps to avoid and puzzles to solve, and that nothing of any plot significance happened in the game except for your fast track promotion - Jeearr is just another foozle that needed killing.

Sorcerer's fine, but lacks that special magic, and that combined with its more irksome tendencies make it a lesser Infocom title in my book.


My Trizbort field map:

Wednesday, October 13, 2021

Game 288: Sorcerer

Read the manual here:
 
Get Frotz (if native Windows execution is your wish) here:
http://www.davidkinder.co.uk/frotz.html
 

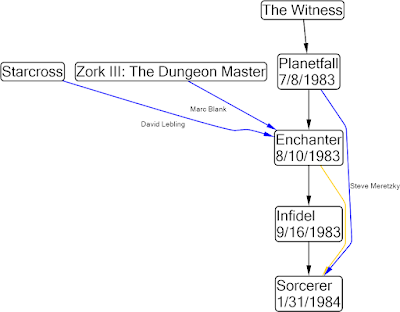
Infocom was just as prolific in 1984 as they were the year before, releasing five new games in their usual assortment of literary styles, starting with Sorcerer, the follow-up to 1983's Enchanter and informally the fifth game in the Zork saga. Sorcerer was also their first to run in MS-DOS; prior games ran on PC as self-booting floppies. Mark Blank and Dave Lebling, the chief minds behind Zork and Enchanter, wouldn't be involved this time, but handed the reins to newcomer Steve Meretzky, who proved his talent for writing and worldbuilding with Planetfall the year before.


The manual, taking the form of an issue of in-universe Popular Enchanting magazine, is disappointingly light on plot material compared to the goodie-filled folios of games past like Infidel's letters and Planetfall's recruitment brochures. Apart from a short cover story that recaps the plot of Enchanter and notes Belboz's rumored retirement, and a few ads at the end, it's all gameplay instructions, re-using Enchanter's D&D-like magic system in which spells must be memorized from your book, Gnusto transcribes lesser scrolls into it, and the more powerful spells are a one-shot deal. Potions, it's noted, play a greater role here.


Sorcerer opens with a nightmare of being chased in the woods by a hellhound. I climbed up a tree to get away, only to be eaten by a boa constrictor, and then woke up in bed at the Enchanters' Guild, where the game began proper.

Frotzing my own spellbook so it could illuminate my darkened chambers, I began exploring and Trizborting. A note outside the room explained the absence of my fellow enchanters, and noted the unexplained disappearance of Belboz. In his quarters, opposite mine, his parrot alerted me to a hidden key, which I found behind a tapestry. To the north, the Chamber of the Circle's walls were engraved with the guild's code. To the south, the Frobar and Helistar's chambers were sparse except for a scroll of Gaspar, a spell of self-resurrection.

Before long, the game told me I was hungry and thirsty, and soon after the doorbell rang. A magazine had been dropped through the mail slot in the lobby, south of the main hallway. I then passed out from hunger and died, and though the Gaspar spell resurrected me, I was still hungry and immediately starved to death again. I think that of all the gameplay conventions that died out with the commercial text adventure, the need to eat and drink (and the related trope of needing to find fuel/batteries for your light source) are the ones I miss the least.


Restarting, I survived the initial nightmare a bit longer by running from the hellhound, but got hit by lightning a few turns later. I searched Belboz's room more thoroughly, finding inside his desk, a small jewelry box with a magic amulet, an "infotater" - a copy protection wheel, and a locked journal which could not be opened with the key nor a rezrov spell. As I searched, the parrot's squawks suggested some struggle between Belboz and an unknown assailant.

East of the lobby was the library, where an unlisted variety of subjects may be studied, and a "Meef" scroll for wilting plants lay in the dust. I cast it on a huge plant in Belboz's quarters, where it worked, but to no obvious usefulness. And I starved to death again.


Restarting again, this time I took a different path out of the nightmare woods, and then stepped on an active landmine. Much like real life, you're just not getting out of this dream alive. This time, though, I found the guild store room, where a potion permanently alleviated my hunger and thirst. In the cellar below was a trunk with four colored buttons, a puzzle I was certain needed the infotater in order to solve but lacked its cipher key. A magic nymph in the lobby prevented me from leaving, warning me that I was the last enchanter here.

I did start to tire while mapping out the guild, so after completing the map, I went to bed, and then a menacing, unidentified wizard burned down the place, told me I'd never rescue Belboz, and transported me to a "chamber of living death" where flesh-eating beetles ate my face for all eternity.


I needed a walkthrough, and found two things I missed. The first, less immediately useful note was that a depleted matchbook found in the store room, which I assumed was a red herring since enchanters use Frotz for light, can be mailed in for a free Vilstu potion, which lets you survive without breath. The second was that Belboz's journal is, in fact, opened with his key. "Unlock journal with key," which is what I had tried, does not work, but "open journal" while carrying the key does. Arghh!

The journal's contents, we're told, are mostly bookkeeping and meeting minutes, but the final entries concern an ancient force of evil known as Jeearr, which Belboz had been researching in secret, and soon give way to an unreadable demonic script. Finally, the inner cover revealed the cipher key needed to turn the infotater to the color combination needed to open the trunk in the cellar. This contained a one-use teleportation scroll, which I invoked to get to Belboz, or at least as close to him as its magic allowed.


It brought me to the woods from my dream, where, as before, a hellhound was chasing me. Here, the game world truly opened up, though the immediate surroundings were, also as in the dream, quite lethal. The deadly boa constrictor waited up in the trees, an impassable minefield stretched up north, and a venomous snake pit descended below. To the east, locusts could be seen across the horizon on a meadow, which would eat you if you lingered. North from there, a treacherous river bank will give way into the rapids if you walk the muddy path too much. East of the meadow, a rotting drawbridge to a castle drops you into the predator-filled moat if you attempt to cross once too often.

After charting the initial few rooms, the world mellowed a bit, and I was able to chart out much of it.

  • The drawbridge leads to an ancient ruined castle, whose main feature seems to be a dungeon complete with a torture chamber and oubliette, which is entered from below and whose pit above is tantalizingly out of reach, even with flying magic active. The torture chamber offers the chance to be (non-fatally) tortured by a troll, and a crevasse in the dungeon floor leads downward to remnants of the old underground empire.
  • Continuing past the riverbank leads to a small fortress with a barracks, armory, and battlements facing the sea. A flagpole in the courtyard explicitly suggests it can be climbed, and yet it cannot, telling you the practice is out of fashion if you try. Two scrolls can be seen inside a cannon here, but an unseen stinging pest kept me from reaching inside to take them.
  • Descending past the snake pit into the darkness below heads through a slimy room and into a crater, which can be climbed out of in multiple directions.
  • West of the crater, a chasm can be crossed with flight magic, leading to a magic tree that bears a single zorkmid coin.
  • South of the crater, a winding tunnel opens up to a cul-de-sac featuring an engraving of a dragon, and branches to a theme park, where an entrance fee of your one zorkmid grants access to its attractions - a haunted house, log flume, roller coaster, arcade, and casino.
  • East of the crater, a bending passage links up with the caves below the castle dungeon, and continues to a toll gate, which also requires a zorkmid to pass. Beyond - I had to load a saved game to get my zorkmid back so I could enter - is an abandoned appliance store with nothing left but a floor waxer, a stone hut with a conspicuous fire place, and a glass arch leading to a multi-room location called the Glass Maze.
 

The Glass Maze is a rather frustrating MOTLP. On one hand it's not so terribly designed - the passages do not twist, and only orthogonal direction are used. But the walls are glass, and there's no way to know what the exits from any given room are except to exhaustively bonk into each wall of each room. What's even worse is that some of the rooms have no floor, and walking into them causes you to fall and die. You've got to have a flight spell active - and they don't last long at all - to survive, and even then you've got exactly one turn to either descend or pick a valid exit (and it's anyone's guess).

But the worst part is the rooms with no ceilings. You've got to check each one by learning the flight spell, casting the flight spell, and flying upward. If there is a ceiling, you smack into it. If there isn't a ceiling you ascend a level, and then you have to guess which direction is an exit. Guess wrong and you smack into a wall, and then your spell wears off and you fall and die.

I mostly mapped out the maze - it's a 3x3x3 cube, but I couldn't quite reach the top-northeast corner of it where I presume the exit is, as this room exists at the top of two cube-heights up from the bottom floor, and your flight spell doesn't quite last long enough to go that high.

With 83 rooms mapped out and a sense of the world and its challenges starting to take form, I picked this as a stopping point for now.


My Trizbort maps (so far) - 

Guild Hall:


Field:

Tuesday, October 12, 2021

Game 287: Tennis

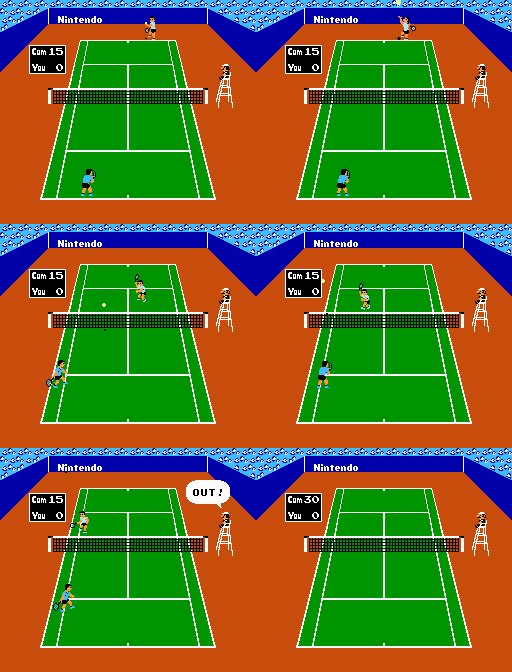
On the face of it, Tennis seems like an ideal fit for the Famicon's early capabilities. You've got two controllers for two players, a d-pad for moving around the court, two buttons for hits, a single static playfield, and a computer to automatically referee and keep track of the needlessly obtuse scoring rules. With Shigeru Miyamoto at the helm, whose dedication to ensuring perfect controls borders on obsessive, what could go wrong? Nintendo's Tennis seemed well positioned to take Pong into the next generation with greater realism than past consoles could afford.

Well, the first sign of trouble came from reading the manual.

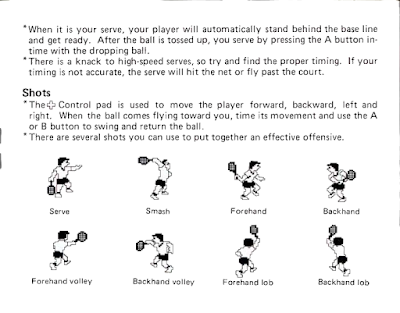
It outlines eight types of shots, but doesn't tell you how to execute any of them! A swings, B lobs, but you're on your own figuring out anything more granular than that. In several sessions against the computer, I never completely figured out what controls shot type, or how to manage aim and power.

This. Always. Happened.

There's also no way to play a vs. match against a human opponent, which seems like a huge waste. The only two-player option is a doubles match against an AI team.

I played a few doubles matches with "B," who plays tennis in real life, and neither of us could figure out how to control the ball. The recorded session is a nearly point-free game in which we lose 12 for 12 games.


"D", also a tennis player, tried and raged at the game. "I can't control where the fucking ball goes," she belted after losing a set six for six, before spiking the controller into the recliner.

GAB rating: Bad. Tennis was a frustrating experience that didn't result in any fun for any of us. If something as basic as how to aim the ball is neither self-explanatory nor can it be explained in the manual, then something went very wrong in the design phase. Pong managed this over a decade earlier, on a controller without any buttons!


Curiously, the arcade port Vs. Tennis, released in the U.S. just a few months later (arriving here long before the NES), absolves much of my misgivings about the Famicom original. It's still not clear to me how controlling the ball works, but however it does, the model just seems to be more forgiving, as more often than not, the ball went more or less where I wanted it to go. It also adds a two player vs. mode, and even a four-player doubles mode, and also adds a female player model. Annoyingly, though, but necessarily thanks to the arcade format, losing three games gets you a game over. In a multiplayer vs. match the losing player can insert more coins to continue or allow the AI to take over, but in a solo match against the AI this isn't an option.

Saturday, October 9, 2021

Games 285-286: Minky Monkey & Tag Team Wrestling

Technōs Japan is best known in the U.S. for the Double Dragon series and River City Ransom, and not much else, though I personally have fond memories of Crash 'n the Boys Street Challenge. Founded in 1981 by Data East members, their earliest whale, Tag Team Wrestling, is preceded in 1982 by Minky Monkey, a title so obscure that Mobygames has no record of it.

Game 285: Minky Monkey


I guess everyone had to start somewhere, and Technōs started off with this strange little Donkey Kong Jr. knock-off where your character looks like an eternally screaming bomb and has to follow a monkey's directions while another monkey tries to screw you up and/or kill you, much to the first monkey's delight.

At the top of the screen, the first monkey scribbles orders like "🍎 BRING UP" and "🍋 BRING DOWN" and you just have to make your way to the indicated fruit and bring in in that direction before the other monkey reaches it first. Sometimes you'll realize that you have no chance of beating him to it - if he has a head start, it's often impossible to, but that's okay as you can fail up to four times per stage without penalty.

And I don't know what else to say here, other than that I encountered a bug, seen around the 5:00 mark in which I jumped to a climbable pole and got stuck in a walking animation instead of a climbing one, clipped to the other side of the screen, and died. That was the first gameplay session I bothered recording, and I didn't bother trying to replay or improve on my score.

GAB rating: Bad. Minky Monkey is weird, but it isn't particularly interesting, or any fun.


Game 286: Tag Team Wrestling


Not featuring: Franz Liebkind, King Hippo, Hägar the Horrible, sunburnt Grimace, Party City Dracula, or Billy the Kid.
Scan provided by FlyerFever.
 

Tag Team Wrestling holds the distinction of being the earliest wrestling video game listed on Mobygames.

I don't really get wrestling games. Maybe they make more intuitive sense to players who actually watch it, but my limited experience with such games has always more or less been pressing random buttons, which sometimes did a move on my opponent, and sometimes did nothing, with no clear feedback mechanism to tell me why one player "wins" a particular grapple or not, or why I'd want to use any given move over another.

Such was my initial experience with Tag Team Wrestling, in which at first, just figuring out how to do moves at all was a struggle. Sometimes after grappling, the word "NUTTER" would flash on the screen and I'd put him in a headlock. Most of the time I'd just get thrown against the ropes and drop kicked on the rebound. Sometimes I'd get thrown out of the ring, where a turbaned man would sometimes throttle me with a cane, and if I was lucky, I'd be able to climb back in before time ran out, or if I wasn't lucky, get slammed into the post repeatedly by an ornery heel who doesn't give a damn if we both ring out together.

But eventually I figured out Tag Team Wrastlin's game, and found it to be pretty easy to win, at least until later matches where it becomes basically impossible.


Tag Team Wrestling can be played two player as well, but not exactly simultaneously - it simply means control is given to player 2 whenever you tag in your partner. I did play a few rounds with "D" this way, but she didn't pull off any moves other than headlocks, and generally didn't attack aggressively enough.

The rule for grappling is is that if your arms are up and his are down, you may execute a move. Otherwise, it's the heel's move, but you have several seconds to break the grapple first. However, if you don't grapple for awhile, the heel will turn red and charge at you with an unbreakable grapple.

The timing on the arms is hard to anticipate, but it's not really necessary. Just be aggressive so that you don't trigger red mode - if you hear a beep it means the grapple was successful and you should select a move. If not, just back off and immediately try again until you succeed. With this strategy I was nearly invulnerable until about the tenth round, when the heels turn red so fast that you don't really have a chance of beating them.

The move selection part is very awkward - it's a menu-based interface where you cycle through a list of moves with the secondary action button, and execute with the primary. If you execute a W. Lariat, for instance, you must tap the second button eight times and the first button once, and you've only got three seconds to do it. It's awkward, but reliably doable with practice.

I did some analysis to figure out what moves are worth using - everything that follows is an educated guess about the inner workings of the game.

  • You and the masked heel both have 16 stamina points.
  • The fat heel has 15, but is invulnerable to the heavier moves and will counter you right out of them.
  • When a heel's stamina drops to 5 or below, he'll try to tag in his partner.
  • Each time a player is tagged in, they start with two points less stamina than before, down to a minimum of 8.
  • Pins are only successful if the wrestler's stamina is reduced to zero.
  • The rear drop automatically pins the masked heel if his stamina is 4 or less.
  • The cobra twist is a submission hold and will be successful if the masked heel's stamina is 4 or less.
 

The move list - each move costs you stamina to execute. Heels expend no stamina to do moves on you.

Move Cost Damage Points vs.
masked heel
Points vs.
fat heel
Reversal
Nutter 2 2 200 300 No
Kick 2 2 200 300 Yes
Straight Jab 2 2 200 300 No
Karate Chop 3 2 200 300 No
Drop Kick 3 3 500 700 Yes
Body Slam 3 3 500 700 Yes
Rabbit Killer 3 3 800 900 No
Pile Driver 4 4 700 50 No
W. Lariat 4 5 1000 50 No
Brain Buster 4 5 800 50 Yes
Rear Drop 4 5 600 50 Yes
Cobra Twist 4 2 600 50 No
 

So the optimal strategy? Use a reversal move to get the masked heel on the left side of the ring so that he can't tag in his partner, and then two more heavy moves, followed by a cobra twist. For the fat heel, use one reversal and four Rabbit Killers instead, and then pin. The only challenging part is selecting the move.

There's one big gotcha - I never found a way to reliably survive being thrown out of the ring, to the point where if I accidentally threw my opponent out, I'd just let them climb back in. It seems that outside of the ring, your opponent gains super powers and will easily lock you into a chain of unbreakable grapples, trapping you in the corner until time runs out. A mutual ring out is still a game over for you. You can also pull off some devastating moves outside the ring, but the risk of suffering a corner trap is just too great to be worth it. And incidentally, this is how almost all of my games ended.

GAB rating: Below Average. Tag Team Wrestling was kind of fun for a little bit, but with puddle shallow mechanics hidden behind layers of obtuseness, there's no lasting value. Time will tell if later, more sophisticated wrestlers appeal to me any better.

Wednesday, October 6, 2021

The Black Onyx: Won!

There's a neat little trick in The Black Onyx that I discovered at the eleventh hour, which exists as a consequence of the ability to save anywhere you want, and allowed me to finish The Black Onyx without grinding further levels on a floor that was simultaneously too dangerous to survive and too stingy with XP to be worthwhile.

First, go to the floor you wish to explore and/or grind, and save. The healthier your party is, the better. Now go roam the maze, but, if someone dies, don't reload - just walk back to the exact square where you saved, press "A," to be prompted to add a party member, and type in the name of the deceased. They'll be instantly added back to your party in the condition they were when you saved, including their drug stock.

This won't work miracles - characters revived this way lose their XP gains, and you'll need to be able to pull off a retreat with a partially depleted team without suffering a total party kill, but with this technique, and some luck, you can gradually remove all of the dungeon's loot-yielding monsters, which greatly reduces the overall encounter rate, and with some clever (and pragmatic) finagling you can seriously optimize your healing. E.g. - Kasumi and William were near death after a fight, so I had them use their drugs to heal everyone else, but not themselves. Kasumi was soon killed, so I went back to the start, revived her, and she got her drugs back along with her post-save health bar.

I made the loop around the maze with this technique, finding several magic tabards along the way (for whatever good that does - it's still not clear to me this makes a difference), and unlocked the entrance to black tower at the center. This time I was more careful about ascending it - the tower remains a 2×2 region on every level which you can exit but not re-enter, but by being mindful about which corner I occupied and which direction I was facing, I easily climbed all the way up to the town level, and then one more flight of stairs to the top.

Here, I got more than half my party flattened immediately.

Every hit from these guys is potentially instant death.

And yet, thanks to the discovery that let me get this far, I knew I could keep on going. I just descended right back to the bottom floor, resurrected, and climbed the tower again, this time disembarking on the town level to heal and restock my potions. Upon returning to the bottom floor, the black tower remained open, and I did not have to repeat the grand multicolor tour to unlock it again so long as I didn't quit to the main menu.

The top level is a big, open plain with lots of very powerful monsters. The only landmarks are black teleporting walls strewn stochastically. I quickly lost my bearings and with it any hope of locating the stairs back down, but before long I stumbled right into the game's namesake.


Then everyone reached level 10 and I was allowed to keep playing, but without any other goals, there wasn't much point. Combat, by the way, is still quite deadly on this floor, even at level 10. I did, through brute force searching and saves, find a way back to the stairs, but nothing in town was any different, and the friendly townspeople still said "Good luck finding the Onyx!" when spoken to.

GAB rating: Below Average. The Black Onyx is functional, I suppose, and at least in its early stages works as an introductory RPG, but thanks to the simplicity is never all that interesting to play, and eventually becomes unreasonably difficult for the tiny breadth of tactical options provided. Playing through was not at any point particularly fun or satisfying, and toward the end just got infuriatingly tedious.


Edge Magazine credits The Black Onyx as the first JRPG, but other than having a general sense of streamlined gameplay mechanics, being a double-distilled adaptation of an RPG adaptation crafted for an audience without any cultural familiarity of the concept, it bears little resemblance to the regional classics that would follow. Wizardry and Ultima may have arrived late in the land of the rising sun, but their impact is more easily observed and are more widely credited as influences.

Still, Black Onyx did come first, and was enough of a success that it may well have influenced the direction of Japanese RPGs, if only by paving the way for Wizardry and Ultima's success. With some imagination, one can conjecture more direct connections as well.

As I mentioned, dialog options, though not so useful here, remind me of the Megami Tensei series, in which you could talk to monsters and sometimes recruit them, bargain, or intimidate.


Diegetic signposts in town oddly remind me of Might and Magic II. Did JVC somehow play this?

Wait up, should that actually say "the well?"


And the stark combat interface, with windows subdivided between status lines and sprites for you and your opponents, reminds me slightly of the first Final Fantasy's battle interface, which also had visible weapons on your character sprites showing what you had equipped.


We'll be seeing a lot more Japanese games in this phase than we have in years earlier, including three more RPG-adjacent titles selected as discretionary whales. 1984 was the only year of the 80's not to have any culturally significant commercial RPGs developed in the U.S., but overseas, this was a pretty major year for genre milestones.

Monday, October 4, 2021

The Black Onyx: Paint it black

The first four floors had apparently just been practice. Floor 5 did its best to be an unmappable bastard of a maze with multiple ensconced 2×2 regions of one-way walls and teleporters.

There are five rooms that look like this. Good luck figuring out which one you're in or where the black doors go.


Combat was, once again, too dangerous for my party - ghosts lurked the maze, who are difficult to hit, take little damage when you succeed, and hit for 10-20 damage in retaliation, and my characters had as little as 24 max HP. Slightly less dangerous but still responsible for some deaths were the demons, who have lots of HP, enough to nearly ensure combat lasts at least two rounds, and pretty hard-hitting attacks. I'd have to farm floor 4 awhile longer, whose XP rewards were no longer significant to my level 6 party, but the gold yields remained fruitful - such an encounter could give $150-$300 per character, and I'd need $2,560 to buy everyone the best weapon in the store, battle axes, and the same amount to buy the second-best armor, full plate.

The mysterious "drugs" sold in the hospital, I discovered, are simple healing items, restoring 5-10 HP per dose by my estimate. Each costs $55, and each player can hold 5 of them, making it a trivial expense to fully restock on a return to town at this phase. The store also sells bottles, which I assume are required in order to purchase drugs. Any player can heal any other player with a drug, so for all intents and purposes, your party has a capacity of 25.

After one session farming floor 4, I acquired enough gold to buy battle axes and full plate for everyone. The XP incidentally earned wasn't even half of what I needed to reach level 7. All that was left to buy was the $10,240 tabard armor, which seemed doable with another session or two, but it seemed time to move on.

In exploring and trying to make sense of level 5, I realized a few things about how maps in The Black Onyx work.

  • Teleporters aren't tiles in the dungeon (as in Wizardry), but rather exist on the edges of certain tiles (as in dnd).
  • Every map is actually a 16×16 grid, with wraparound, and cleverly packed in a manner to make it seem larger than this boundary (a la Wizardry III).
  • Features that span multiple floors - stairs, the well, and the black tower - consistently retain relative coordinates to each other.
  • The cemetery and the area immediately below the well exist on the same 16×16 grid as the main first floor dungeon, which is why that floor appears to be so small.

Consolidated level 1 map. Orange region is below the well, blue below the cemetery.

Speaking of the well, it goes down all the way to level 5, where a fixed encounter against a Kraken is almost certain to kill at least one character, even with the heavy loadout I was packing at this stage.

So much for a convenient shortcut.

At least my battle axes were enough to deal with the ghosts and demons, typically killing them in a round or two, minimizing their chances to hurt me in return. The drugs came in handy for healing the unavoidable damage. I did, one time, encounter a "hider" monster, who one-shotted Helen, but apart from that rare encounter (and the Kraken), the combat was doable, and at this stage, perhaps more valuable for the experience than the money.

In retrospect, it probably would have been better to keep farming floor 4, as here I kept running through my drug supplies and being forced to make the long trip back to the surface, but after three sessions, using the quit/save/load function to reset the treasure encounters, I simultaneously reached level 7 and earned enough money to buy the best armor.

This was good enough to take on the Kraken.


I decided I'd grind one more level before descending to floor 6, by no means a quick feat. Each trip to floor 5 was good for about one bar's worth of experience before the drugs ran out, and you need nine for a level up, but at least I didn't need to think about collecting money any longer. Occasionally, fights would drop magic versions of weapons and armor, which I didn't bother taking as I had no way of knowing their effectiveness compared to what I already had, or indeed if it even differed from the equivalent stuff available for purchase at all.

I did re-encounter the hider, and on its defeat, received its invisibility cloak, which made its recipient nearly unhittable. That was nice. Wish I found more.

Badly battered battalion but Betty's better buffed.

After hours of mindless grinding, I reached level 8 and returned to town to heal, stock up on drugs, and check our new stats. At the examinations, the size of the bar representing level suggested that level 9 was the highest you could go, but grinding level 8 any more would have been pointless; most combats there weren't even yielding one pixel worth of XP, and a level up needs approximately 180 of them. Even the kraken "boss" encounter was only good for a single pixel on the bar. It was time to take on the next floor.

Everyone had full health at the start of this combat.

If you thought combat on level 5 was bad, it's so much worse on 6. Those damage-sponge demons that hit for at least two drugs-worth of HP? Enjoy fighting four of them at once. And those aren't even the worst things found down here. An average encounter here did enough damage to my party that I'd need to consume five drugs for a mostly full heal, and you can't carry more than 25.

I don't know if I was underlevelled, understatted, or had just been shooting myself in the foot by never taking magic armor drops (other than that ultra rare invisibility cloak), but none speak of great game design here. Grinding out one last level would have been impractical - too slow on floor 5, too deadly on floor 6 (and painfully slow still). Stat gains per level are random and variable, and you have zero control over it, unlike Wizardry where your initial stat distribution is the most important part of character development and HP/stat gains trend on the generous side. Hellen had barely half as much HP as William, Francois's strength and dexterity lagged behind the party's highest by over ten points each, and the prospect of grinding another five characters to level eight so I could pick a team of the best certainly did not appeal!

As for magical items, as I mentioned, there's no clear indication of relative effectiveness. Wizardry showed you your AC, but The Black Onyx doesn't. I can presume from the price that a tabard protects better than full plate, but where does magical half plate fit in? Furthermore, the paper doll view is the only indication of what your party has equipped - the game offers no character sheets whatsoever - and "magic" armor and weapons look no different from their standard counterparts, so I hypothesized that there is no difference.

At the very least, mapping floor 6 was straightforward, but the process involved suicide runs. The level is divided into six regions, each with differently-colored walls, and each region directly connects to four others. A red region holds two teleporters, the only on this floor, and is the only region from which all five others may be reached directly, though the walls will remain red until you walk to a different region. A seventh black region, which I can only presume is the base of the black tower, connects to all six colored regions, but remains impassable.

With no clear exit, I had to look at CRPG Addict's post to find out what to do. This is a color puzzle, and the solution is maddeningly obscure even without regard to my own colorblindness. The key is the title screen.

Leave this looping long enough and you get an animated overture.

That black death star-like object is the solution, cycling through black, blue, purple, yellow, white, red, and green. MS Paint's color picker tool is very useful for discerning this when you have eyes that can't. That said, how did users stuck with monochrome monitors cope? The game has a monochrome option, but I can't tell if it changes anything

I passed through the maze regions in the order, starting with blue. I soon lost Hellen to the rough monsters, but gained a second invisibility cloak (obviously I did not save). By the time I reached red, everyone but Betty and William was gone. The game emitted a chirp once I entered the green region, and I was able to enter the black zone -  a somewhat confusing but very small maze of dark walls, with an ascending staircase near the middle.


I went up, to find the maze continued, until I realized I had inadvertently stepped outside the black tower region and was just lost on floor five again. Damn it - am I just going to have to grind on floor 6?


Maps:

Floor 5

Floor 6


Most popular posts