Friday, January 26, 2024

Game 396: Commando


I can't believe it - I actually beat Commando - an old-school, quarter-munching multidirectional shooter which, unlike Capcom's prior (and much longer) game 1942, doesn't allow you any continues.

I cheated, but only a little bit. Specifically, I made a save state right at the game's midpoint, once I managed to reach it without losing any lives. Beating the first four stages on one life, earning me two extras along the way, took me quite a few tries. Beating the remaining four stages on five lives still took me far longer.


At first glance, Commando seems awfully similar to Taito's Front Line. Even dumbed down compared to it. You run around in eight directions, shooting at grunts with your semi-automatic carbine and throwing grenades, but there's no aiming dial here - you shoot in the direction you are moving, which can be a bit awkward as you might not always want to be moving toward the thing you're trying to shoot. There are no tanks to commander (or fight), and no multi-directional scrolling; you're doing this on foot, and it's vertical scrolling only. At least it looks nicer.

Except for when Super Joe appears faceless in closeups. Aaaaaaaa!
 

Much of what I said about Front Line still applies here, especially regarding the success of an aggressive playstyle. If you try to cautiously and systematically eliminate threats before advancing, you'll get overwhelmed by infinitely respawning soldiers. If anything, Commando demands even more aggression than Front Line does; your bullets do not outrange the enemy, but their bullets are slow and individually easy to dodge. Eventually, you'll face barrages of grenades, mortars, and bazookas, but they tend to be bad about leading you, and overtaking these enemies can be easier than killing them and almost as good.

Only grenades can kill men in foxholes, but sometimes it's better to walk around them
 

Your own grenades, though they are finite and may seem a bit underpowered, are still quite useful simply because they are quick to throw and are always thrown due north, no matter what direction you are moving in. You can afford to be a bit wasteful; there are lots of grenades lying around, and you never know when lobbing one or two ahead of you as you move at an angle might take out an enemy, sparing you the trouble of stopping to shoot him.

Lots of enemies, lots of bullets, good thing the puddle is a barrier to them too.

Super Joe can face and shoot in 16 intermediate directions, though you only move in eight of them, and this can lead to some control awkwardness. Rotation is not instant; there is a delay of a few frames as he cycles through each angle. A light joystick tap in the direction opposite or lateral to your current movement vector, intended to help you face a certain direction without moving, could only rotate him part of the way, causing him to not face and shoot in the desired orientation. On the other hand, this can be done on purpose too, when you need to hit something at a slight angle, but not a full 45 degree diagonal. Especially during the climactic fights at the end of each stage where enemies spawn in great numbers but not infinitely, making it worthwhile to fight more cautiously. 

A late stage unpleasantly reminds me of Cannon Fodder and its grunt-spawning barracks.


Beating Commando is doable, but it felt like it required some luck, even with my midpoint anchor save. Enemy spawns and attack patterns are semi-random, and sometimes you just get pinned down into a corner and gunned down in an inescapable hail of bullets and grenades, or sometimes an enemy spawns on the edge of the screen and shoots you immediately.


Most dangerous of all are the overpasses, which funnel you into a small area that conceals the bullets that fly under them, during which enemies on the overpass are lobbing nonstop grenades at you from above - I found that the best approach is to keep moving forward, toss some grenades, shoot, and hope you emerge unscathed on the other side. Any hesitation means more enemy spawns to deal with.

And I swear that during the second half, enemies' hitboxes magically shrink. During one run I flat-out saw one of my own bullets pass right through an enemy sprite.

Nevertheless, after countless failures, I beat the last level, on my last life, and without many grenades left.

Setting fire to the final compound


Side note - in order to comply with German censorship laws, Europe got a sprite-swapped version called Space Invasion, where the soldiers have a robotic makeover, somewhat resembling Star Wars stormtroopers, perhaps anticipating the similar redesigns of Contra/Gryzor/Probotector. Super Joe at least stays human.


GAB rating: Above average. Commando is, like many arcade games, repetitive and a bit shallow. It's also a better game than its inspiration Front Line despite being simpler on the surface - the run & gun action is tighter, faster, and more intense. It's also better than its predecessor 1942 despite having more awkward controls - I noted that game was overlong and overpadded and should have had eight levels instead of 32, which is exactly the length of Commando.

Monday, January 22, 2024

Rebelstar Raiders: Starlingale


Scenario 2 follows the Rebelstar victory on the moonbase, as Joe Capricorn #2 and Captain Krenon, assumed (despite the reality) to survive the first scenario, attempt to escape on the Starlingale.

Main-Comp attacks while half of the Starlingale's security team is on an away mission.

I will once again command Rebelstar, who takes the defender role this time, and Scribe plays Main-Comp, who must disable the Starlingale in twelve turns. I deploy first, in the magenta area, but Scribe will have the first move.

My units are mostly familiar, minus the incredibly useful grenadiers:

  • Two defenseless navigation computers, placed at the bridge. Main-Comp's target.  
  • Three pilots with laser pistols, at the bridge  
  • Three slow-moving robots with laser rifles at the north flank of the bridge  
  • Two commanders with their rapid-fire photon guns   
  • Three laser gunmen, survivors of the moonbase raid
  • Eight laser riflemen

We know from the last mission that laser pistols are better than laser guns, and photon guns are even better. Speed is more useful to a defender than accuracy, and a quick unit can jump out of cover, squeeze off multiple unaimed shots, and jump back into cover. A lasgunner, on the other hand, takes far longer to aim and fire a single shot, and is liable to run out of movement points doing this, forcing him to end his turn in whichever spot he fired from.

But my main rifleman security detail are even worse than lasgunners. They're just as slow to shoot, and although they fire more accurately, damage is poor - worse than laser pistols - which is doubly bad against Main-Comp's armored robots which negate a fixed amount of damage from every shot. Range is not great either, with a linear damage reduction applied over a distance until it drops down to nothing (or too little to penetrate armor). So, they don't miss often, but hitting and doing zero damage isn't any better than a miss.


Main-Comp attacks with an exotic array of killbots.

  • Four Zorobtrons, slow but powerful robots with gas grenades
  • 13 Flybots, fast, weak robots with fast, weak "zeeker" guns  
  • Four Slaverbots with powerful laser whips
  • One mining bot
  • Two human guards with laser pistols


The last scenario taught me the power of grenades, and this time I'm up against them. Gas grenades don't demolish walls, but can bypass them, killing whoever takes cover behind it. "Zeekers" could be trouble - the Flybots are fast and expendable, letting them swarm and suppress key targets, and their weapons' weakness is made up for by speed and accuracy; five weak shots is at least as good as one strong shot. Laser whips are something altogether new - shorter range than pistols, but longer than melee, and the Slaverbots wielding them are faster than Zorbotrons and mining bots, though a bit slower than humans.


Main-Comp will get the first move, and will almost certainly inflict massive casualties if I place my men too close to the aft. Anything I put in the central magenta area is likely to die right away. The two commanders are especially prime targets; the only units that can really take advantage of cover apart from the pilots who are all the way up in the bridge.

But I'm also outgunned and outnumbered, and if I spread my defenders too far apart, Main-Comp can just ignore half of them as they push through the other half while using flybots to swarm isolated units. I've got to slow them down until my reinforcements arrive, or I lose.


I deploy the majority in cover, with two riflemen covering the gantry, away from the walls.


Main-Comp deploys.


As before, I have a reconstructed video of the entire battle.


Turn 1

They advance, killing both riflemen in the center, but the narrow corridor slows their entry.

My men do their best to return fire from cover, but only manage to kill one guard and hit a few Flybots. The rear guard advances from their post, and I can only hope Main-Comp fails to sneak a Flybot past them.


Turn 2

Main-Comp continues its advance, suppressing my northern flank with Flybots. Slavers move past, entering a northern passage. The Zorbos and surviving guard advance toward the north flank and fire at my riflemen reserve, killing two.


Joe Capricorn and his first mate Darwin Jones are pinned down.

I send one riflemen up north to swat a fly, Darwin, who moves south and kills the Flybot blocking Capricorn.


Capricorn, free, moves south to shoot at the intruders, joined by Krenon from the south, but all that their combined firepower can take out is one Flybot and one Zorbotron.


Two riflemen step out of cover, and shoot at the guard, wounding him.


The pilots and robots move closer to the action, and I detach one man from the south flank.


Turn 3

Major losses as flybots swarm and kill Joe Capricorn and a rifleman, trapping Darwin Jones, while the guard and Zorbotrons destroy Krenon and the two exposed riflemen.


Darwin Jones desperately kills two Flybots.


My plotbots move to intercept the slavers, and I detach another gunman from the south flank. The pilots, now joining the sole survivor of the original rifle team, fire from cover, but only manage to kill another two Flybots.

Turn 4

The Flybots, escorted by Slavers, mobilize en masse toward the bridge, killing Darwin Jones along the way, while the Zorbotrons continue shooting gas bombs from cover, killing another rifleman.


Situation: Not good! Two Flybots are heading unimpeded toward the bridge, my best men are dead, and my second best men are being pummeled by artillery while kinkybots close in for the kill.


Eight more riflemen arrive. Super.

I hurry to intercept and shoot at the flies, but only manage to take out one of them, and one Slaver.


The riflemen advance to engage the Zorbotrons, but only succeed flaking off some of their paint and killing the human guard.


Turn 5

It's a nightmare for the Starlingale, as Slaverbots move in and kill two of the pilots while Flybots continue onward to the bridge. Zorbos pound the absolute crap out of the rifle reinforcements, and even one of the Flybots scores a double Zeeker kill.


No time to grieve - I do my best to chase and kill the Flybots with what I've got left, but am only half successful. Amazingly, three riflemen with unerring aim utterly fail to kill even one of them.

Turn 6

The Flybot enters the bridge, destroys one of the navigation computers, and comes to rest on the right arm of the captain's chair. The rest of the robots continue to advance and/or flagellate my crew - the final pilot is crushed by a miner, a plodbot is flanked and flogged by two Slavers, and the three remaining riflemen are zeeked and gassed, killing two of them.


I send my nearby gunman into the bridge to shoot the Flybot, but only manage to singe the chair it sits on. Meanwhile, my plodbots double-team and fail to kill a slaver, and the last rifleman shoots and finally kills that damned fly.


Turn 7

The Flybot in the bridge finishes off the other navigation computer, and the robot rampage continues against the few survivors.


Once again, the attackers have a major advantage here, maybe even more so than on Moonbase. Riflemen suck, their underpowered laser rifles barely able to hurt Main-Comp's softest robots, and laser gunmen less able to take advantage of cover than the moonbase's guards were. Only the two commanders have half-decent firepower, and Main-Comp has many options for flushing them out.


We tried this scenario a second time, swapping sides, and Scribe employed a stalling strategy of blocking off the bridge with two Plodbots, stationed in the narrow doorwars. This made it all but impossible for Flybots to sneak into bridge without some support from slow-moving artillery, but nevertheless, Main-Comp wins again, this time with an even bigger victory point margin. By turn 2, I had wiped out half of Starlingale's crew, mostly with Flybots, while the big boys followed as closely behind as their actuators allowed, and by turn 8, I breached the bridge and took out the nav computers, leaving no survivors but for a single pilot and an away-team rifleman.


Back in our main reality/timeline, the Starlingale and her crew is lost, but their primary mission on the moonbase was still achieved, and Joe Capricorn's final clone lives. One mission left - the final assault on Main-Comp's master control unit.

Monday, January 15, 2024

Wishbringer: Won!


Last session, we delivered a letter - an ultimatum to deliver Wishbringer into the hands of The Evil One - to the kooky, isolated magic shop at the top of a windy, treacherous mountain path, and subsequently watched the township of Festeron go dark and transform into a foreboding, fog-swept pit of a city, a massive tower erected where the post office used to be.

Wishbringer itself is in our hands, concealed in the bottom of a rattlesnake-in-a-can taken from the shop's joke shelf, but the fog is quickly rising, concealing the safe footing of the trail back down.

I have the means to wish for advice, luck, or rain, but each wish is only granted once. Opening my umbrella and wishing for rain quickly disperses the fog, and I found myself at the bottom of the cliff again.

Returning to the bridge, things have changed. Festeron has become Witchville, and a troll guards it, demanding payment of a gold coin to cross. I had none, and couldn't see a means of obtaining one - perhaps one could be found in the fountain that I neglected to search during my trip through, but that was on the other side of the bridge now.

I thought that perhaps I could scare the troll off with the rattlesnake can, but to do that, I'd have to reload to a save from before opening it. And this also means I'd have to descend the foggy trail without magic. Blindly. But thanks to my Trizbort map, this was simple.

My thought was correct - the simple-minded troll opened the can and got spooked off by the snake inside, saving me a wish and a hypothetical gold coin. Crossing the bridge, an ominous sign bared a warning:

   ENTERING WITCHVILLE

  Curfew Begins At 6 PM
   Boot Patrol On Duty
Violators Will Be Jailed!


Not good! And it was already after 6:00 when I left the magic shop.

I explored Witchville:

  • Giant, magic boots patrol the rotary. The sound of them stomping around can help you to sneak around without getting caught.
  • God no longer dwells in the church. The candle can be taken now, and the mouse infestation has become a rat infestation.
  • I searched the fountain water and saw a brass token, and a piranha that prevented me from taking it.
  • The police station has a wanted poster with my picture on it! Enter and the sergeant threatens to arrest you, but won't pursue if you leave.
  • The movie theater is open (How? There's a curfew!) and the gravedigger works as a ticket collector.
  • The vicious poodle south of the rotary is now a vicious hellhound.
  • A platypus is trapped in a pit near the cemetery gate, too narrow for us to enter, too deep for us to reach into.
  • The gate to the cemetery is unlocked, but ghosts infest it. Try to cross through and they carry you off to a random part of Witchville, and your possessions scatter all over the place.
  • The mailbox on the wharf is alive, and demands mail. I tried giving it Ms. Voss's note, but it rejected the offering; "Not STAMPED!" And it followed me around for awhile.
  • The rocky path leads to a familiar scene - an open field west of a white house, with a boarded front door, and a little mailbox beside it. Soon, the big mailbox found me, and they fought to their mutual deaths.
  • Getting caught by the boots lands you in jail, but escape is pretty easy; an obvious secret passage leads to an underground maze.
  • Three ways out of the maze; a grue's nest with a refrigerator you don't have time to open, a stump at the top of Lookout Hill, and the open grave in the cemetery.
 

Stuck, with no ideas on what to do next, I wished for advice. The conch shell rang like a telephone - I picked it up, and a voice whispered "release a prisoner, be rewarded." I was pretty sure this referred to the platypus, but couldn't find any way to get it out, and so I turned to a walkthrough to see what I might be missing.

I restarted the game and followed it for a bit, mostly repeating prior actions but with a few more things picked up:

  • A gold coin (not bronze!) is found in the Festeron fountain during the day.
  • After descending the foggy trail, a branch can be broken off the tree at the base.


The branch rescues the platypus, who gratefully etches an 'X' into the sand. Digging reveals a silver whistle, which when blown began a surreal little episode where I was magically transported to a majestic castle of platypuses, who thanked me for rescuing their princess, and commanded me to bring a magic hat to a creature of the sea.

The creature was a pelican perched on the fake lighthouse. I gave it the hat, and learned the magic word - SORKIN.

Stuck again, I wished for advice, and got some - "One path Magick; one path Science; both lead to thy Goal." Useless!


So I turned to the walkthrough again. I am supposed to get arrested, take a blanket from the jail cell, and go to the grue's nest, where I may cover the grue with the blanket and raid its refrigerator.

Um. Okay. I did that, and found a bottle of grues' milk and an earthworm.

The earthworm baited the fish, letting me grab the brass coin, which I put into the sole working machine in the arcade, now titled "TRANSMATTER." The screen displayed a map of Festeron, corresponding to the map in the game package, and the machine's purpose became clear; operating the joystick selects a sector of the map, and pushing the button teleports you there (and fries the machine). Only the post office tower cannot be reached by foot, making it the obvious destination, and five points awarded upon its selection confirm this. But I didn't save just yet - it's a one-way trip, and my business in Witchville seemed unfulfilled. In particular, the movie theater's purpose wasn't yet clear.

SORKIN lowers the tower drawbridge, and upon entering it, Mr. Crisp seized me and dragged me to a torture chamber, where Princess Tasmania of the platypus kingdom was clamped into some diabolical machine. Really, Taz, twice in the same night?

I offered him the note from Miss Voss, and he blushed, removed his coat, and took off in a hurry. Grabbing and searching the coat procured a key, which freed me and the princess, who thanked me and blew her own magic whistle to leave.

Reading the note, an invitation to cookies from Miss Voss, revealed a clue - the poodle obeys the command "ALEXIS, HEEL."

Climbing up from the torture chamber, I ascended into the tower, where a room was described as "Fuzziness." I couldn't go anywhere, or look at anything - it was all too fuzzy. Every object in my inventory had become fuzzy. I couldn't seem to do anything, not even wish for advice.


Surely enough, I had missed something important at the movie theater. Miss Voss, who waits outside, sells tickets for the price of your gold coin if you type "BUY TICKET."

The gravedigger took my ticket and let me in, where the picture was a blurry double-image. I know what this means. I looked at the floor - this is something I'd never think of doing except for the fact that adventure game logic meant there had to be something useful in here - and found a pair of 3D glasses, letting me watch the movie.


I repeated my actions leading to the tower. Wearing the 3D glasses let me see inside the laboratory, where I found a telescope, control panel, broom, and a black cat - "black as night from head to tail," and therefore not Chaos.

The control panel de-activated some security system, and a crank hidden behind a painting lowered the drawbridge, letting me leave.

The hellhound outside Violet's cottage obeyed my command, letting me enter, where I found a steel key and a cutsey love message scrawled in the dust.

The key unlocked the library door, and upon entering, the door slammed behind me. No matter - here, I found a cat sculpture inside a display case, which I smashed with the umbrella. The sculpture was black marble, with a shallow hole carved into the forehead, just like Chaos!

With no other ideas, I put Wishbringer inside the hole. An old woman appeared, demanding I hand over the stone. Obviously a fraud, I ignored her and carried on. Energy rays shot out from the stone, annihilating her disguise, and afterwards herself.

I found myself transported back to the cliff edge.

The door of the Magick Shoppe creaks open, and the old woman, dressed in a nightgown, stands blinking in the morning sun. "Who's there?"

The black cat leaps into the woman's arms. "Chaos!" she cries, laughing and sobbing all at once as the cat licks tears of joy from her face.

At last the old woman lowers Chaos to the ground and walks over to where you're standing, red with embarrassment.

"Now you know me for the old liar I am," she chuckles, clasping your hands gratefully in her own. "I promised to give you Wishbringer, knowing full well that, if you succeeded, its virtue would be lost.

"In truth, the Stone would make a poor reward," she continues, stooping to tickle the cat's white forehead. "As you can see, it brings more joy in the shape of a companion than in any other. This is Wishbringer's finest Magick. A pity that my sister, the Evil One, did not know of it."

The old woman touches the violet note in your hand. "Make sure you give this to Mr. Crisp when you see him," she says with a sly wink. "And tell him I said hello."

Cradling Chaos in her arms like a child, the old woman ambles back into the Magick Shoppe. "Farewell!" she calls from the closing door, and the sunlight makes her face look young. "Now you are a true Adventurer."

A concealed bell tinkles merrily.


Congratulations! You've finished the story of Wishbringer!

Your score is 100 points out of 100, in 297 moves.


GAB rating: Good, but not great. There's some decent writing and storybuilding here, albeit with some aspects that can come across as childish when I don't think they were meant to. The colorful cast of characters - often not an Infocom strong suit - are some of the most memorable yet. Exploring Festeron the first time around was fun, despite the time limit hanging over your head, and the return to its wicked nighttime counterpart Witchville was an odd but effective mix of whimsy and horror, made better for the twisted familiarity of your first trip through it.

But its puzzle design isn't the best. All actions taken to finish the game are either completely obvious, or obscure and unmotivated. Nothing indicates that you can buy tickets from Miss Voss, or that a pair of discarded 3D glasses is on the floor of the theater, or that one of the paintings in the gallery can be moved. This is meant as an introductory game, and there are some beginner's guardrails, like explicit warnings on when you should save, and second chances to retrieve lost items, but it's inconsistent. Right away in the first chapter, you have to think to search the fountain at the center of town for a gold coin. This isn't signposted, and you absolutely must have it later on, and if you don't get it before delivering the letter, the one thing you're under strict instructions to do and to do so quickly, you've locked yourself out of victory. By nightfall, it's gone. This seems arbitrarily cruel for a beginner-friendly game!

Then there's Wishbringer itself, whose magic is often mentioned as a means to provide beginners with alternate solutions to difficult puzzles. Hogwash, I say - in retrospect, darkness is the only legitimate example of this, and even that has limitations!

My assessment of the wishes from most to least useful:

  • Darkness - Sneak past certain characters. Notably the troll, but you need to sneak past him anyway long before you raid the grues' refrigerator (this itself a ridiculous puzzle that magic will not help you to solve) for the milk needed to do this. You can also sneak past Violet's dog in darkness, but you'll need to make the return trip the more conventional way.
  • Rain washes the fog away from the dangerous trail, but if you do this, then you've already destroyed the snake-in-a-can joke needed for the troll. And you're locked into the alternate solution of bribing him with the gold coin, then coming back later and wishing for darkness to scare him off, and also wishing for luck so that your coin doesn't fall into the river. It's much easier and obvious enough to just give him the rattlesnake-in-a-can joke and avoid all that nonsense, not to mention the burden you spare your inventory limit from not carrying a bunch of magical crap that you don't need.
  • Luck also delays the ghosts in the cemetery from spiriting you away (they'll steal your things instead and then spirit you away, so just stay out), and delays Violet's dog from killing you (but she still won't let you pass, so you'll need to learn her command anyway).
  • Freedom - which you can't even wish for unless you took the time during your day errand to steal candy from the police station - lets you escape from jail, which is easy enough (and required) to do normally. It can also unshackle you in the torture chamber, but if Mr. Crisp is watching he'll just re-shackle you, and if not then it's trivial to take his key and free yourself.
  • Advice hardly ever tells you anything you didn't already know.
  • Foresight gives you a glimpse of the ending, but this tells you nothing useful.
  • Flight takes you back to the magic shop, but you do not want to do this before finding Chaos, whose magic teleports you there anyway.
 

Overall I enjoyed Wishbringer, and can certainly recommend it as a gentler, more accessible counterpart to the Enchanter trilogy, but still can't help but feel a little unsatisfied.
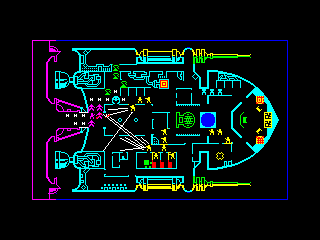
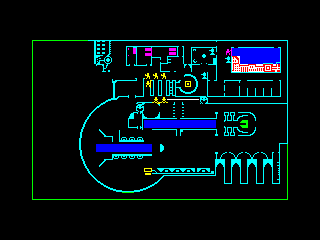
My Trizbort map:
 

Friday, January 12, 2024

Game 395: Wishbringer

Read the manual here:
 
Get Frotz (if native Windows execution is your wish) here:
http://www.davidkinder.co.uk/frotz.html


Rebelstar Raiders will continue next week, but today, we return to interactive fiction.


1985 is a lean year for Infocom adventures, and a troubling time for the company, with only three releases (two of which I will be playing) compared to the five of 1984 and the five in 1983 before that. They had been busy with their ill-fated Cornerstone database software, along with their "Z-Machine v4," a 128KB upgrade to the aging v3 engine which, thanks to the memory requirement, could not replace it, but coexisted alongside it for years, for bigger games that had to run on bigger computers.

Wishbringer, the first release of the year (and the first by Steve Meretzky), is one of those smaller v3 games, targeting older 48KB-64KB computers such as the Commodore 64, Atari, and Apple ][+ and //e models. Marketed as a beginner's interactive fiction, though not necessarily a children's one, it became one of their five best sellers, earning a 1988 re-release under the "Solid Gold" label.

The manual begins with a Grimm-style fairy tale about a peasant-born girl, Morning Star, kidnapped by a wicked queen and raised as her daughter. As she came of age and suitors from across the land come to seek her hand, the queen sends them all off on various grue-filled quests, never to return, and the poor princess, doomed to spinsterhood, shrivels away into dust. Nothing remains but her heart and lifetime of unfulfilled wishes, which metamorphosed over the centuries into a gemstone - Wishbringer.

We're told that Wishbringer's magic can grant whoever possesses it seven wishes, but only specific ones, under certain requirements.

  • Rain, but you must have an open umbrella.
  • Advice, but you must have a sea shell.
  • Flight, but you must have a broom.
  • Darkness, but you must drink grue's milk.
  • Vision, but you must wear glasses.
  • Luck, but you must have a horseshoe.
  • Freedom, but you must eat candy.


Also included in the box is a sealed envelope - a replica of a letter that our protagonist will be tasked to deliver - a map of the area, and Wishbringer itself.

Like many Infocom games, Wishbringer begins in media res, only to be a dream.


"Behind you!" cries the Princess. "It's a trap!"

Too late. The drawbridge crashes shut against the tower wall. You turn to face your enemy, and find yourself staring into the open maw of Thermofax.

Only your Magick sword can save you now. You swing it high, speak the Word and stand unhurt as the blade absorbs the searing dragon-breath.

The reptile bellows with rage and flaps its wings to fan the fire in its belly. You are advancing, sword poised to strike, when a familiar voice shatters the daydream and stays your mighty hand...

WISHBRINGER
Interactive Fantasy for Beginners
Copyright (C)1985 Infocom, Inc. All rights reserved.
Wishbringer is a trademark of Infocom, Inc.
Release 68 / Serial Number 850501

Hilltop
You're on a hilltop overlooking the seaside village of Festeron.

To the south stands the Festeron Post Office. It's a little brick building with a neatly-trimmed lawn. The Post Office door stands invitingly open.

Roads run down the hill to the east and west. There's a signpost nearby.

Somebody inside the Post Office is calling you.


The obvious thing to do is to go south, and for now I do.

Post Office
This is the lobby of the Festeron Post Office. The walls are lined with small, private mailboxes and wanted posters. A service counter runs along the entire length of the room.

Your boss, Mr. Crisp, is behind the service counter reading other people's postcards.

Mr. Crisp hides the postcards away as you enter. "Where have you been?" he barks angrily. "Daydreaming again, eh? I've been looking everywhere for you!"

(Your score just went up by 1 point! Your total score is 1 out of 100.)

What next?
>z
Time passes.

Mr. Crisp reaches under the service counter and pulls out a mysterious envelope. "We just got this Special Delivery," he snarls, tossing it onto the service counter. "I want you to drop it off right away. That means NOW!"

What next?
>get envelope
Taken.

(Your score just went up by 5 points! Your total score is 6 out of 100.)

Mr. Crisp drums his fingers on the service counter impatiently. "Quit stalling, chowderbrain! The Magick Shoppe closes at five o'clock!"


No time for that right now, though - even though the game comes with a map, I've got some Trizborting to do!

The time limit eventually cuts my adventure short, but I'm able to map out a good chunk of Festeron before five. The game does not accept intercardinal directions, for which I am thankful.

  • East from the hilltop overlooking the signpost, a small but very nasty poodle outside a cottage prevents me from heading in any direction other than right back the way I came.
  • West from the hilltop is a small, spooky cemetery area, which the narrator warns us to take caution exploring.
  • Within the cemetery, a creepy gravedigger inquires about the letter. I ignored him, and he disappeared through a gate off to the north, locking it behind him. An umbrella, one of the wishing items, is found here, leaning against a recently-placed tombstone.
  • A bone lies in an open grave. I grabbed it and fed it to the poodle, allowing me to pass into Festeron's suburbs.
  • Approaching the central rotary, surrounding a park, Miss Voss, the town librarian gave me a note addressed to Mr. Crisp. A church sits on the corner of the north side.
  • Further northward, past the rotary, a bridge leads to the base of a cliff.
  • Eastward from the bridge is a decorative lighthouse, where a pelican sits perched, watching intently.
  • South from the lighthouse is a tidal pool where a conch shell, another of the wishing items, sits half-buried in the sand.
  • Further south is the wharf area, which is directly east from the rotary. A movie theater and video arcade are seen from the corner, and a large mailbox is seen in the center. On the east end, a seahorse, caught and abandoned by the fishermen, gasps for breath.


My round-trip through Festerton brought me back to the cottage, where the poodle had finished its snack and wouldn't allow me to return, and I had no choice but to face Mr. Crisp's wrath.

"There you are, dummy!"

You wince as Mr. Crisp strides into view and grabs you by the front of your uniform.

"You good-for-nothing numbskull!" he bellows in your face. "I wanted you to deliver that envelope BEFORE five o'clock! Now the Magick Shoppe is closed... and you're FIRED!"


Restarting, I continued exploring, this time being more adventurous in my interactions.

  • Trying to open the envelope and read is not allowed yet.
  • Offering it to the gravedigger causes him to remark that he buried the addressee years ago.
  • Miss Voss's note also cannot be opened. Nor can it be given to Mr. Crisp just yet - the poodle blocks your return home.
  • There is a police station on the west side of the rotary. Here, Sergeant MacGuffin naps, and a chocolate bar sits on his desk. Waste any time here, and Mr. Crisp chides you through the police radio.
  • The church on the rotary's north side is open. There is a lit candle on the wall - not take-able - and a mouse can be seen skitting across the floor every now and then.
  • The mailbox by the west rotary has nothing inside, and clangs itself shut when opened.
  • West of the bridge is the river outlet and lake, from which the other side of the cemetery's locked gate is seen. A hill can be climbed here, where a horseshoe sits on a stump.
  • The seahorse on the wharf can be thrown back into the bay to save its life, but there's no immediately obvious benefit.
  • Only one machine in the arcade is operable, titled "LEATHER GODDESSES OF PHOBOS!" But playing requires a token.
  • Heading upwards from the cliff leads to a twisting trail, where wrong steps kill you. The correct path leads to the magic shoppe.


Confident that I've seen everything I can while meandering, I restarted and made sure to grab everything and do everything before heading up the dangerous trail, arriving a few minutes before 4:00pm.

I handed the letter to the half-blind old woman who ran the shop, who asked me to read it to her. At this point, we are meant to open the envelope included in the game box.


The old woman is motionless as you read. Glancing up, you see tears of anger forming; but she turns away as your eyes meet.

"Kidnapped," she whispers after a long silence. She paces aimlessly around the room, deep in thought.

"Many seek to gain the Stone of Dreams," she mutters, mostly to herself. "Yet few can imagine the price. For years I have fought to conceal it from the Evil One and others like her. My youth, my home and family, all were forfeited for its protection. And now," her voice breaking with emotion, "now it claims my only companion."

Impulsively, the woman snatches away the letter and envelope and crumbles them in her trembling hands. "No one is strong enough to guard Wishbringer alone." 

The old woman makes an effort to compose herself.

"Thank you for coming all this way for me," she says, reaching up to a shelf full of cheap gags. "I know I'm not supposed to tip you, but take this little trinket anyway."

The woman holds out a small metal can for you to take.

>get can
Taken.

"It's getting Dark outside," the old woman remarks, and you can almost hear the capital D. "Maybe you should be getting back to town."


The old woman hobbles over to the Magick Shoppe door and opens it. A concealed bell tinkles merrily.

"Keep a sharp eye out for my cat, won't you?" She speaks the words slowly and distinctly. "Bring her to me if you find her. She's black as night from head to tail, except for one little white spot... right HERE."

The old woman touches the middle of your forehead with her finger. The light outside dims suddenly, like a cloud passing over the sun.

The old woman takes away her finger. Your forehead is tingling.

"The Stone of Dreams can help you in your search. I cannot reveal the place where I have hidden it, for the Evil One would see your thoughts and take the treasure for herself. You must discover it alone, and rely on legends to instruct you in its mysteries."

As she speaks, the old woman gently leads you through the door of the Magick Shoppe. She pauses before closing the door.

"Return the cat to me, and Wishbringer shall be yours.

"Her name is Chaos."

A concealed bell tinkles merrily.


Cliff Edge
You're standing high on a rocky cliff, at the top of a steep trail leading downward.

The surrounding landscape has disappeared under a thick blanket of evening fog. All the familiar buildings and landmarks are completely hidden; only the summit of Post Office Hill is high enough to pierce the cloud, rising like a lonely island in a sea of mist...

... an island with a tower on it.

There's a TOWER where the Post Office used to be! The massive outline is hard to make out against the twilight sky. But the longer you stare, the clearer and more frightening it becomes.


The can contains a rattlesnake joke... and Wishbringer, concealed by a false bottom. But as I retrieved it, the fog quickly rose from the valley, concealing the safe path down the cliff.


My inventory:

  • Wishbringer
  • A squashed can
  • Violet note
 

Magic stuff:

  • Conch shell
  • Horseshoe
  • Umbrella
 
My Trizbort map (so far):
 

Tuesday, January 9, 2024

Game 394: Rebelstar Raiders

It's beginning to look a lot like X-COM!

Early last year, I started playing/covering the early games of X-COM author Julian Gollop in parallel with The Wargaming Scribe, including Time Lords, an interesting dud, Islandia, an uninteresting dud, and Nebula, a Galaxy-style space conquest game that was clearly unsuited for the PBEM format play that I joined and eventually aborted. Scribe covered its singleplayer experience - one of the few early Gollop games to have one -  but I didn't bother, feeling in the end that I had little to say about it.

Rebelstar Raiders is, once again, a multiplayer-only title, but a career-defining one for Gollop. This is the game that he'd update, remake, and remake again and again until it became the first game in the X-COM series, which he'd update and remake multiple times again.

A thin whisper of a sci-fi plot is outlined in the manual. Mankind colonized the furthest reaches of the galaxy by the end of the 25th century, and space feudalism collapsed and gave rise to space corporatism. The largest corporation - the Red Shift Trans-galactic Co-operative - employed a centralized AI dubbed "Main-Comp" to increase operational efficiency, which predictably went berserk and made total eradication of Red Shift's human resources an imperative. Councilman Joe Capricorn, chairman of the company's cloning division and one of the few senior executives to survive the first robot rampage, sends three security details (each led by one of his own clones) to raid and disable key installations and ultimately pull Main-Comp's plug.

Being a very early turn-based strategy/tactics game, Rebelstar Raiders plays much more simply than the likes of X-COM, but anticipates a surprising amount of its features.

  • Every raider, robot, and mutant is a distinct entity with a name, stats, and equipped weapon (though you can't change them).
  • Actions, such as moving and shooting, consume a unit's movement points - moving uses a fixed number of them, shooting uses a percentage that varies depending on the weapon used.
  • A variety of weapons with innate properties and uses; e.g. a slow, accurate laser rifle, a fast but less accurate burst-firing photon SMG, area-of-effect grenades, melee-range (and instantly fatal) rock drills, etc.
  • Terrain destruction.

Before playing for real, I participated in a semi-interactive forum game at The Wargaming Scribe, and afterward, we played the first of three campaigns - I command the invading Rebelstar forces, and he defends the base with robots and technicians.

Read his account here. We cover the same ground in a game of mutually perfect information, but his has way better visuals and more focus on narrative.


Deployment phase

Scribe deploys his defenses first, though some are pre-deployed.


The mission - infiltrate the base with a squad of 24 men and make it into the control room in the northeast corner. Only one has to slip inside - and survive the turn.

The defenders are:

  • 4 technicians with pistols
  • 8 security guards with short range laser pistols
  • 7 battlebots with long range laser guns
  • 3 mining bots with instant death "grapplers"
  • 2 stationary turrets, seen at the back exterior 

I only appreciate this in retrospect, but security guards are their best unit. Robots are powerful, but slow. Guards are quick enough to pop out of cover, fire a shot or two, and move back into cover. Technicians can too, but their pistols lack stopping power.


My units may be deployed anywhere in the red zone:

  • 4 commanders with rapid-fire photon guns
  • 4 grenadiers
  • 16 raiders with long-range laser guns


Commanders are great. In X-COM, auto-fire mode was king; that 30% accuracy rate really means a 65% chance that at least one shot out of three hits, which is better odds than single aimed rifle shot and twice as fast. And in Rebelstar Raiders' chunky 2D pixel environment, a "missed" shot has a decent chance of hitting anyway. But the 16 laser infantry aren't so great; they move pretty fast, but lasers are very slow to shoot. If you don't have enough movement points left for an aimed shot, then you can squeeze off a snapshot at reduced accuracy, which ends that unit's turn.

The raiders' decimation in the forum game taught me that this base's cramped interiors do our gunmen no favors against the heavily armored robots that make up the bulk of the defenses, but grenades hold the power to reshape the world. Unfortunately, each grenadier only carries five pineapples. I will need to guard them, and my commanders carefully.

The front entrance isn't guarded too heavily inside, and I get to deploy my assault troops anywhere in the red region and I get the first move. In defiance of all logic, I can just place men right next to the auto-turrets and shoot them point blank. With a bit of luck, I can take them out turn 1 before they get a chance to return fire, giving me a chance to enter the base somewhat close to my objective, bypassing all of the resistance in the southern half of it.

And with a lot of luck I won't frag most of my own with missed shots, X-COM-style.
 

From this point on, we used Fuse's record/playback functionality to exchange turns, and after the match's completion, I was able to reconstruct a video.


Turn 1

It takes the combined firepower of all four commanders plus two grenades to destroy the turrets, which also blow open a hole in the front gate, where a battlebot is stationed.


Unfortunately, I have no way to take it out. My commanders' movement points are all spent, and the only grenadier close enough already threw two and hasn't got enough points remaining to enter the base and chuck another one, so I have my fastest man (named "Chief") go in and take a potshot.

The rest of the raiders fall in as closely as movement points and the door's width allows.

Everyone line up in front of the killbot! I'll... be right behind you.


My turn ends, Scribe's begin. The robot sentry opens fire, killing Chief and wounding another, and the cowardly techs hiding in their dorms pop out and fire off a few shots, killing another two. One ducks back in, the other ventures out further and wounds Jason.

The rest of the ops either advance or take defensive positions.


Turn 2

The northern corridor leads straight to the computer room, but the sentry bot in the alcove is perfectly positioned to cover it. My commanders stack up, ready to storm it.

In the entryway, Jason's got a score to settle - despite his wounds, he takes out the foolish technician that wounded him and finishes off the robot. Another grunt takes point and wounds the other. My men follow, ready for a bloodbath.


And, well, it's not quite as bad as expected.


Main-Comp continues to advance on my foothold.


Turn 3

Lots of shooting in the entryway, mostly a lot of missing. I kill three men, but one of them is my own. My cannon fodder maneuver closer to the technicians and guards taking cover in the hallway, and my commanders, followed by some backup, go down the corridor of death, just out of reach of the killer mining robot.


The pushback is brutal this time. Up in the north corridor, robot sentries take positions and destroy the lead commander. In the base interior, combined fire from one robot and multiple guards and technicians moving from cover to cover kill an astonishing five more of my raiders.

The guards return to cover and their backup inches closer. Luckily for me, robots are not fast.


Turn 4

I no longer have a numbers advantage, with 13 raiders surviving of the original 24, against 18 operatives, half of them robots. At least some of them are removed from the action, for now.

In the north corridor, Joe Capricorn's clone leads the assault, destroying the frontmost sentry - and exposing himself to the mining bot right behind. The line shuffles forward.

In the entryway, I finally put my grenadiers to use and blow a few of those cowering rent-a-cops from their cover.


My few surviving grunts move in, detaching from the north assault line, to cover the grenadiers, taking out one more guard.


The defenders open fire on the group. First the robot fires, killing one. Then the guard jumps in front of the robot, killing another and wounding a third. Then the tech jumps in front of the guard and shoots a bunch, hitting a few men but killing no one. Up north, the mining bot moves in and crushes Joe Capricorn #2.


Turn 5

Ten raiders left against 14 defenders, but three of them are sitting in a pretty little row, uncovered.

First order of business - I kill the mining bot at point blank range up in the north with the commander's photon machinegun. This not only kills it, but also the sentry far behind it!

Then I take out the three defenders with combined fire, mostly grenades. But I make a whole bunch of input errors and put several of my south group into less than ideal positions.


Fortunately, the surviving tech is a bad shot, popping out into the open and shooting three times but failing to do any real damage. Unfortunately, the robots covering the north corridor, joined by one of the guards, are great shots and kill both commanders and the grenadier behind them. The north corridor assault is a failure and my commanders are all dead, but the effort kept Main-Comp's sentry bots distracted and unable to defend the central corridor.


Turn 6

Six raiders left, half them wounded. Nine defenders, five of them robots. By the numbers, it's not looking great for me, but I'm in a position to pick off two humans with little risk of retaliation, and do precisely that.


The defense re-positions, mostly away from me.


Turn 7

Grenadier "Androyd" surprised me with a beautiful "missed" throw that went right through two pixel-wide arcades and blew up a guard on the other side.


Then I moved two grunts southward to plink at one of the rock crushers.


Main-Comp repositions.


Turn 8

I target the sentry with my grenadiers, but this time it takes three grenades, and I'm starting to run low.


Main-Comp repositions.


Turn 9

I have six grenades left between three men. Carefully positioning them to maximize ordinance efficiency, I toss four grenades and mostly just blow up the room. One gunman shoots at the exposed mining bot.


The sentry fires back with a trick shot of its own - right over the head of one man and into the head of the one behind him!


Unluckily for them, this is useless; it killed the only man who was out of ammo.

Main-Comp repositions.


Turn 10

Two grenades left, and there's a big old rock crusher in my way, with sentries and a guard behind it. Great.

I take out the rock crusher with one grenade, and with it out of the way, the other grenadier "Eric the Digit" rushes the guard with his last grenade. My gunmen shoot at the remaining robots.


The sentries reposition and fire back, but fail to kill anyone!


Turn 11

Eric rushes toward the computer room under lasgunner cover. One sentry is destroyed.


Main-Comp returns fire, killing one and wounding another.


Turn 12

Gunmen destroy the last sentry and Eric enters the computer room.


I think - and Scribe concurs - the attackers have a major advantage on this map. First strike is a powerful asset indeed. Grenadiers and commanders are amazing units, and Main-Comp's slow-moving robots are not that great, though their guards are better than Rebelstar's gunmen in this map's close quarters. My charge on the north corridor of death was a major strategic blunder that wasted the commanders' potential, and my plan to avoid fighting the brunt of Main-Comp's forces utterly failed, but I still won thanks to a few unlucky turns in which Scribe's sentries missed crucial shots.

In the next mission, the roles reverse as Rebelstar's Raiders find themselves protecting Joe Capricorn #3's getaway car from a swarm of robot harriers. Will their fortunes reverse as well, or will pluck, intuition, and perhaps dumb luck foil the calculating killbots once again? Find out next time.

Most popular posts