

It's beginning to look a lot like X-COM!
Early last year, I started playing/covering the early games of X-COM author Julian Gollop in parallel with The Wargaming Scribe, including Time Lords, an interesting dud, Islandia, an uninteresting dud, and Nebula, a Galaxy-style space conquest game that was clearly unsuited for the PBEM format play that I joined and eventually aborted. Scribe covered its singleplayer experience - one of the few early Gollop games to have one - but I didn't bother, feeling in the end that I had little to say about it.
Rebelstar Raiders is, once again, a multiplayer-only title, but a career-defining one for Gollop. This is the game that he'd update, remake, and remake again and again until it became the first game in the X-COM series, which he'd update and remake multiple times again.
A thin whisper of a sci-fi plot is outlined in the manual. Mankind colonized the furthest reaches of the galaxy by the end of the 25th century, and space feudalism collapsed and gave rise to space corporatism. The largest corporation - the Red Shift Trans-galactic Co-operative - employed a centralized AI dubbed "Main-Comp" to increase operational efficiency, which predictably went berserk and made total eradication of Red Shift's human resources an imperative. Councilman Joe Capricorn, chairman of the company's cloning division and one of the few senior executives to survive the first robot rampage, sends three security details (each led by one of his own clones) to raid and disable key installations and ultimately pull Main-Comp's plug.
Being a very early turn-based strategy/tactics game, Rebelstar Raiders plays much more simply than the likes of X-COM, but anticipates a surprising amount of its features.
- Every raider, robot, and mutant is a distinct entity with a name, stats, and equipped weapon (though you can't change them).
- Actions, such as moving and shooting, consume a unit's movement points - moving uses a fixed number of them, shooting uses a percentage that varies depending on the weapon used.
- A variety of weapons with innate properties and uses; e.g. a slow, accurate laser rifle, a fast but less accurate burst-firing photon SMG, area-of-effect grenades, melee-range (and instantly fatal) rock drills, etc.
- Terrain destruction.
Before playing for real, I participated in a semi-interactive forum game at The Wargaming Scribe, and afterward, we played the first of three campaigns - I command the invading Rebelstar forces, and he defends the base with robots and technicians.
Read his account here. We cover the same ground in a game of mutually perfect information, but his has way better visuals and more focus on narrative.
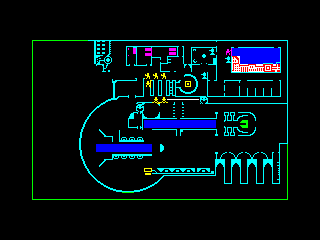
Deployment phase
Scribe deploys his defenses first, though some are pre-deployed.

The mission - infiltrate the base with a squad of 24 men and make it into the control room in the northeast corner. Only one has to slip inside - and survive the turn.
The defenders are:
- 4 technicians with pistols

- 8 security guards with short range laser pistols

- 7 battlebots with long range laser guns

- 3 mining bots with instant death "grapplers"

- 2 stationary turrets, seen at the back exterior

I only appreciate this in retrospect, but security guards are their best unit. Robots are powerful, but slow. Guards are quick enough to pop out of cover, fire a shot or two, and move back into cover. Technicians can too, but their pistols lack stopping power.
My units may be deployed anywhere in the red zone:
- 4 commanders with rapid-fire photon guns

- 4 grenadiers

- 16 raiders with long-range laser guns

Commanders are great. In X-COM, auto-fire mode was king; that 30% accuracy rate really means a 65% chance that at least one shot out of three hits, which is better odds than single aimed rifle shot and twice as fast. And in Rebelstar Raiders' chunky 2D pixel environment, a "missed" shot has a decent chance of hitting anyway. But the 16 laser infantry aren't so great; they move pretty fast, but lasers are very slow to shoot. If you don't have enough movement points left for an aimed shot, then you can squeeze off a snapshot at reduced accuracy, which ends that unit's turn.
The raiders' decimation in the forum game taught me that this base's cramped interiors do our gunmen no favors against the heavily armored robots that make up the bulk of the defenses, but grenades hold the power to reshape the world. Unfortunately, each grenadier only carries five pineapples. I will need to guard them, and my commanders carefully.
The front entrance isn't guarded too heavily inside, and I get to deploy my assault troops anywhere in the red region and I get the first move. In defiance of all logic, I can just place men right next to the auto-turrets and shoot them point blank. With a bit of luck, I can take them out turn 1 before they get a chance to return fire, giving me a chance to enter the base somewhat close to my objective, bypassing all of the resistance in the southern half of it.
 |
| And with a lot of luck I won't frag most of my own with missed shots, X-COM-style. |
From this point on, we used Fuse's record/playback functionality to exchange turns, and after the match's completion, I was able to reconstruct a video.
Turn 1
It takes the combined firepower of all four commanders plus two grenades to destroy the turrets, which also blow open a hole in the front gate, where a battlebot is stationed.

Unfortunately, I have no way to take it out. My commanders' movement points are all spent, and the only grenadier close enough already threw two and hasn't got enough points remaining to enter the base and chuck another one, so I have my fastest man (named "Chief") go in and take a potshot.
The rest of the raiders fall in as closely as movement points and the door's width allows.
 |
| Everyone line up in front of the killbot! I'll... be right behind you. |
My turn ends, Scribe's begin. The robot sentry opens fire, killing Chief and wounding another, and the cowardly techs hiding in their dorms pop out and fire off a few shots, killing another two. One ducks back in, the other ventures out further and wounds Jason.
The rest of the ops either advance or take defensive positions.

Turn 2
The northern corridor leads straight to the computer room, but the sentry bot in the alcove is perfectly positioned to cover it. My commanders stack up, ready to storm it.
In the entryway, Jason's got a score to settle - despite his wounds, he takes out the foolish technician that wounded him and finishes off the robot. Another grunt takes point and wounds the other. My men follow, ready for a bloodbath.

And, well, it's not quite as bad as expected.

Main-Comp continues to advance on my foothold.

Turn 3
Lots of shooting in the entryway, mostly a lot of missing. I kill three men, but one of them is my own. My cannon fodder maneuver closer to the technicians and guards taking cover in the hallway, and my commanders, followed by some backup, go down the corridor of death, just out of reach of the killer mining robot.

The pushback is brutal this time. Up in the north corridor, robot sentries take positions and destroy the lead commander. In the base interior, combined fire from one robot and multiple guards and technicians moving from cover to cover kill an astonishing five more of my raiders.
The guards return to cover and their backup inches closer. Luckily for me, robots are not fast.

Turn 4
I no longer have a numbers advantage, with 13 raiders surviving of the original 24, against 18 operatives, half of them robots. At least some of them are removed from the action, for now.
In the north corridor, Joe Capricorn's clone leads the assault, destroying the frontmost sentry - and exposing himself to the mining bot right behind. The line shuffles forward.
In the entryway, I finally put my grenadiers to use and blow a few of those cowering rent-a-cops from their cover.

My few surviving grunts move in, detaching from the north assault line, to cover the grenadiers, taking out one more guard.

The defenders open fire on the group. First the robot fires, killing one. Then the guard jumps in front of the robot, killing another and wounding a third. Then the tech jumps in front of the guard and shoots a bunch, hitting a few men but killing no one. Up north, the mining bot moves in and crushes Joe Capricorn #2.

Turn 5
Ten raiders left against 14 defenders, but three of them are sitting in a pretty little row, uncovered.
First order of business - I kill the mining bot at point blank range up in the north with the commander's photon machinegun. This not only kills it, but also the sentry far behind it!
Then I take out the three defenders with combined fire, mostly grenades. But I make a whole bunch of input errors and put several of my south group into less than ideal positions.

Fortunately, the surviving tech is a bad shot, popping out into the open and shooting three times but failing to do any real damage. Unfortunately, the robots covering the north corridor, joined by one of the guards, are great shots and kill both commanders and the grenadier behind them. The north corridor assault is a failure and my commanders are all dead, but the effort kept Main-Comp's sentry bots distracted and unable to defend the central corridor.

Turn 6
Six raiders left, half them wounded. Nine defenders, five of them robots. By the numbers, it's not looking great for me, but I'm in a position to pick off two humans with little risk of retaliation, and do precisely that.

The defense re-positions, mostly away from me.

Turn 7
Grenadier "Androyd" surprised me with a beautiful "missed" throw that went right through two pixel-wide arcades and blew up a guard on the other side.

Then I moved two grunts southward to plink at one of the rock crushers.
Main-Comp repositions.

Turn 8
I target the sentry with my grenadiers, but this time it takes three grenades, and I'm starting to run low.

Main-Comp repositions.

Turn 9
I have six grenades left between three men. Carefully positioning them to maximize ordinance efficiency, I toss four grenades and mostly just blow up the room. One gunman shoots at the exposed mining bot.

The sentry fires back with a trick shot of its own - right over the head of one man and into the head of the one behind him!

Unluckily for them, this is useless; it killed the only man who was out of ammo.
Main-Comp repositions.

Turn 10
Two grenades left, and there's a big old rock crusher in my way, with sentries and a guard behind it. Great.
I take out the rock crusher with one grenade, and with it out of the way, the other grenadier "Eric the Digit" rushes the guard with his last grenade. My gunmen shoot at the remaining robots.

The sentries reposition and fire back, but fail to kill anyone!

Turn 11
Eric rushes toward the computer room under lasgunner cover. One sentry is destroyed.

Main-Comp returns fire, killing one and wounding another.

Turn 12
Gunmen destroy the last sentry and Eric enters the computer room.


I think - and Scribe concurs - the attackers have a major advantage on this map. First strike is a powerful asset indeed. Grenadiers and commanders are amazing units, and Main-Comp's slow-moving robots are not that great, though their guards are better than Rebelstar's gunmen in this map's close quarters. My charge on the north corridor of death was a major strategic blunder that wasted the commanders' potential, and my plan to avoid fighting the brunt of Main-Comp's forces utterly failed, but I still won thanks to a few unlucky turns in which Scribe's sentries missed crucial shots.
In the next mission, the roles reverse as Rebelstar's Raiders find themselves protecting Joe Capricorn #3's getaway car from a swarm of robot harriers. Will their fortunes reverse as well, or will pluck, intuition, and perhaps dumb luck foil the calculating killbots once again? Find out next time.


I enjoyed reading both of your accounts of the battle. This sounds like a fun game to play.
ReplyDeleteScribe and I have been PBEM'ing Murkwood; a fantasy-themed reskin of Rebelstar Raiders which was developed by Red Shift without Gollop's involvement and never officially released. And it's pretty good! With a bit more time to sand down some rough edges (and replace the out-of-character laser blast sounds and animations with something more thematic) it could have been better than Rebelstar; it looks decent for a Spectrum game, the units feel nice and distinct in their stats and abilities, theming and worldbuilding is strong enough to construct a coherent narrative around the action despite the missing manual, and the scenarios are well crafted and better balanced.
ReplyDeleteI don't plan on covering this, but Scribe will, and just published a narrated AAR for the first two scenarios.
https://zeitgame.net/archives/18005